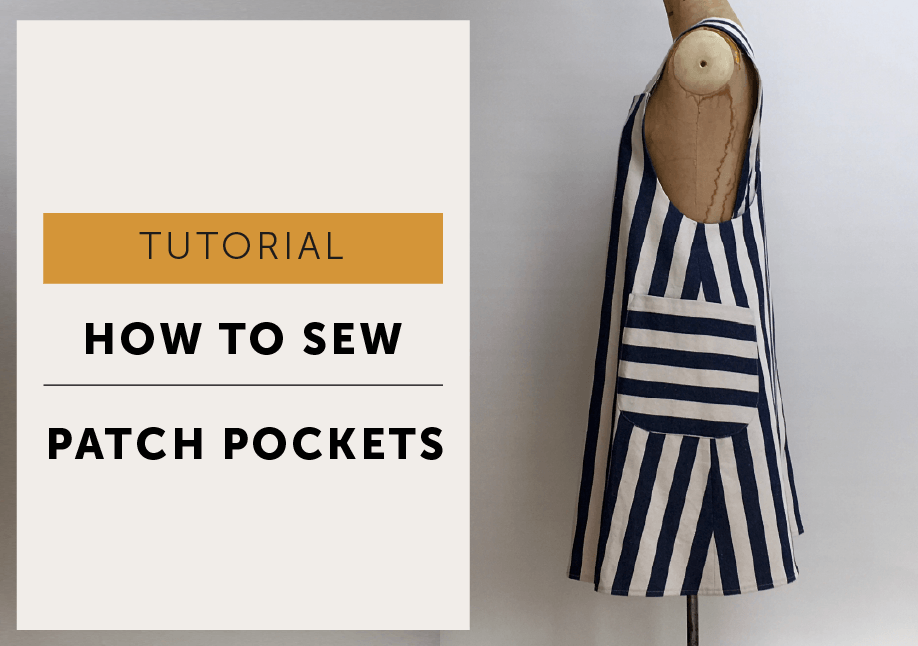
Posted on 2 Comments

The Patch Pocket Tutorial

We had a couple of requests for a photo tutorial for the patch pockets on The Maria Apron. So here it is!

The same principles will apply to the pockets for our Wendy Smock Top too. Wendy just has a little gathering at the base of each pocket, do that first and then follow below!MAVEN PATTERNS_MARIA APRON MAVEN PATTERNS_PATCH POCKET TUTORIAL


 KEY | RS(U): right side of pocket (up) | WS(U): wrong side of pocket (up) | S/A: seam allowance

You’ll need your Pocket Bag Former pattern piece. To work this really needs to be in card (a cereal box will do the job perfectly). If you need help here’s my tutorial

MAVEN PATTERNS_PATCH POCKET TUTORIAL

We are going to start at the ironing board: Everything above FOLD 2 is actually the facing of the pocket (a grown-on facing). The corner of the pocket bag will be ‘bagged out’ with the grown on facing so the raw edges will be concealed inside of it. Don’t freak out at the term ‘bag(ged) out’ it just means sewing your fabric with right sides together and then turning through so the RS is facing to the outside and all the stitching and seam allowances are enclosed on the inside.

Make fold 1 | Start with the RS of the pocket bag facing downwards and press the top edge 1cm to the WS – use the notches as a guide.

MAVEN PATTERNS_PATCH POCKET TUTORIAL

Make fold 2 | Still with RS facing down, at the next set of notches fold down again to the WS of the pocket and press in FOLD 2, creating the facing for the top of the pocket. Fold 2 is 2.3cm from FOLD 1. Why such a random number I hear thee ask? Because, a little later, we will topstitch 2cm down from the top edge of the pocket (this will stop the facing poking out during wear), which leaves a 3mm allowance to catch the stitching on. Clever stuff.

MAVEN PATTERNS_PATCH POCKET TUTORIAL

Turn facing to RS | Turn the pocket bag over so RSU is facing you.

At FOLD 2, flip the facing over from the back of the pocket to the front, and pin through the facing and S/A.

MAVEN PATTERNS_PATCH POCKET TUTORIAL

Stitch | At each pocket corner, take a 1cm S/A and stitch through the facing.

Trim each corner to reduce bulk and give a little press.

MAVEN PATTERNS_PATCH POCKET TUTORIAL

Turn corner | Turn those corners out to the right side now. Poke out the corners gently so they are nice and square (I use my small scissors, but be careful!) and press again. There you go, a bagged out corner!

MAVEN PATTERNS_PATCH POCKET TUTORIAL

Pressing the curve | Grab the pocket former and slide it underneath your pocket facing and then use it as a template to press a 1cm S/A around your pocket. Remove template.

Oh look, a delightfully smooth curve and 2 matching pockets. Hurrah! Now is a good time to check they are in fact the same size and shape. They are? Jolly good – on we go.

MAVEN PATTERNS_PATCH POCKET TUTORIAL

Topstitch and pocket placement | Topstitch across the top of the pockets 2cm down from the top edge to hold the facing in place.

Pin the pocket on your apron. Remember the pocket marker dots sit 5mm INSIDE the finished pocket edge (an industry trick so the marks don’t show on the finished garment).

TIP | You can use a fabric marker pen or chalk to mark a line 5mm above the dots which is where the top edge of your patch pocket sits and mark a line 5mm on the outside of the dots for the outside edge of the pockets. Check you are happy with the position of the pockets and then tack them in place.

MAVEN PATTERNS_PATCH POCKET TUTORIAL

Stitch into place | The pockets will be edgestitched onto your garment, but as this is a functional garment that will hopefully get a lot of wear, the pockets will benefit from a little reinforcement. This should help to give many years of joy and use from your apron.

Reinforce corners with a triangle | Start at point 1, stitch up to point 2, pivot your garment 90º and stitch across 3 stitches to point 3 (doesn’t matter how many stitches, but keep them the same number on all of your corners). Pivot again and stitch back to point 1 completing the reinforcement triangle. Then just continue to edgestitch the pocket bag all the way around and finish with a triangle again on the other side.

Voila! You’ve mastered the art of the patch pocket.

Get creative | Don’t forget you can have some fun with your patch pockets to make the most of your fabric’s design. Stripes can run in different directions – a good plan if you don’t want to match them to the apron body but don’t want to look like you didn’t think about it. That’s why ready-to-wear check shirts usually have pockets cut on the bias – it avoids stripe matching. Or you could pick a favourite part of a print and give it pride of place on your pocket. If you do get creative, remember that patterns or stripes on pockets are usually cut to pair each other!

MAVEN PATTERNS_PATCH POCKET TUTORIAL

Posted on 11 Comments

Lengthen or Shorten a Sewing Pattern Tutorial

How to Lengthen or Shorten a Sewing Pattern

This is just about the easiest pattern alteration to do!

You’ve probably noticed, many patterns have horizontal length adjustment lines marked on them to show where to alter the length. I don’t do that on my patterns, I prefer a cleaner look. It’s so easy to get in a muddle with too many lines everywhere and so simple to mark any length adjustments only if you need them. This straight forward tutorial will show you how simple it is to lengthen or shorten a sewing pattern, to help achieve a great fit.

Tools:

Your pattern (or copy of your pattern if you don’t want to alter your original)

ruler

pencil

tape

paper


Things to be aware of:

  • If you are doing lots of alterations to your pattern, do any length adjustments first.
  • Keep the grainline or “place to fold line” IN A STRAIGHT LINE, do not allow them to stagger.
  • The Chain Effect: when altering one pattern piece, also alter the corresponding pattern piece in the same way and remember to check they still fit together after your alteration. It is very annoying to end up with the front skirt longer than your back skirt!

STEP 1:

HOW TO LENGTHEN OR SHORTEN A SEWING PATTERN TUTORIAL_MAVEN PATTERNS-01Once you’ve made a toile, you’ll know how much and where you need to add or subtract length to your garment. You can just change the bodice length, or a skirt length or the sleeve, or all 3!

Draw an adjustment line horizontally across your pattern at a right angle to the grainline or to the “place to a fold line”

On a bodice: mark the line above the waist line but below a bust dart, and straight through any waist darts.

On a skirt (or skirt portion of a dress) below the hip line, but avoid any pocket details – no point making life complicated!

On a sleeve: half way along the underarm seam, unless it’s a fitted sleeve or has an elbow dart, then divide between two lines. (See “Good to Know” at the end)

Step 2:

LENGTHEN A PATTERN:

HOW TO LENGTHEN OR SHORTEN A SEWING PATTERN TUTORIAL_MAVEN PATTERNS-02Cut along the adjustment lines and separate the pattern piece.

Place a piece of paper behind your pattern and tape the top portion of your pattern to it.

Extend the grain line. Draw a line parallel to the your adjustment line the amount you need to lengthen the pattern by. Tape the lower portion of your pattern to the new line, matching up the grainline. Re-draw the seam lines so that they match up again, these may need to be curved or may be straight depending on your pattern piece. It’s quite usual to need to blend the new lines together, adding a bit to one and taking a bit off the other.

SHORTEN A PATTERN:

HOW TO LENGTHEN OR SHORTEN A SEWING PATTERN TUTORIAL_MAVEN PATTERNS-03Cut along the adjustment lines.

Place a piece of paper behind your pattern and tape the top portion of your pattern to it. On your pattern, draw a line parallel to the adjustment line the amount the pattern is to be shortened. Overlapping your pattern pieces, tape the lower portion of the pattern to the new line, matching up the grainlines. Re-draw the the seam lines so they match up again, in the same way as lengthening a pattern.

STEP 3:

Check your pattern pieces still fit together before cutting out your garment. Toile again if you need to!

Good to Know:

The Maria Wrap Apron: lengthen the straps

HOW TO LENGTHEN OR SHORTEN A SEWING PATTERN TUTORIAL_MAVEN PATTERNS-06


This is a great method to use if you need to alter the length of the straps of The Maria Wrap Apron too. Be sure to keep the grainline aligned as before, but you can just chop through the strap, spread the pattern the required amount and re-draw the edges with a straight line – all without changing the length of the angled edge that attaches to your apron! You will need to do exactly the same alteration to both the TOP and UNDER straps.

If you are lengthening or shortening a larger amount, you can spread the amount between two lines.

HOW TO LENGTHEN OR SHORTEN A SEWING PATTERN TUTORIAL_MAVEN PATTERNS-05On a bodice, for example, take the amount needed to lengthen and place half above the bust dart, and half below the dart, this will of course lower the bust dart a little, so be sure you want it lower!

On a skirt, especially a maxi skirt style, half could go through the skirt in two places, this will lengthen the skirt and keep the hem circumference the same as the original. Alternatively, use one adjustment line and extra length could be added straight to the bottom of the hem, but the hem circumference will get bigger.

For a fitted sleeve: Spread the amount between two lines one above and one below the elbow/elbow dart.

Now, do I always use this method for changing the length of every pattern? ( I’m 5’2″ so it’s always shorten, shorten, shorten)

HOW TO LENGTHEN OR SHORTEN A SEWING PATTERN TUTORIAL_MAVEN PATTERNS-04NOPE, I don’t! If it’s only a little bit, or a boxy shape I’ll just chop it off/add the extra on to the bottom of the pattern. That works just fine too in some cases.

I do hope you’ve found this tutorial useful, and can now confidently lengthen or shorten a sewing pattern.

Happy Sewing!

Posted on 2 Comments

The Original Maria….

MARIA THOMAS TEXTILES_MAVEN PATTERNS


MARIA THOMAS TEXTILES_MARIA WRAP APRON

This really is the most delightful Maria Wrap Apron I’ve seen. Let me tell you why…It’s made by THE actual Maria that the apron is named after! Oh, yes…my very inspiring friend Maria of Maria Thomas Textiles is a textile artist, screen printer and a very generous teacher. She wore the very first incarnation of the Wrap apron in her studio, where this image was shot, and you can see some of her work hanging behind her apron. As you can probably see, Maria works with found objects and recycled materials, often recanting the daily rituals of life within her work.

Her apron has been made from an embroidered table cloth, that she has rescued and hand-dyed indigo and given careful consideration to the placement of the embroidery. The edges have been bound as a facing wouldn’t have been a suitable finish in this case, and she has stitched all of that binding down by hand, because she is, in fact, a demon hand stitcher! She has worked with the fabric and squared off the back at the hem to make the most of the embroidered edge.

MARIA THOMAS TEXTILES_MARIA WRAP APRON

I met Maria by chance, our eldest children in the same year at school, me also with a 2-year-old in tow & Maria with one a year younger – we discovered we had a mutual love of denim and a hatred of cooking the tea so I think the friendship was meant to be! She talked me into doing a screen printing course that she was teaching, just 2 or 3 days, where we met Wendy (of the smock), who had coincidentally worked with my other friend from college that I had dragged along at the very last minute to cheer her up…funny how you meet your tribe isn’t it!? Well those 2 days, turned into a 4 year, 1 day a week print course, a couple of exhibitions and some very good friends. She is also the reason why I have paper spoons hanging in my kitchen, the occasional hangover, more fabric than is strictly necessary and the knowledge that making stuff is a way of life and I didn’t know I was missing it. Like I said…good friend.

MARIA THOMAS TEXTILES_MARIA WRAP APRON

Maria is currently working on her next exhibition and will be at the Sewing for Pleasure show at the NEC in Birmingham, 17-20 March 2016 where you’ll be able to chat to her about her art, her inspiration and find out more about the amazing workshops that she runs.

Work from a previous Maria Thomas Textiles exhibition, nothing to do with me…I just wanted to share it! Now go be inspired!

Maria Thomas Textiles

Maria Thomas Textiles


Maria Thomas Textiles: The Blog

Maria Thomas Textiles: Facebook

Posted on

HOW TO USE THE LAYERS FEATURE WHEN PRINTING YOUR PDF PATTERN

Well hello again!

This is just a quick little guide to using the layers feature in Adobe Reader when printing your PDF sewing pattern.

The Layers tool is great, it means you can toggle sizes on and off and only print the size (or sizes) you want. I know, it’s really quite splendid! One snag, it’s currently only available on the desktop version, not the mobile App version of Adobe Reader.

So how does it work? Well, want to make a size 16?  Toggle off to ‘Hide’ the other sizes and just print that one size 16. Or, are you between a size 10 and 12? Turn off the other sizes and leave the two sizes you want visible before printing, this makes it easy to see and blend your between your sizes now. 

No more pick a line, and hope you’re cutting the correct one for your size, there only is your size. And, as a little added bonus, only printing the size you want saves ink too!

Oh yeah, like I said, layers is a great feature!

So you’re convinced LAYERS is amazing, so here’ s how to use the layers feature:

(Not convinced? You can just leave them all on and carry on as usual and print the full range of sizes)

Open up your layered pattern and make sure you are using the latest version of Adobe Acrobat Reader.

MAVEN PATTERNS LAYERS TUTORIAL 2016

On the left you can see a menu, look for the LAYERS icon. It looks like 3 diamonds (or sheets of paper, I can’t decide) on top of each other.

MAVEN PATTERNS LAYERS TUTORIAL 2016

Click the LAYERS icon to open and a panel will fly out, showing two options. The first bar is for the Maker Instructions (the instructions have NO layers) and the second bar is for the PATTERN.

CLICK the + icon on the PATTERN HEADER BAR to release the DROP DOWN MENU.

MAVEN PATTERNS LAYERS TUTORIAL 2016

TA-DA! All the layers are listed so you can easily select your size(s). To toggle the layers on and off, just click the eyeball icon next to each layer name.

MAVEN PATTERNS LAYERS TUTORIAL 2016

Leave the eyeball ON to print a layer, eyeball OFF to hide a layer. Now you see it, now you don’t!

You can see two layers are locked, the pocket layer and the tiling layer that contains pattern and the print test square information relevant to every size, you really don’t want to turn those off by mistake.

TOP TIP: Before you print, just double-check you have everything you want to print selected because the only thing worse than a pattern with lots of lines, is a pattern without any lines!

So there you go, all the benefits of a layered pattern in one little post! Enjoy!