
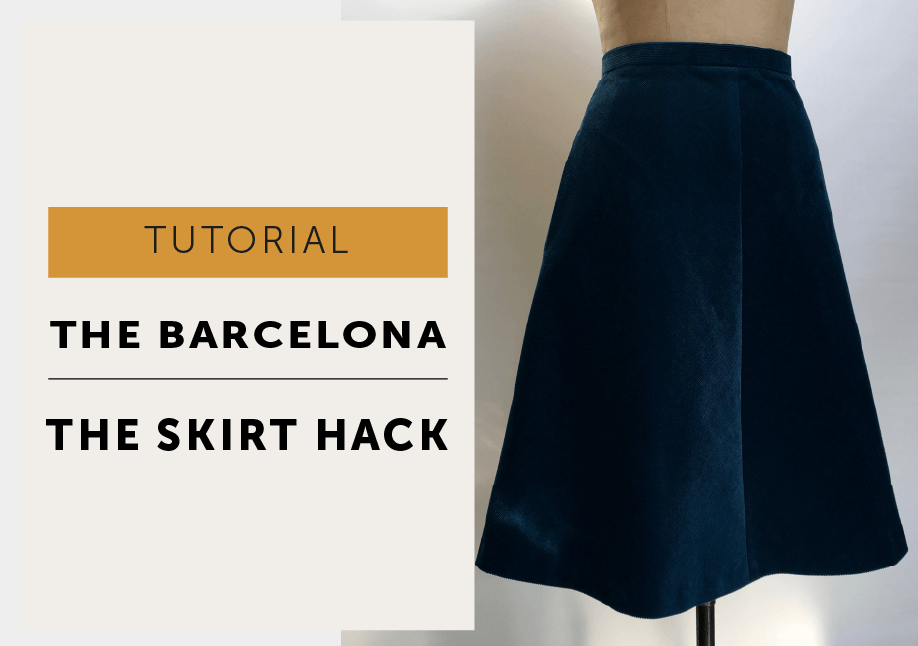
How do you turn the Barcelona dress into a corduroy skirt? This simple hack shows you how to leave off the bodice, add a waistband and make a completely wearable second style from the same pattern. It also includes practical tips for sewing corduroy, from handling the nap and pressing carefully to keeping bulky seams under control, so you get a neat skirt that feels right for the fabric

So Autumn is truly here in the UK as I write this. All the leaves are brown(ish) and the sky is, in fact, grey. It could be a completely different story by the time I publish the post…the weather being somewhat unpredictable these days! And corduroy seems to be the fabric of the season. Useful because I was making this skirt anyway. Bloody irritating because a good solid basic staple of a fabric will be deemed ‘so last season‘ by some idiot ‘expert’ in the near future. Be a rebel…join my club of ignoring the idiots and consciously making what you please, to wear for long as humanly possible. So, this skirt is a hack of our Barcelona dress pattern. The idea is to just leave the bodice off and add a waistband and voila 2 styles from 1 pattern! Not that complicated as hacks go and many of you will not need to follow the instructions to do this, but here they are anyway and with a few tips for sewing cord too. Of course, you can make this in any suitable skirt fabric.

SEWING CORDUROY
NAP – Corduroy has a NAP, no it’s not tired, but has a pile like velvet. If you brush your hand up and down you can feel one direction feels smooth and one is rough. The smooth is the direction of the nap. I like to cut with smooth up and rough down as the fabric looks darker when it’s worn and I can also remember writing that in massive letters in marker pen in the front of my diary when I got my first proper job after college. Not everyone is going to agree with me here, many prefer to have the smooth running down the body, especially on a skirt as it does feel nicer when you smooth your skirt down during wear. It will appear lighter and I think it’s a bit shiny but it’s also supposed to wear better in the seat area. Whichever you choose, BE CONSISTENT and have all the hems of your pattern pieces facing in one direction.
CUTTING – Cut in one layer and one direction. Because of the wales (the raised ridges) be careful about keeping everything on grain or they can look as though they are running off skew. The wales can vary in size, the wider the wale the smaller the number, with needlecord being about 16 on the scale (16 ridges per inch). I’ve used cord with a very typical sized wale (I’m guessing around size 11) and didn’t worry at all about trying to match the wales while stitching. For a really wide chunky wale, I would have matched. For waistbands and other straight edges, you can always cut a straight line first following a wale and you will have a straight edge to line up your pattern piece with.
PRESSING – Pre-wash and then gentle pressing on the reverse only or you’ll flatten the pile and make it go shiny. Use a spare bit of cord fabric as a pressing cloth so the pile of your garment is always face to face with another piece of cord. And PRESS the cloth rather than iron – lift in an up and down motion rather then dragging back and forth! Gently press seam allowances (SA) open, avoid pressing the edges of the SA so as not to create an impression on the garment. If you do, lift the SA up and steam gently underneath and the impression mark may press away. *In industry we used a needle board for pressing, which has hundreds of tiny needles poking up to support the pile of the fabric. I haven’t found it necessary to get one for domestic use, but useful to know if you are planning to sew a lot of this type of fabric.
POCKET BAGS – Cut them in something else – cord is too bulky! I used a leftover cotton print, and they look OK but I’m tempted to take them out and have big patch pockets for the full-on ’70’s effect!
SEWING – The seams can get quite thick, so press seam allowance open and grade the SA whenever necessary – definitely the enclosed SA of the waistband. Take extra care with seams, they can creep or crawl during stitching, feeding through the machine at slightly different rates to each other. I used lots of pins, took my time. You could tack them or use a walking foot if you find it an issue.

FUSING – The general advice is to use a sew-in interfacing so as not to crush the pile while pressing it onto the waistband. I didn’t do that – for the waistband, I used slotted waistband iron-on fusing because that is all I had that was suitable.* The SA on the fuse wasn’t the same width as my pattern piece (1cm versus 1.5cm) so I just centralised it and carried on. I did use a spare piece of cord as a pressing cloth. I used very lightweight iron-on interfacing for the pocket bags and zip and pressed very gently with lots of steam.
*I have a hardcore policy of not leaving the house to buy more stuff unless I really have too – hence I used a black invisible zip too!
Abbreviations
SA | seam allowance RS | right side RSU | right side (of fabric/garment) up RST | right sides together CB | centre back CF | centre front WB | waistband

WAISTBAND PATTERN – It is just a straight rectangular pattern piece and once you know the formula for constructing one, you can add or alter waistbands as you like. A straight waistband shouldn’t have a finished width of more than 5cm (2″), if you want a deeper waistband you will need to make a shaped one to curve to your body. (That’s for a different day!)
WIDTH – the finished desired width (x 2) + the seam allowance (x2)
- 2.5cm + 2.5cm + 1.5cm +1.5cm = 8cm wide pattern.
I made my finished waistband width 2.5cm (1″) as I was using slotted waistband fuse with this finished width and the SA are 1.5cm to match the Barcelona dress SA (BTW: I usually only do 1cm SA, but a bias skirt needs a bigger SA).
LENGTH – finished waistband length (waist measurement + wearing ease) + extension + SA at each end.
- 76cm actual waist + 2.5cm ease + 2.5cm extension + 1.5cm SA + 1.5cm SA = 84cm pattern length
The finished band length is your waist measurement (e.g. mine is 76cm) + wearing ease (2.5cm) = 78.5cm Divide this by 2 to get the midpoint which is your CF. Wearing ease is so you have enough room to tuck in your top, move, sit, eat and generally feel comfortable. How much is really up to you, I allow 2.5cm (1″) because after doing alterations for 10 years that seemed to be an average comfortable amount for my ladies. I found the younger person likes it tighter with less ease, but the older we get the more we like to breathe easy! I wouldn’t advise doing less than 1.2cm (1/2″) ease. If you have a similar skirt you like the feel of (that SITS ON YOUR WAIST) measure that one.
The extension (or underlap) is the part of the waistband that extends beyond the skirt with the button on it so when you do the skirt up it sits underneath the buttonhole. I’ve gone with 2.5cm (you could go a bit bigger for a wider waistband with a bigger button).

Add notches to your pattern at the CENTRE FRONT, the centre fold, SA and the extension. Draw the grainline so it runs the length of the waistband, parallel to the longest side. Annotate your pattern piece with pattern name, pattern piece, cutting info, size/waist size, and date (helps to keep track of alterations). So, now you have a waistband pattern that fits you, you need to make sure it fits onto the skirt pattern. The skirt can be actually be eased onto the waistband and therefore can be slightly bigger than the waistband. Depending on the fabric you are using this can be about 3-5mm per ¼ skirt.
Cord, however, does not take kindly to too much ease, so you will most likely need to adjust your pattern to make the band and skirt the same measurement.


Mark the 1.5cm SA on the skirt pattern and measure the front & back waist. Multiply by 2 to find the total skirt pattern waist measurement. Compare with your finished waistband measurement to find the difference. If they are the same hurrah, you can sew your waistband on! If not, divide the difference by 4 (think of the skirt body in 4 quarters; left front, right front, left back, right back) as this is how much you will need to adjust each pattern piece. If the skirt pattern is too big for the waistband you’ll need to reduce your skirt pattern at the side seam. At the waist mark how much you need to reduce your pattern piece by. Draw a new stitchline and blend into the hip with a smooth line. Draw your new SA and trim off the excess pattern. If the skirt is too small for the waistband you’ll need to add a bit to your skirt pattern at the side seam to increase the waist measurement.
In these diagrams, the skirt pattern waist has decreased or increased at the side seam by 5mm per ¼ as the skirt was a total of 2cm too big or small for the waistband.
ATTACH THE WAISTBAND
So you join us here with your skirt body made with the zip and pockets done. All the instructions to get you that far are in the pattern. Just ignore any bits that refer to the bodice!
All that’s left to do is add the waistband and finish the hem.

With RST pin waistband to the skirt. Align at CF and make sure you leave the waistband extension, well umm, extended.

Stitch with a 1.5cm SA. Press SA and trim skirt SA to grade, so reducing the bulkiness of the seam. Press SA towards WB.
Go ahead and neaten the long free edge of the waistband with an overlock or zig zag stitch or a Hong Kong binding finish. You can also trim the SA down by 5mm, leaving you with a 1cm SA.
CLOSE EACH END

Extension | Fold the waistband in half with RST. Take a 1.5cm SA and stitch down from the folded edge and pivot across to finish stitching at the CB. Clip the corner and trim the SA.

With the WB folded again, close the other end of the WB with a 1.5cm SA. Clip and trim SA.
Press, turn WB to RS and carefully poke out the corners so they are nice and square.
CURTAIN WAISTBAND | this is a good finish for thicker fabrics like corduroy, as the SA hangs down (like a curtain) so the waist seam has less bulk.


Once the WB has been turned to the RS ‘Stitch in the ditch’ with a tacking row of stitches to hold the WB. At each end fold the SA at an angle away from the zip.

Machine stitch in the ditch from the RS. You will hardly notice any stitching.

Now you just need to finish your waistband with a button and buttonhole. Let your skirt hang overnight before levelling and hemming.

More to Sew …


Excellent post! Love the skirt, love behind a rebel and leaving the ‘fashion world’ to themselves and making my own decisions of what I like!
Thank you for the tips on pressing corduroy, esp. using scrap corduroy under with the pile up. And I enjoyed being educated on the ‘pin board’!
Hint: I wonder if some top stitching would add interest; perhaps done by hand in an appropriate contrasting colour?
So glad you liked it and I think some topstitching would be lovely, especially if it was done by hand. It could be really beautiful and a very inspiring idea!