
How do you accurately measure a curve in sewing patterns and garment construction? This tutorial shows you simple ways to measure curved seams, necklines and armholes so pattern pieces match correctly and sewing adjustments are more precise. Whether you’re checking seam lengths, adding bias binding or making pattern alterations, understanding how to measure a curve accurately is an essential sewing skill.
Now, this might seem a little obvious to everyone, I’ve hesitated even posting and calling it a tutorial. But following conversations with my youngest daughter (15, studying textiles at school) and a friend of mine (long time sew-er), neither of them knew this shortcut – and to be honest I only discovered it when I was working after 4 years of studying fashion. It’s the easiest and most straightforward way I know to measure necklines, measure a sleeve head, armholes (or the armsyce if you want the industry term – I’m popping it in here for the benefit of Sir Google).
So on the off chance that someone, somewhere, needs to quickly measure the curve on a sewing pattern …
HOW TO MEASURE A CURVE
There are various gadgets and measurement tools around to measure curves on sewing patterns – flexible rulers and wheely things, and if they work for you, excellent! The great thing about sewing is there is always more than one way to solve a problem.
But, you see I’m not a great one for gadgets, so for this method, you’ll only need the basic pattern making tools – a tape measure, a pencil and a ruler.
Why would I need to measure a curve on a sewing pattern?
If you need to alter a pattern to fit you, you may find you need to adjust the armhole or neckline and then you are going to need to make sure the collar or sleeve fits again. For that, some pretty accurate measuring will be needed!
Here’s the method, I’m going to pretend you’re measuring an armhole.

Step 1:
Before you measure the curve, you will need to use your ruler and mark the correct seam allowance accurately on your paper pattern in pencil. This represents your stitch line when you stitch your garment together. It’s this line, not the outside edge of your pattern that needs to be the same measurement.
You don’t need any Fancy Curve Measurement Tools …
Step 2:
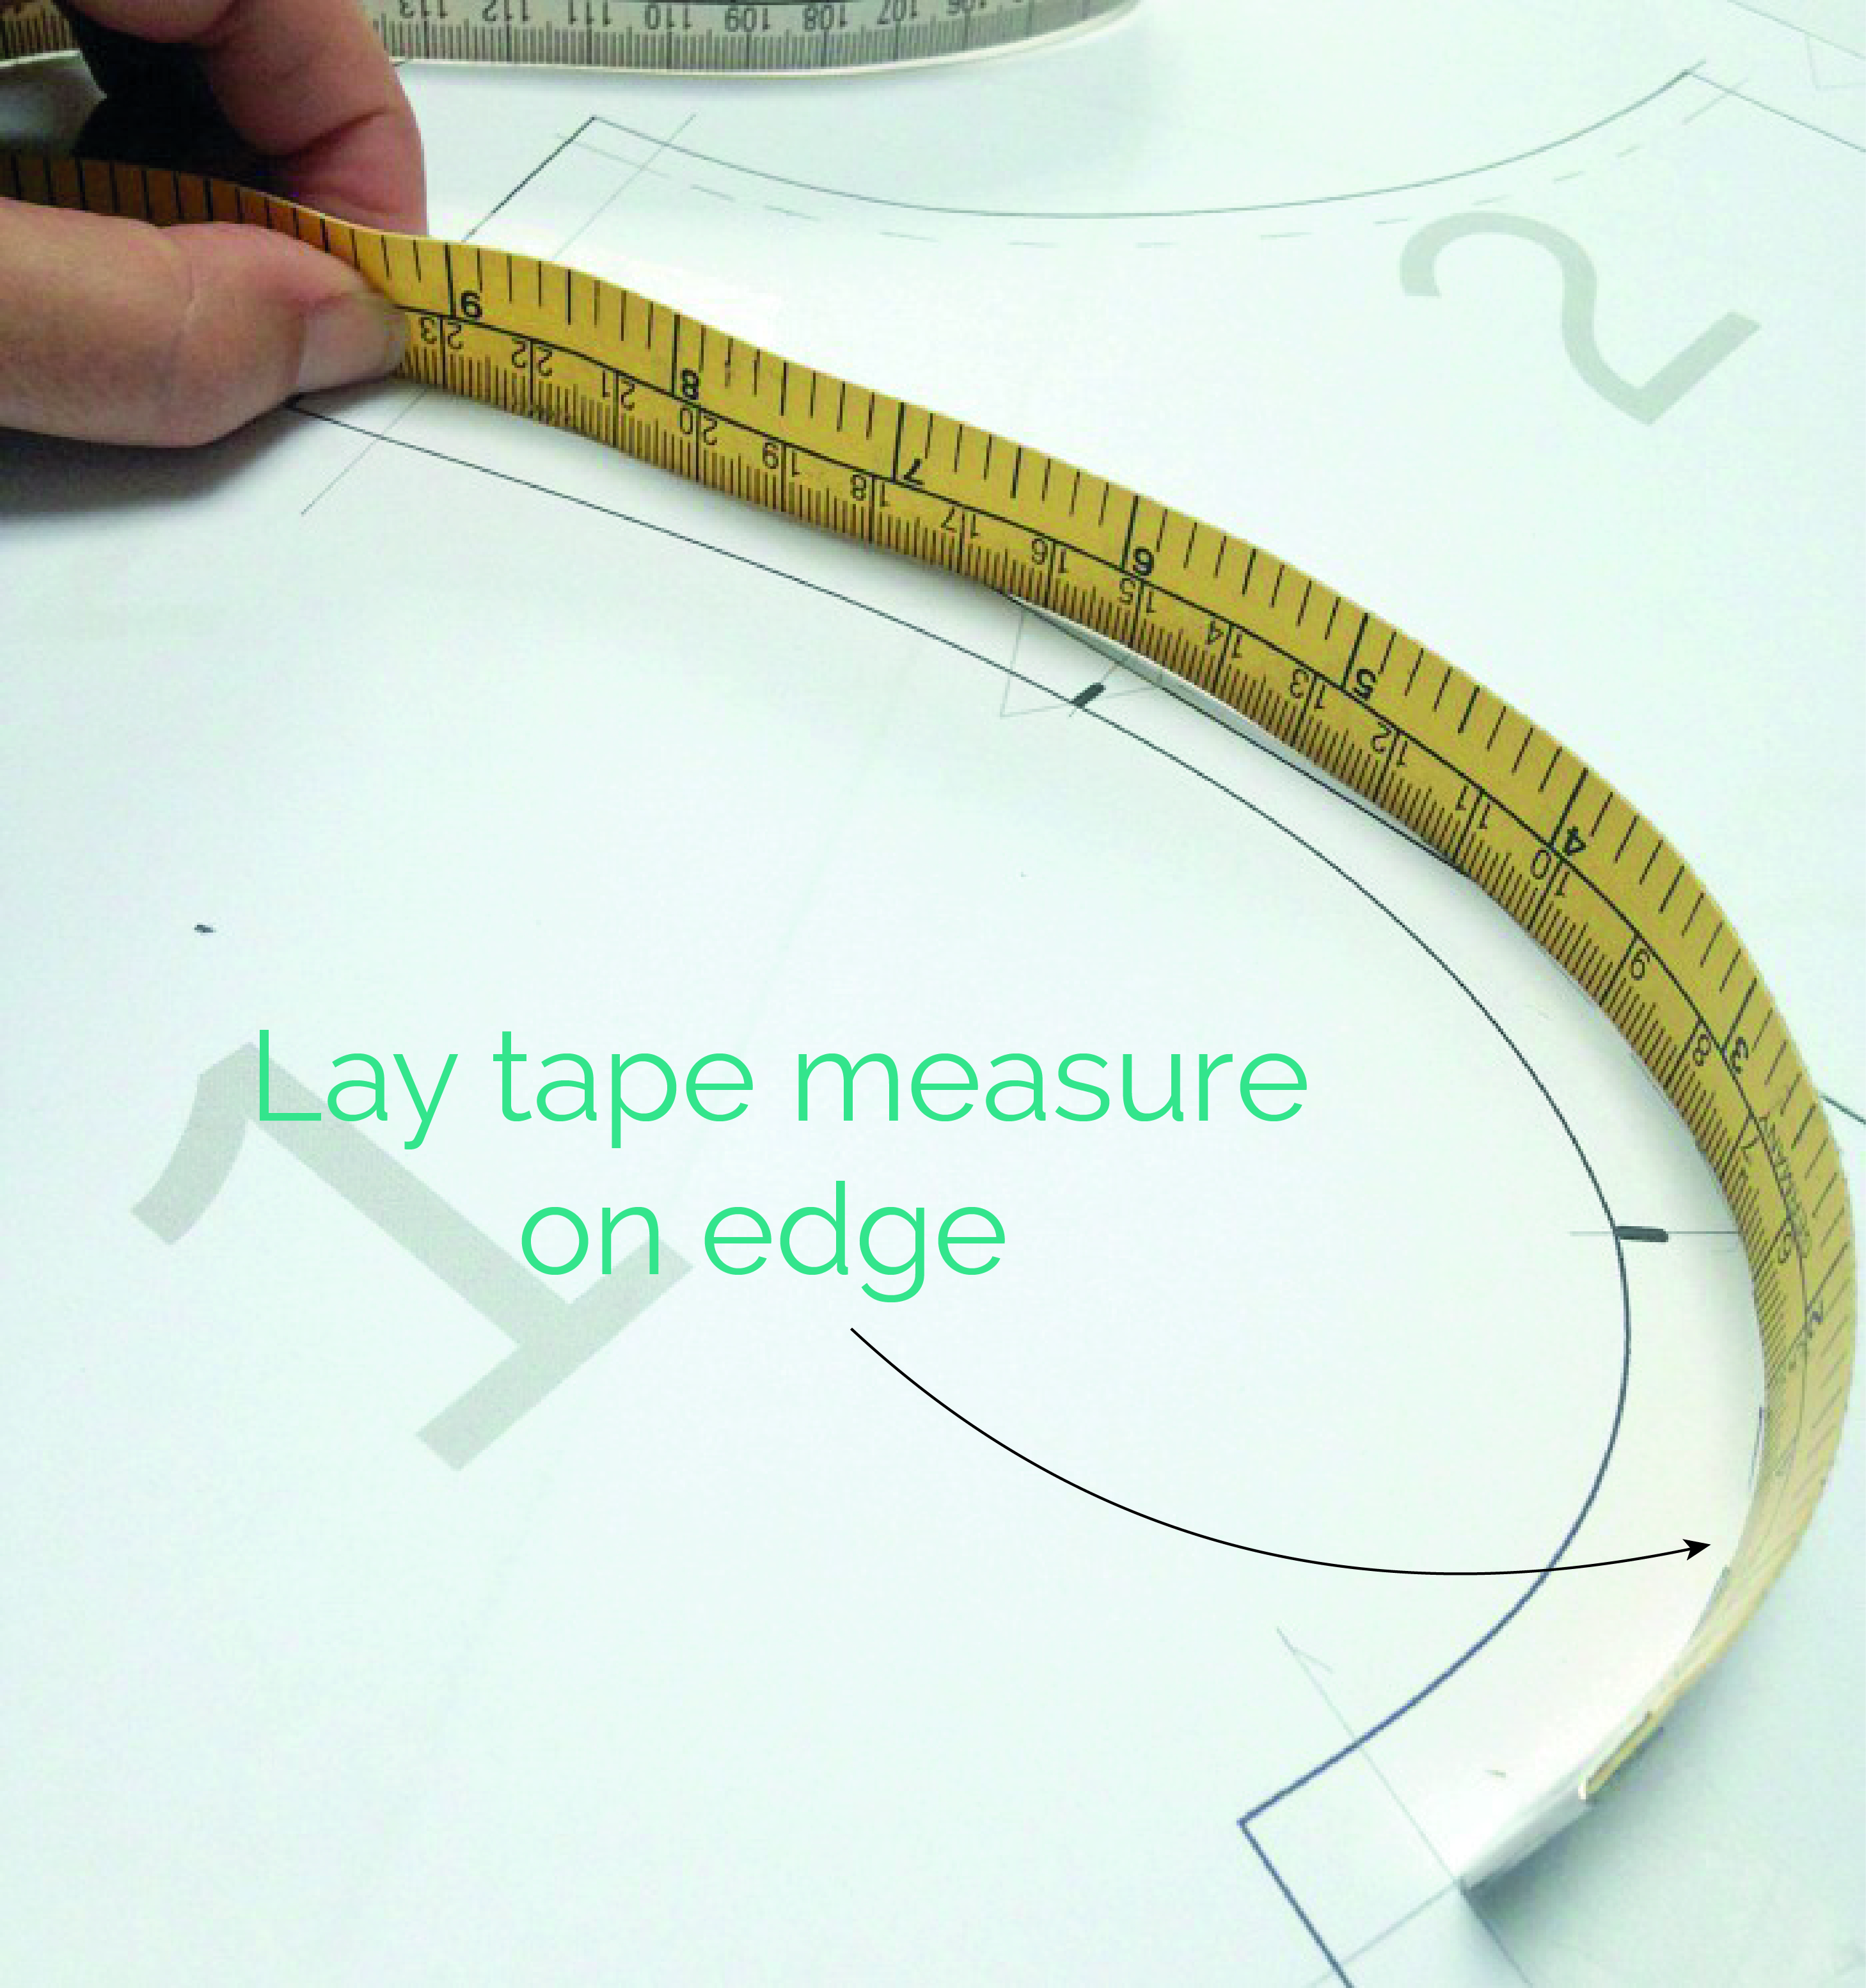
Next grab your tape measure. Here’s the trick. Stand it up on its SIDE and walk it EXACTLY along your pencil line to measure that entire length of armhole – EASY! Make a note of the measurement, I always write them straight on the pattern piece.
- Now use the same method to measure the curve of your sleeve head. Remember it will be bigger than the armhole as it should have some ease in it.
- You can see here that I don’t include the side seam allowances when I measure. As a general rule when measuring your pattern the trick is to just be consistent. It’s really easy to get confused and include the seam allowance in the armhole and then not on the sleeve head or sleeve cap. And then it takes a while to work out why the pattern pieces don’t fit together!
- When I’m measuring a sleeve head to check it fits into the armhole I don’t measure the whole sleeve head in one go.
- I’ll either measure from the underarm seam to the top of the sleeve head, where it would align with the shoulder seam. And then the other half of the sleeve head.
- Or if I want to check the position of the notches I’ll draw a line from each notch to intersect the seam line. Then I’ll actually measure in-between each notch so I can check the notches are all in the right place and will match up at the same time as checking the sleeve will fit.
That’s it! It can take a little practice to do it accurately, but who doesn’t love a low (no!) tech solution to a problem?
Happy stitching and curve measuring,
Mrs M x
More to Sew …


[…] both the back and the front bodices. (Or you can simply lay your measuring tape on it’s edge Mrs Maven from Maven patterns for a good pictorial on how to do […]