Recently, I had a little sewing dilemma with a new Bloom Skirt I was planning and had to quickly come up with a how to cut narrow fabric hack.
I had been gifted the most delightful vintage Italian brocade (thank you Sarah @OliveRoadLondon) but it was a little narrow for my skirt pattern. With a useable width of just 86cm (34″) the cloth was not wide enough to cut the front panel which normally is cut to the fold.
The obvious solution is to just add a front seam to make a 4 panel skirt. And if I had been working with a ‘casual’ fabric like denim that would have been a great idea. I could have made a really nice feature of the seam which would have looked like a deliberate design decision.
THE DILEMMA
This fabric, however, is a really gorgeous brocade and I didn’t feel that a centre front seam was going to look right whacked down the front of my skirt. And, obviously, the plan wasn’t to cut it in contrasting fabrics like the sketch above but the seam was still going to be more noticeable than I wanted. And yet, the fact remained that the only way to get the skirt out of the fabric is to cut 4 equal skirt panels instead of the front panel on the fold.
THE SOLUTION
As there is, in fact, no sewing law in the world that says you have to place those panels so the seams fall as expected at the centre front, centre back and the side seams, so I decided to rotate the skirt by 45° so the seams are ‘off-set’ and sit in a much more pleasing (to me at least) position.
You probably don’t really need a tutorial now you’ve seen the images, it’s all quite self explanatory, but I’ve started so I’ll finish*
CONSTRUCTION
Construction of the skirt will be the same as usual, but as the seams have moved keep in mind the pockets and zip will obviously not be placed in the side or back seam.
CUTTING
Completely ignore the front skirt pattern and cut your skirt using just the Back skirt pattern but cut 2 pairs instead of 1 pair.
Cut the waistband and pocket bags as originally directed.
POCKETS
The pockets can’t be placed at the side seams because there isn’t actually a seam at the side any more. They need to be placed on either side of the front panel. Use the template included in the pattern to mark the pocket notches on the panels.
TIP / I’m going to suggest you check the pocket bag placement before permanently sewing in place. I left mine in the original position and, while perfectly useable, they are a smidge low for me. If I make another I will raise their position by about 2cm (½”ish). I should point out I’m 5’2″ with short arms, so this may or may not be a problem for you. If you’ve already made a Bloom Skirt, slip it on and twist it around so the pocket is sitting roughly where the new seams will be and just see how it feels.
ZIP
As we no longer have a centre back seam, but now have 2 seams offset to each side of the Centre Back, you’ll need to pick a back seam to insert your zip into. I’m right handed so I have inserted mine into the seam on the right hand side (as worn), but again there is no sewing police so it’s your choice really.
SCALLOPS
I didn’t add the scallop hem to my skirt. Apart from being short on fabric, I don’t think my fabric particularly lent itself to sewing them, this brocade being quite bouncy and full bodied – not impossible but not a quick win either. And the scallop pattern wouldn’t fit across the width of the cloth anyway.
If you find yourself wanting the fancy scallop hem but lacking fabric width, consider cutting them on the opposite grainline so the paper pattern runs along the length of the selvedge – do check you are not going to have issues with the direction of any print design or fabric shading though.
The other option would be to keep the pattern on the original grainline but add seams to make each scallop section the same width as each panel.
I was really pleased with how my Brocade Bloom Skirt turned out, she’s be worn quite a few times already and I do hope this gives you a few ideas to experiment with your patterns!
* For my non-UK sewing friends: I’ve started so I’ll finish – is a little quote from Magnus Magnusson on Mastermind, a famous Brit quiz show.
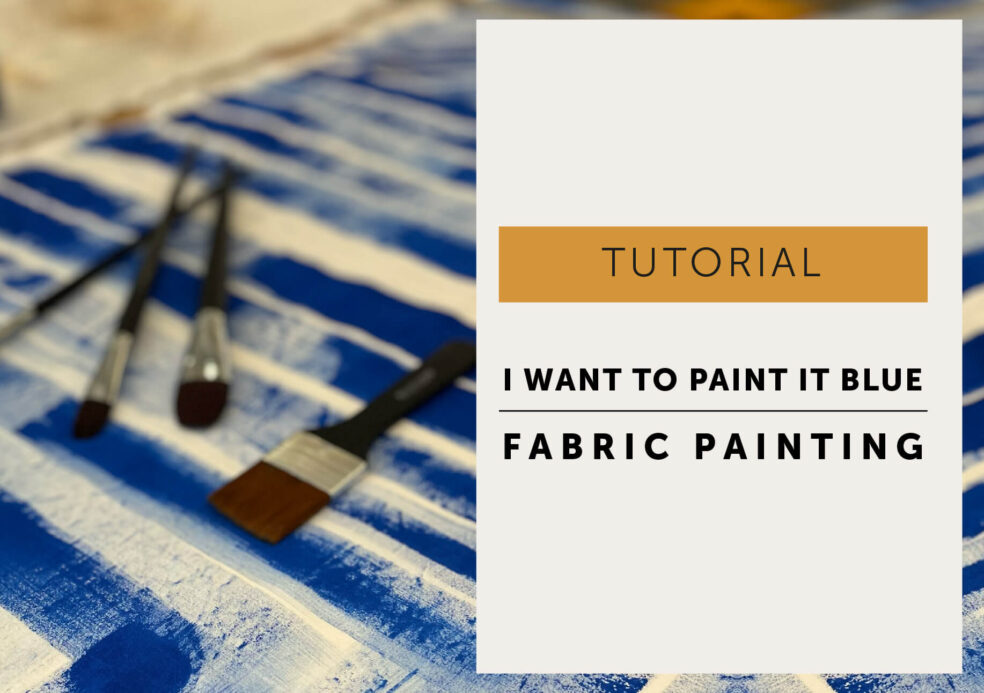
Fabric painting is hugely fun and addictive. Once you start painting your own fabric do not hold me responsible when you can’t stop!
What’s not to love about designing your own unique fabric? The paint was only £3 a pot and the brushes were about £5. If you work on stash fabrics or a pre-loved garment it’s potentially a very inexpensive way to update or create a really special garment.
Now, I’m just going to pre-face this post by saying I am not an expert at fabric painting or surface decoration. I got an idea into my head, thought about it quite a lot, bought the fabric paint and slapped it on some fabric.
Fabric Painting – Tools + Equipment
Fabric Paint in Royal Blue from Handprinted. I bought 3 pots, and used every single drop to paint the fabric for a full skirt.
Frixon pens/fabric marker/ do a test for your fabric!
Protect The Area
No polite way of saying this – I am a messy worker. So protect the area and yourself. I covered or moved anything I didn’t want paint on and wore old clothes and an apron.
Protect your table as the paint will bleed through fabric. I taped old plastic wrappings that we had kept from fabric deliveries to the table.
Test Piece
I was a bit impatient to start painting and didn’t really have time to clear everything and paint-proof. So I did a quick test first on some scrap fabric to scratch the itch and to get a feeling for the brush stokes and how heavy/dense I wanted the strokes to look. I did a vague design by drawing with a Sharpie on pattern paper, which I could see through the fabric and gave me a guideline to follow. The ink did bleed through the fabric, rather obvious but reminded me of the need for plastic underneath the fabric. I’m not sure if the Sharpie plan was a good one, I have a niggling feeling the black sharpie ink could transfer to the fabric during fabric painting.
Fabric Painting Prep
I washed and ironed the fabric before laying it flat and wrinkle free on the table. Taped it down and made sure to keep it on grain. And, bonus points to me, I remembered to lint roller it. And remembered to put plastic sheets over the areas of fabric I wasn’t painting at the time to protect them from paint splatters. Because, as we have established, I’m messy. You could use a hairdryer to dry the paint a bit quicker but I didn’t have one with me.
I want to Paint It Black Blue
So my plan had always been to paint the fabric specifically for a Bloom Skirt, so I took quite a while to draw the skirt pattern pieces directly onto the fabric. I can recommend doing this if you are thinking of doing any kind of print placement. After which I marked a design/guidelines directly on the fabric with a Frixon pen so I could avoid crossing patterns over seams and having to pattern match at the zip and kind of line up the ‘stripes’. It was a bit vague and I didn’t follow it very precisely, and the pen did come off with the iron later.
I knew wanted a hand painted, painterly effect so you could see the brush marks, but sharp and graphic too. In the end I just starting painting and decided not to overthink it any further, not at all usual for me the queen of overthinking. That’s my best bit of advice, just start painting and don’t try to control the result too much. I played with different thickness of brushes and pressure for a variety of brushstrokes and just enjoyed the process.
And then patiently (again, highly unusual for me as I was a bit excited at this point) left it to dry overnight before I could move it to make room to paint the other bits of fabric. By this point, I was having such a jolly time I’m ready to paint anything and everything blue.
Fixing The Fabric Paint
Once dry, the fabric paint needs ironing to fix it.
So, I did a shout out on Insta as I wasn’t sure how long to iron for (it’s 2 weeks later at this point and I’d thrown away the pots) and there was lots of great advice given in the comments of the reel HERE.
There was a few suggestions to use a tumble dryer, but I don’t have one, but do have a menopausal shoulder so ironed it for as long as I could be bothered while listening to a podcast. Keep in mind this is a sample skirt for The Bloom Skirt pattern so I’m probably not going to wash and wear it as much as normal garment (if at all). I can’t confirm how it will wash at this stage but I’d suggest being a little more pedantic about fixing it correctly than I was!
My top tip would be to check your iron is actually still clean after not only pressing the fabric but after making said skirt because the ink transferred to the bottom of the iron and then onto some white linen. Totally my fault, I was very slapdash about using a pressing cloth and fixing the paint and checking the iron was still clean which is actually quite an obvious thing to check when pressing freshly painted bright blue fabric paint!
Overall, I’m delighted how the fabric turned out and looking forward to painting more at some point. Give it a try, it’s great fun!
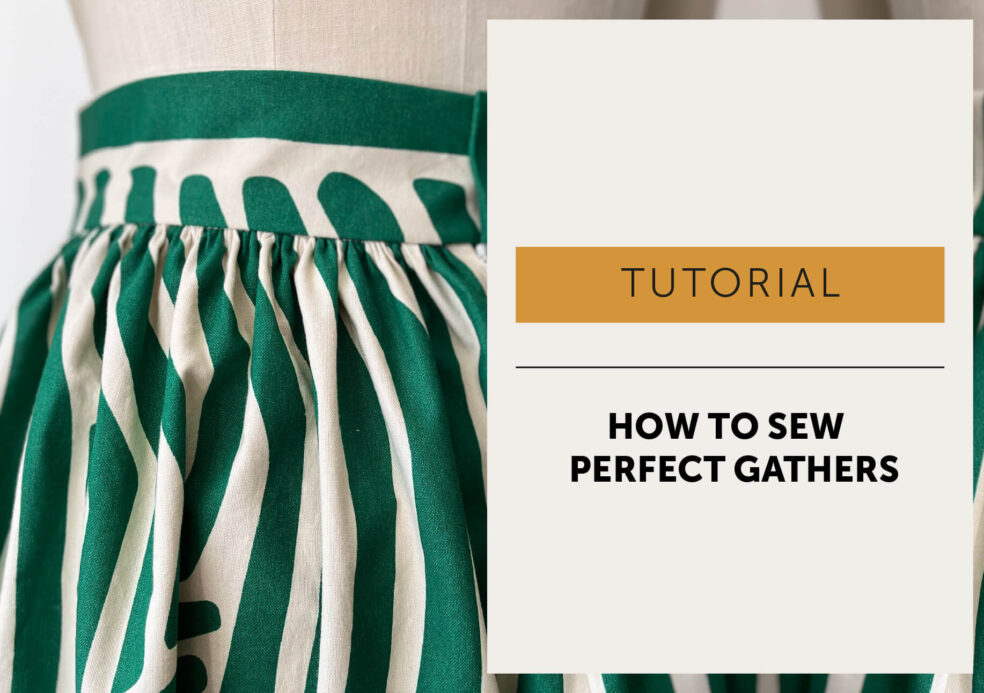
How do you sew gathers that look soft and even instead of bulky or uneven? In this tutorial, we show you a simple method for sewing gathers with control and consistency, including how to prepare your fabric, distribute fullness evenly, and stitch everything smoothly into place. Whether you’re adding gentle shaping or creating more dramatic volume, these techniques will help you achieve clean, balanced gathers with a professional finish.
Gathering is a great way to add fullness and volume and is often used for gathered skirts like The Bloom Skirt sewing pattern or on a neckline like The Wendy Smock.
How to gather fabric
Learning how to sew gathers is a basic sewing technique that isn’t too hard to master. For this tutorial I’m concentrating on the traditional way of how to sew gathers with rows of gathering stitches and it is perfect for light to medium weight woven fabrics. Not sure if it’s the right method for your fabric? Just do a little test sample, the fabric will soon let you know!
Gathering Ratios
A gathering ratio is just the amount of fabric that you will gather onto a flat area like a gathered skirt onto a waistband or bodice. Or you might have a smaller area as a design detail such as the sleeve head of The Kitty Dress or on the back of the Joy Dress.
You may not need to worry about gathering ratios, usually how much gathering you have in a garment will already be decided by the pattern. But it’s good to have an understanding should you want or need to add more or less gathering.
There is no set gathering ratio. Generally speaking, finer fabrics look good with a higher ratio of gathering but heavier fabrics can look too bulky. Do a test sample of gathering on your fabric and if you like it and it works for your fabric then it’s right!
Examples of gathering ratios
2:1 ratio 2 rows of gathering stitches
2:1 ratio 3 rows of gathering stitches
3:1 ratio 3 rows of gathering stitches
1.5:1 ratio 3 rows of gathering stitches
The above samples are all made of cotton poplin and show how different gathering ratios can look. And also shows the difference in gathering with 2 versus 3 rows of gathering threads (explained later in the tutorial).
A ratio of 2:1 means the piece being gathered is twice as long as the flat section it is being gathered onto.
E.G if you had a 30cm flat section, the total fabric to gather into it would be 60cm.
1.5:1 means 1½ times as long
2.5:1 means 2 ½ times as long
3:1 means 3 times as long and so on.
Note / Not all fabrics gather well using this method, heavier fabrics might look better pleated. Or you can use a zig zag stitch over a cord (that’s a tutorial for a different day). For stretch fabrics you may need a different technique. For the cuff of The Somerset t-shirt I use shirring elastic to create gathers as that helps retain the stretch of the fabric.
Machine settings
These can vary depending on your fabric and sewing machine.
Do a test first, you may need to experiment to find the best settings for your fabric and machine.
Set your stitch length to the LONGEST possible stitch length for your machine. Fine and lightweight fabrics can be gathered using a shorter stitch. You may find it gives you more control over your gathers but they can be harder to pull.
Tension – if necessary loosen your top tension so the threads pull easily.
Use a quality thread, you are going to be pulling the thread and we do not want the thread to snap.
Take care not to snap your gathering threads because that is very, very annoying!
How to Sew Gathers
Work in sections
Reduce bulk at seam Junctions
For this example I’m working with a 1.5cm seam allowance and the stitch line is marked in blue pen.
Decide how many rows of gathering you want to do. You can do 2 or 3 rows of stitching. (Images below)
Work In Sections. If you have a large area to be gathered, dividing the area into sections makes it much easier to handle. To gather a skirt onto a waistband, I would divide it into 4 equal sections but you can do more if you wish.
To reduce bulk at seam junctions, lift the seam allowances out of the way and stitch up to the seamlines. The exception being if you are working with a very fine fabric then you could stitch across pressed open seam allowances.
Start with the first section (or between the notches to show where your gathering will start and finish) and stitch with Right Side of the Fabric Facing Up.
Gathering rows must not cross each other.
Do not back stitch at each end but leave long ends to the threads.
Work in sections and just repeat for each section.
2 gathering rows
3 gathering rows
2 rowsof gathering stitches
Stitch 2 rows in the seam allowance parallel to each other. The first about 3-5mm away above the stitchline, and the second 3-5mm above that.
TIP / Your machine may have the option to just move your needle across.
3 rows of gathering stitches
Stitch 3 rows of gathering stitches, with the 3rd row on the body of the garment.
As before, stitch 2 rows in the seam allowance parallel to each other, the first about 3-5mm away above the stitchline, and the second 3-5mm above that. Stitch the 3rd Row 3-5mm below the stitchline on the garment.
TIP / Your machine may have the option to just move your needle across.
The advantage of the 3rd row is that it does make nicer gathers as they are easier to control. The disadvantage is the 3rd row will be removed and the stitching could potentially leave a mark on your garment. So test on your fabric first!
Time to gather!
Again working one section at a time; pull up the bobbin threads, sliding the fabric along the thread to create gathers to roughly the desired length.
Match the seams/notches and pin the 2 fabrics with Right Sides Together and fine tune gathering to fit. Take your time and distribute the gathering evenly.
Once you have finished one section, wrap the long threads around a pin in a figure of 8 to hold everything in place and move onto the next section of gathering.
When all the sections have been gathered, unwrap the threads from the pins and either tie them off in a secure knot or stitch them by hand to fix your gathers.
Set your machine stitch length back to your normal stitch length
Sew your seam with the correct seam allowance to join the fabrics together.
I always sew with the gathers facing upwards so I can see what they are up to and I can avoid any uneven and unsightly tucks. If you do get any areas with tucks that you don’t like, you can just unpick that little area and re-sew.
Neaten the seam allowances together, which will give you a stronger seam. Unless it’s an enclosed by a waistband and then no need to neaten!
How to Press Gathers
Don’t press directly on or across the gathering as you will squash your gathers. We do not want to flatten the fullness you’ve just created!
On the Wrong Side, with the tip of your iron, just press the stitchline and seam allowance. Then press the seam away from the gathers towards the flat/ungathered side.
With the tip of the iron facing towards the seamline, press in between the gathers and up to the seam but not over it. Be sure the fabric is flat under the iron at all times so you don’t iron in creases and squash the gathers.
And don’t forget to remove the 3rd row of gathering if applicable.
How do you sew an invisible zip neatly and without frustration? In this invisible zip tutorial, which is perfect for beginners, we break the process down step by step; from stabilising the seam and positioning the zip correctly to stitching close to the coil for a clean, professional finish. You’ll also find tips for stripe matching, shortening an invisible zip, and avoiding the most common mistakesto achieve a seamless, professional finish.
How to easily sew an Invisible zip
Inserting a zip can be a bit daunting and an invisible zip (sometimes called concealed zips) even more so. But honestly fear not, here’s an easy way to insert invisible zips without a load of fuss. Invisible zips are actually my favourite zip to use because when they’re closed they are, well, almost invisible.
If you are new to invisible zips, don’t panic. I don’t always get it right first time – and I still unpick sometimes. Practise makes perfect or so they say, and if not perfect, practise at least makes you familiar with the process. So, round up some scraps of fabric and do a few tests before jumping into your garment. It’s also much easier to insert a zip in a stable fabric such as cotton poplin than a shifty, slippery satin or chiffon!
This is a simplified version of a post I originally shared for The Barcelona pattern, which explains how to stripe match, seam match and shorten an invisible zip. It’s a little bit more advanced due to the nature of the matchy – matchy process but you can see that invisible zip tutorial HERE.
This method closes the seam before you insert the zip rather than after. My normal method of invisible zip insertion (stitch down each side of zip, stitch up from the bottom to close the seam) was fine and dandy (and if you prefer/are happy with that method, carry on – we’re not doing brain surgery here) but I felt this one was just easier and better to help avoid the dreaded bump at the base of the zip situation.
For this example I am inserting an 20cm (8″) invisible zip and placing it into a 17cm (6¾”) opening in a centre back seam of a skirt that has a 1.5cm (5/8″) seam allowances.
INVISIBLE ZIP TIPS
An invisible zip is always stitched from the top down to the bottom.
Invisible zips are placed RS of zip to RS of garment.
The coil (teeth) sits right on the CB line.
You never get to use the entire length of an invisible zip. You lose around 2.5-3cm (1″) as you can’t stitch right to the bottom because the zip puller is in the way. If you have a 20.5cm (8”) zip the finished length will be about 17cm (7”)
Invisible zips are very easy to shorten. I often shorten an invisible zip after it I have sewn it in and always with the zip closed. You could do it before hand but remember it must be longer than your actual opening. If in doubt insert the zip and chop it off carefully shorten after. (Tips on how to shorten an Invisible zip HERE)
TOOLS
Invisible zip (Also called a concealed zipper)
Invisible zipper foot
Regular zipper foot
Usual machine presser foot
Fabric marking pen/chalk implement of choice
The usual sewing stuff; iron, thread, pins, scissors, sewing machine
ABBREVIATIONS
WSU: wrong side up / WS: wrong side / RSU: right side up / RS: right side / SA: seam allowance / CB: centre back
How to sew an Invisible zip
1. SPOT FUSE the seam allowance to stabilise the area.
Apply a strip of lightweight fusible interfacing along the seam where you will be inserting the zip. I make mine twice as wide as the SA (seam allowance) and 3cm (1″ or so) longer than the finished zip length.
2. Press the zip.
Open the zip and lay on the ironing board with WSU. With a cool iron press the coils (the teeth) flat to uncurl them so they are easier to sew. WARNING! If your iron is too hot, the teeth will melt. Close the zip.
3. Close the seam.
With RST pin the seam together from hem to the notch at the base of the zip opening.
Start at the hem and stitch the seam closed with 1.5cm SA, using your normal machine foot, stopping at the zip notch with a backstitch.
Neaten the raw seam edges.
Press the seam open.
Gently press the seam allowance of the zip opening which will give you a guideline to help place your zip.
4. Place the zip.
It’s really easy to get an invisible zip twisted as you pin it in place. The RS of the zip will be facing the RS of the garment.
I find the best way is to lay the garment with WSU facing you, and then fold and pin the SA into place.
Place the zip FACE down onto the garment, so WS of the zip is facing you.
Open the zip a couple of inches and pin the zip tape to the SA on each side of the opening with one pin.
This is just to place the zip without twisting it, we will pin the zip accurately to stitch in the following steps.
NOTE – The zip tape will be narrower than the 1.5cm SA.
Open the zip so the puller is all the way to the bottom.
Start on one side of the zip (it doesn’t matter which side) and place the top stop on the stitch line. In this case it would be 1.5cm from the top edges as we have a 1.5cm SA at the waist edge (I’ve marked the waist stichline with a red pen line) and pin the tape to the SA.
Keep the zip coil positioned ON the pressed CB seam line.
Once you have pinned one side of the zip in place, tack next to the teeth coil to hold in place.
On the zip tape, mark the base of the opening so you know where to stop stitching.
5. Change to an invisible zip foot.
Take a look at your zip foot and you will see 2 grooves or channels on the bottom of your invisible zip foot – yours may not look exactly mine but you’ll get the idea.
The coils of the zip will sit in one of these channels depending on which side you are stitching. Choose the groove furthest away from the SA and so that you are stitching through the zip tape right next to the coil.
Start with a backstitch at the top of the zip and stitch close to the zip coil. Roll the coil away from the needle with your fingers as you stitch so it sits perpendicular to the zip tape as you sew.
You need to stitch as close to the coil teeth as possible but do not stitch on the coil as your zip will not close!
Stop with a backstitch when you get to your mark at the base of the zip opening.
*I prefer to use an invisible zip foot but many makers like to use an ordinary zip foot.
Now to repeat with the other side of the zip.
Make sure you line up the top stops on each side of the zip or it will look uneven and stepped at the top when it is closed.
Pin and tack into place. Starting at the top with a backstitch, stitch the other side of the zip using the other groove of your machine foot, again stopping with a backstitch at your mark at the base of the opening.
Close the zip to check puller will run up and down smoothly and all looks good before continuing. Getting the puller to the right side can be a little bit fiddly sometimes, but I just remove any tacking that’s in the way and get the pointy, end bit of the puller to poke through to the right side first.
If you have stitched on the teeth of the zip it won’t close so you’ll need unpick that section and re-stitch. But please remember that there is no such thing as the sewing police – if you’re happy to wear it, it’s good enough!
The point of securing the zip is to reduce the strain on the zip and also to stop the tape flapping about. Make sure you are only stitching zip tape to SA and you are not stitching through the actual garment.
Change to an ordinary zip foot (sometimes called a half foot). There’s two ways to do this step, it’s mostly personal preference but Option 1 is probably the stronger of the 2.
OPTION 1 / Anchor the full length of the zip tape to the seam allowance. Start at the top and machine stitch the tape and SA together.
OPTION 2 / Anchor the zip tape to the seam allowance at the base of the zip for just a few centimetres. You can do this bit by hand if you prefer.
Press
Give your zip a gentle final press.
NOTES / I discovered the original version of this technique a while ago, when it popped up in my Instagram feed from Threads Magazine. The YouTube video is demonstrated by the delightful Kenneth D King. I’ve adapted the original technique a little bit to help with stripe matching, I only close the CB seam to the bottom of the zip opening. The original method also closes the zip opening using a machine basting stitch. I also prefer to use an invisible zip foot, it’s just what I’m used to, but Mr King uses a generic adjustable zipper foot. The original video can be viewed here: YouTube LINK: Imperceptible Zipper by Kenneth D. King.