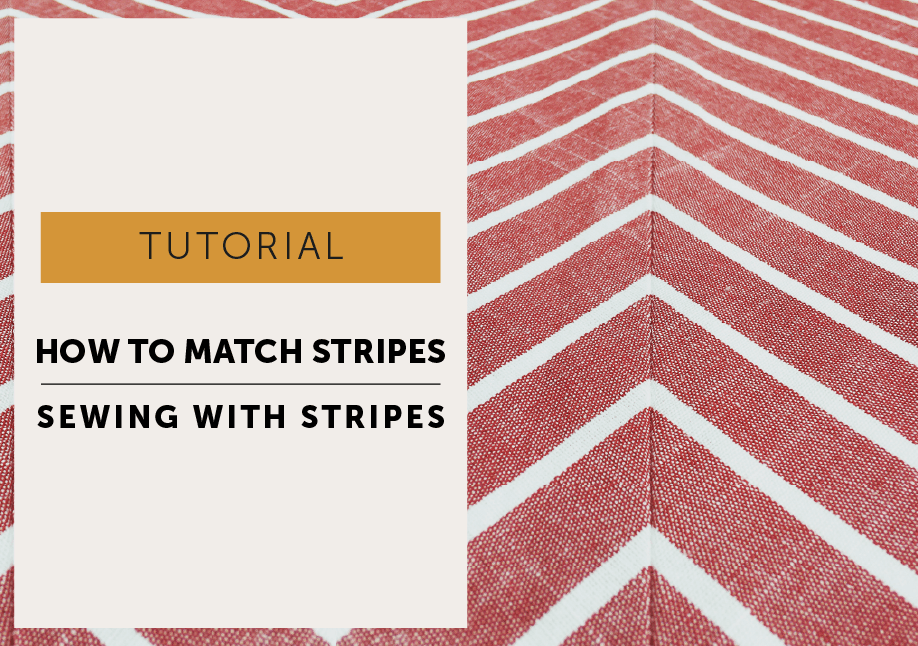
Posted on

Sewing Stripes – how to match stripes.

How to match stripe. Stripe matching tips & Tricks. The Barcelona Dress in Blue stripe linen

Stripe matching tips & tricks

How to cut, match and sew stripe fabric.

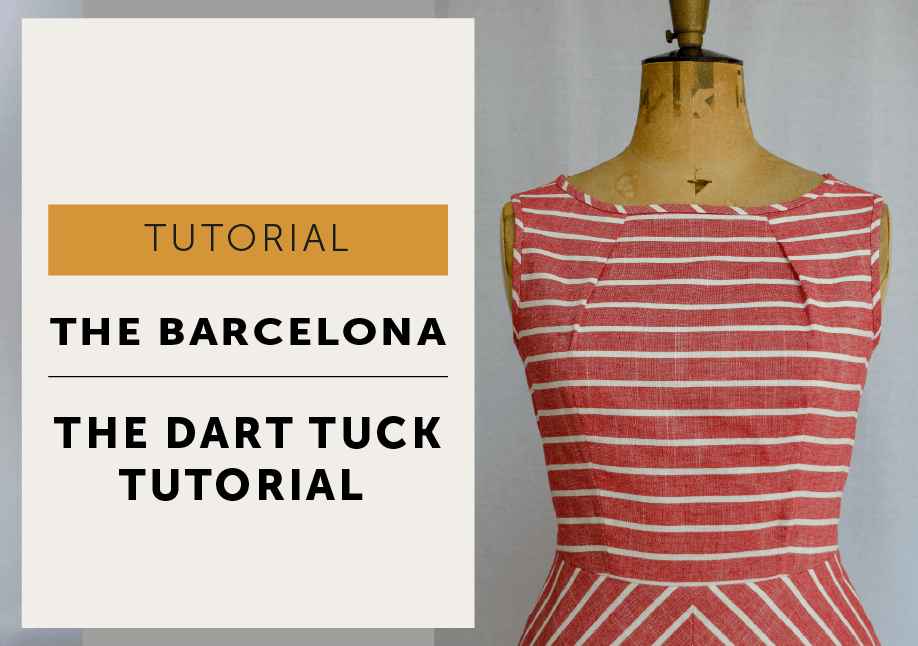
The Barcelona dress…. all the stripes in all the directions!  Stripes can be tricky little blighters, on the move when you think you’ve got everything straight! It does take a bit of extra work to get matching stripes but good stripe matching starts with accurate cutting out, take your time in the beginning and you’ll be halfway there.

PSA: I would like to point out that I did not get those stripes looking like that first time, I practised on samples and I unpicked. Sometimes do a lot of getting it ‘wrong’ before it goes right. I’m OK with that! Try not to suck the joy out of sewing yourself a dress by setting unrealistic expectations of perfection, it’s overrated. It’s supposed to be fun! If a stripe isn’t perfectly matched does it really matter? (It doesn’t) The other thing to remember is that you are your own worst critic so be kind to yourself! Oh, and by the way, Barcelona is delightful in a plain fabric too!

Do I need extra fabric to match stripes? 

Truthfully, you might! The Barcelona dress has it’s stripe costings based on a 2cm wide stripe with all the pattern pieces cut in one direction (a one way lay / with a nap) but I can’t do a costing to cover every stripe on the planet so you may need to allow more or less depending on your fabric.

Even and uneven stripes image

Even or uneven stripes?

Start by looking at your stripe fabric. Is it EVEN (also called symmetrical or regular) or UNEVEN (also called asymmetrical or irregular)? To check, fold back a corner and if the stripes match across the diagonal fold they are even, if they don’t they are uneven. Why is this important? Because even stripes can be cut in either direction but uneven stripes need to be cut in one direction with all the pattern pieces facing the same way and will most likely (but not always) take more fabric. I actually prefer to cut everything in one direction if possible / just a preference no actual logic.

How to match stripe. Stripe matching tips & Tricks. which way do your stripes run?

Lengthwise or horizontal?

The next thing to look for with stripes is which way does the stripe run? Is it a LENGTHWISE stripe – does it follow the direction of the selvedge/grainline along the length of the cloth? Or is it a HORIZONTAL stripe that runs ACROSS the fabric? Again these will make a difference in how you lay up your pattern. If you look at The Barcelona pattern you will see both the STRIPE DIRECTION and the GRAINLINE marked for this reason because depending on the stripe direction of your chosen cloth they may or may not be running in the same direction! You can cross reference the 2 lines to make sure your pattern is cut with the stripes running in the right direction and is on grain .Make sure you keep the grainline parallel to the selvedge.

Guesstimate!

If I am ever unsure about the amount of fabric to buy I’ll lay it all out and measure it. I use washi tape or masking tape and actually mark the width of the fabric on the table or half the width and pretend it’s on the fold. For stripes I also mark the pattern repeat and then lay out the pattern as if I was going to cut it out to give myself an idea of how much fabric I need.

I think my way will be more accurate but it’s not always possible to do a full layup of a pattern when you are in a fabric shop so I’m including a couple of ways I’ve come across on the old internet for general ‘rules’ of guesstimating the extra you may need for stripe matching.

  1. Allow around an extra half a metre for smaller stripes and 1 metre for wider stripes or those with a big repeat.
  2. The other way is to count the main large pattern pieces and multiply that number by the width of the stripe repeat. So 4 main pattern pieces (front bodice, front skirt, back bodice, back skirt) x stripe repeat of 5cm = 20cm of extra fabric.
  3. If in doubt buy a bit extra on top of those!

Make a full pattern

How to match stripe. Stripe matching tips & Tricks. How to cut a full pattern piece 1
How to match stripe. Stripe matching tips & Tricks. How to cut a full pattern piece 2
How to match stripe. Stripe matching tips & Tricks. How to cut a full pattern piece 3
How to match stripe. Stripe matching tips & Tricks. How to cut a full pattern piece 4

I find it easier to lay up stripes using a single layer of fabric. And it’s easier to do this if you have a full pattern. By this, I mean any pattern pieces on the fold should be traced so they can be cut without needing to fold the fabric.

  • Take a piece of paper, larger than your pattern piece.
  • Fold it to make a nice sharp crease. This will be your Centre Front (CF).
  • Place the CF of your original pattern piece right on the fold. Be accurate – if it’s not exactly on the fold you can add or lose millimetres from your garment before you even start!
  • Pin (or use weights) through the layers of paper, keep everything as flat as possible. I always trace around my pattern pieces with a sharp pencil and a ruler, as I feel it’s more accurate than just cutting out.
  • Transfer all the markings. This is where a tracing wheel is very handy. Draw the STRIPE DIRECTION/ grainline all the way across the pattern.
  • Once traced, remove the original pattern. Make sure the lines that are dissecting the CF fold (neck and waist) are doing so at a right angle (90°) or you will get weird pointy shapes at your neck and waist! While its still on the fold, I’ll repin to hold together before cutting out on my pencil line.
  • Once cut, mark in your grainlines/stripe direction and I like to circle my marker dots. Label and date your pattern piece so when you find the cat playing with it on the floor in 2 weeks time you’ll know where it came from.

You can trace all of your pattern pieces, to give you a left and right. You will only need to use a single layer of paper if the pattern piece is not to be cut on the fold. I don’t trace everything but that means when you are cutting in a single layer you have to remember to flip your pattern piece over to make sure you are cutting a pair. For example, when I cut a right back bodice I’ll mark a cross in pencil on the face side of the paper pattern, so I know which side I’ve already cut and then I’ll know to turn the pattern piece over to the other side before cutting the left back bodice.

Stripe Matching: Laying up & Cutting out 

So as we said before the trick to good stripe matching starts with accurate cutting!

So we are going to cut the fabric in a single layer with the Right Side Up (RSU), so we are in control of those stripes. It can be difficult to match them and keep them aligned when the fabric is folded and frankly I get really bored because it just wasted so much time trying to line them up and pin them together! You need a large flat area, it often ends up being the floor, and be sure that if you are using a table that isn’t quite big enough that any overhanging fabric is not dragging your lay off grain and making your stripes go skew-wiff.

How to match stripe. Stripe matching tips & Tricks. How to lay your pattern to match stripes 1

When deciding on where to match and place stripes, think about visually what will be noticed first. A wide dominant stripe will draw your eye to that point so consider this when placing your pattern and cutting out your fabric. It’s usual to match the CF, CB and side seams, so stripes run continuously around the body. Shoulder seams may not always match and the dart tucks on The Barcelona will not match because of the angle they are on.

How to match stripe. Stripe matching tips & Tricks. How to lay your pattern to match stripes 2

The Barcelona pattern already has the STRIPE DIRECTION marked on each pattern piece. It’s just a case of lining it up with the stripe on the fabric and keeping it consistent for each corresponding pattern piece. The underarm is an easy place to line up for bodices, and the hem is often a good place to start for a skirt or sleeve. If you have a bodice with a side bust dart, so it comes from the side seam, match your stripes below the dart.

How to match stripe. Stripe matching tips & Tricks. How to lay your pattern to match stripes 3
How to match stripe. Stripe matching tips & Tricks. How to lay your pattern to match stripes 4

If you need to add a stripe direction line to a pattern piece, draw it all the way across and in whichever direction you choose to have your stripes but MAKE SURE IT’S STRAIGHT!If you haven’t traced the whole pattern, you can chalk around one pattern piece and then flip it over to cut the matching piece. You can also stagger your pattern pieces rather than having them in a row straight across the fabric. Just make sure you are still placing them on the same part of the stripe. In the photo above both armholes are placed at the bottom of a white stripe each time.

Cutting the skirt

 The skirt of The Barcelona is cut on the bias grain to create a chevron at each seam. So the STRIPE DIRECTION LINE is at a 45° angle to the CF and CB seam. The same principle applies to lining up the STRIPE DIRECTION line and consistently placing it on a stripe for all pattern pieces.

How to match stripe. Stripe matching tips & Tricks. How to lay your pattern to match stripes 6
How to match stripe. Stripe matching tips & Tricks. How to lay your pattern to match stripes 7
How to match stripe. Stripe matching tips & Tricks. How to lay your pattern to match stripes 8
How to match stripe. Stripe matching tips & Tricks. How to lay your pattern to match stripes 9
How to match stripe. Stripe matching tips & Tricks. How to lay your pattern to match stripes 10
How to match stripe. Stripe matching tips & Tricks. How to lay your pattern to match stripes 11

As the seams are quite long I also made extra checks as I cut to be sure those stripes matched up. First, I cut the right front skirt panel, again placing the STRIPE DIRECTION line to the bottom of the white stripe. Then I flipped over the pattern piece to cut the left front, again aligning the STRIPE DIRECTION line to the bottom of the stripe and I pinned the pattern in place.

Before I cut it out I can double check my stripe matching skills by laying the skirt panel I have already cut ON TOP (fabric with Right Sides Together) of the pattern piece. I can see the stripes actually matched before I chop out the second skirt front. You can repeat this when cutting the back skirt. Before I unpinned the pattern piece from the fabric I copied and drew the placement of the stripes straight onto the pattern piece. I then transferred to the back pattern piece so I knew they’d match. I just placed the side seams of the back and front patterns together and used a tracing wheel and a ruler to mark them straight through.

Remember they need to match at the STITCHLINE!

It’s a useful trick to have handy if you are matching a long length of stripes, because technically the stripes are evenly repeated but actually, it’s a woven fabric and sometimes I’ve had to ‘encourage’ the stripes to do as they’re told! The STRIPE DIRECTION line does meet at the same point along the side seam because I made sure it does during testing, but if you are adapting a pattern this is one of those things you need to double check because if you can’t just randomly draw a line and expect it to match another one! It’s then just a case of cutting out the back skirt and methodically checking the seams will match.

Sewing with stripes

Troubleshooting

How to match stripe. Stripe matching tips & Tricks. How to sew and match stripes 1

 I’ve stitched my seams with my usual machine foot, but if you are having difficulty controlling those stripes, consider using a walking foot. A walking foot will feed both layers of fabric through the machine at the same time, helping to keep the stripes aligned. My new machine doesn’t have one, but my old one did. I will be buying one very soon! Start by marking in the seam allowance, the stripes need to match at the stitchline (I may have mentioned that before).

How to match stripe. Stripe matching tips & Tricks. How to sew and match stripes 2
How to match stripe. Stripe matching tips & Tricks. How to sew and match stripes 3

Pin every stripe so they are directly on top of each other. The more pins the less likely the stripes are to move as you stitch. Never knowingly underpinned is my motto! For the chevron, I placed the pins at an angle to follow the stripe direction. Remove them as you sew. Don’t tell anyone but I sewed over them with no ill effects but I’m pretty sure it’s a criminal offence so I’m not recommending it.

Tack or Baste

Machine baste (use the longest machine stitch you have) on the stitchline. If you sew to one side of the stitchline those stripes can still move. When you sew don’t rush and take your time!A machine baste is preferable but if you decide to tack by hand – they need to be small and tight stitches and it can be difficult to pull out randomly coloured tacking thread after stitching on top of it.

How to match stripe. Stripe matching tips & Tricks. How to sew and match stripes 4

Check the stripe matching. If anything has shifted, you could just unpick that section and restitch. Or not, depends how you feel sometimes near enough is the way to go! Machine stitch the seam closed with a 1.5cm SA with your usual stitch length on top of the basting.

How to match stripe. Stripe matching tips & Tricks. How to sew and match stripes 5
How to match stripe. Stripe matching tips & Tricks. How to sew and match stripes 6
How to match stripe. Stripe matching tips & Tricks. How to sew and match stripes 7

You may find that some machine basting stitches have strayed either side of your permanent stitchline. Remove any basting stitches that are not under the permanent stitchline. The ones that have strayed either side of the seam will hinder your seam pressing open neatly. Be careful not to pull out or break the permanent row. I did. I wasn’t careful enough. C’est la vie! Before pressing a seam open, always press seam allowance flat and together. I don’t know the science behind it, but you do get a better finish! Neaten the seam, press open and …stripe matching joy!

Aah…’Tis a stripe matching thing of beauty!

join the gang! NEWSLETTER SIGN UP!
Posted on

The Barcelona – in-seam pocket tutorial


So here at Maven, we do our in-seam pockets a little differently. You may have noticed our pocket bags have a curvy bit, which has many a function.

“So why a curvy bit, Mrs M? Go on then, talk pockets and garment construction.”

Oh well, if you insist!

  • That curvy bit acts as a hinge and it gives a bit of support to the pocket bag.
  • The curvy bit makes it easier to neaten around the edge of the pocket (especially if you are using an overlocker).
  • Our method of construction sets the pocket back from the seam edge so it is less likely to show.
  • We don’t have any snipping into seams to make a weak point – pockets are functional and need to be strong!
  • The pocket bag is overlocked together after construction, again, so it’s stronger.
If you’ve made a Maven Pattern before, this is the same construction method as our other in-seam pockets – The Barcelona just has different seam allowances because of the bias cut skirt.

Stripe matching |

I’ve covered the process of sewing with stripes and stripe matching in another tutorial called rather imaginatively ‘Sewing with stripes’.

I did match the pocket bags to the skirt, just to see if it could be done easily. All I did was lay the pocket pattern piece in position directly on the cut skirt panel as if it was ready to be sewn on and then traced the stripes onto the pattern. You don’t really see it unless you look for it, so most definitely not something to worry over unless your fabric is a little sheer and the stripes show through. In that case, I would avoid the issue altogether and cut them in plain cotton!

METHOD |

Interfacing | your garment is cut, make sure you have cut 2 PAIRS of pocket bags (so you have 4 bags in total). Transfer the marker dot positions to your garment; chalk, fabric marker pen, tailor tacks – whatever works for you.  Fuse the strip of interfacing to the pocket mouth on the FRONT body.

look closely – there is a pocket bag there!

Attach the bags | Place the pocket bags to the front and back garment, with right sides of the fabric facing each other, and so the notches on the pocket bags line up with the side seam notches and stitch together with a 1cm seam allowance.

Front skirt | Overlock (or neaten with your usual method) the raw edge of the pocket bag and garment together, starting and finishing about 3cm above and below the pocket bag.

Back skirt | Rather than starting the overlocking just above the pocket bag – start at the underarm and overlock the entire seam right down to the hem.

Press the pocket bags AWAY from the garment and understitch on the front pocket bags.

Side seam | Pin with right sides of fabric facing each other. When matching a style that has a seam that needs to be aligned I usually start by pinning that together first. Then I use all the pins and match all the stripes! Line up the pocket marker dots on the front body with the corresponding ones on the back body.

Take a 1.5cm seam allowance, start at the underarm and stitch down to the first marker dot, PIVOT * and stitch from the dot across the pocket bag until you are back at a 1.5cm seam allowance on the pocket bag. (The stitch line is marked on the pattern piece, so you could transfer the line across with chalk and a ruler if you wanted). Carry on around the pocket bag, and stitch TO the next marker dot, PIVOT again and continue down to the hem.

*TO PIVOT: stitch to the marker dot, leave your machine needle IN your garment, lift your machine foot and turn your work in the direction you want to stitch, drop your foot back down and continue to stitch – makes a nice tidy corner!

Reinforce each of the corners at the pivot point as in-seam pockets can take quite a lot of stress. Set your machine to a smaller stitch length and just stitch a second machine row DIRECTLY ON TOP of your first row of stitching about 3cm either side of each marker dot. Don’t forget to put your stitch length back to your normal setting!

Neaten | Overlock the front side seam from underarm to hem, all the way around the pocket bag – it’s easier because of the curved shape!!!

Press the pocket bags towards the front body. Press the side seams OPEN above and below the pocket bag, as far as you can.

And from the right side…

Just to prove there is actually a pocket there!

Now you get to swish around and smugly say “why yes I did make my dress…it’s got pockets!”

Posted on 2 Comments

The Barcelona – Neck Dart Tuck Tutorial

This isn’t a very complicated part of the Barcelona dress but a few extra photos never hurt anyone!

So what is a dart tuck? A dart tuck is really just a dart that is only partially stitched along the dart legs so the fullness is released below the stitching.

Because of the angle of the tuck, you will find the stripes won’t match.

Method |

Fold the tuck in half along centre fold so the notches at the neck align (I’ve placed a pin above the neck so you can see the notch) and the marker dots lay directly on top of each other. Push a pin through dots to help line up with each other.

Sew from notch to dot, pivot and sew across from dot to fold edge and backstitch.

You could stop sewing at the dot but a backstitch can be a bit untidy here and sewing across to fold helps to keep the tuck in shape.

While the tuck is still flat and wrong side up, press flat and along the crease for about 6cm past the stitching.  

The centrefold actually lines up with the end of the bust dart and the bust point if you need a visual to keep things straight.

Flip over to right side up and press the bulk of the dart towards the armhole and softly press the tuck for about 5cm past stitchline.

Edgestitch at neck edge in the SA to hold the bulk of the tuck flat. And that’s it!

As a little extra option…if you prefer a dart at the neck instead of tuck, just extend the legs of the tuck until they meet (red lines above) and just stitch as a normal dart.


Posted on

the BARCELONA – invisible zip tutorial

The Barcelona Dress | Invisible zips & stripe matching

Invisible zips (sometimes called concealed zips) strike the fear into many a sewist, and our lovely Barcelona dress has an invisible zip and stripe matching! Sounds a bit daunting, doesn’t it?

Don’t panic, I didn’t get this right first time – I practised and I unpicked. More than once.

Do please remember that there is no such thing as the sewing police and perfection can be truly overrated if it’s taking away the joy and not adding to it. If it’s near enough, if you’re happy to wear it, it’s good enough!

This is a new-to-me method of inserting an invisible zip, which does prove my point that there is always more than one way of sewing something and you’re never too old to learn. This method closes the CB seam before you insert the zip rather than after. The benefit of sewing it this way is there is no bump at the bottom of the zip issue to worry about. I know…mind blowing! My normal method of invisible zip insertion (stitch down each side of zip, stitch up from the bottom to close the seam) was fine (and if you prefer/are happy with that method, carry on – we’re not doing brain surgery here) but after a day of testing methods, I felt this one was better at controlling the stripe matching situation, not to mention the dreaded bump at the bottom of the zip situation.

I discovered the original version of this technique when it popped up in my Instagram feed from Threads Magazine. The YouTube video is demonstrated by the delightful Kenneth D King. I’ve adapted the original technique a little bit to help with the stripe matching, I only close the CB seam to the bottom of the zip opening. The original method also closes the zip opening using a machine basting stitch. I also prefer to use an invisible zip foot, it’s just what I’m used to, but Mr King uses a generic adjustable zipper foot. The original video can be viewed here: YouTube LINK: Imperceptible Zipper by Kenneth D. King.

STRIPE MATCHING TIPS |

  • see our ‘sewing with stripes’ tutorial
  • Take your time!
  • Use lots of pins and pin ALL the stripes together.
  • My philosophy of stripe matching is “Never Knowingly Under Pinned”.
  • Remember you are matching them at the STITCHLINE, not the outside edge!
  • Take your time (it’s worth saying twice).
  • You may find it easier to mark in your SA with chalk or fabric marker pen.

INVISIBLE ZIP TIPS |

  • An invisible zip is always stitched from the top down to the bottom.
  • Invisible zips are placed RS of zip to RS of garment.
  • The coil (teeth) sits right on the CB line.
  • You never get to use the entire length of an invisible zip. You lose around 2.5-3cm (1″) as you can’t stitch right to the bottom because the zip puller is in the way. If you have a 56cm (22”) zip the finished length will be about 53cm (21”)
  • They are very easy to shorten, this method is actually easier if the zip is too long. Always shorten a CLOSED invisible zip AFTER it has been inserted.

And you can, of course, use this tutorial for both versions of The Barcelona, classic back or V back, striped or plain. Or any other pattern with an invisible zip, we don’t mind!

TOOLS |

Invisible zip, Invisible zipper foot, ordinary machine foot, ordinary zipper foot, and the usual sewing stuff!

ABBREVIATIONS | 

WSU: wrong side up | WS: wrong side | RSU: right side up | RS: right side | SA: seam allowance | CB: centre back

METHOD |

You will have already spot fused the zip area with fusible interfacing.

Press the zip |   Open the zip and lay on the ironing board with WSU. With a cool iron press the coils (the teeth) flat to uncurl them so they are easier to sew. WARNING! If your iron is too hot, the teeth will melt! Close the zip.

Close the CB seam | With RST pin CB seam together from hem to zip opening notch. Match the stripes together and pin to hold – remember you are matching them at the STITCHLINE. Tack or machine baste if you wish.

Close CB seam with 1.5cm SA using your normal machine foot. Start at the hem and stitch to zip opening notch and backstitch. Press the seam open and neaten before taking a minute to marvel at your stripe matching!

Place the zip | It’s really easy to get an invisible zip twisted as you pin it in. The RS of the zip will be facing the RS of the garment.

I find the best way is to lay the dress with WSU facing you, and then fold back the SA at the CB neck and use one pin on each side to hold.Place the zip FACE down on the dress, so WS of the zip is facing you. Open the zip a couple of inches and pin the zip tape to the SA on each side of the opening with one pin. This is just to place the zip without twisting it, we will pin the zip accurately to stitch in the following steps. The Barcelona dress has a 1.5cm SA so the tape of the zip will be narrower than your SA.Open the zip so the puller is all the way to the bottom. Start on one side of the zip, it doesn’t matter which side and place the top stop 1cm from neck edge. This is to allow space for the binding (I’ve placed a pin in the photo to show you where) and pin the tape to the SA. Keep the zip coil ON the CB stitch line.Once you have pinned one side of the zip mark on the zip tape the base of the opening so you know where to stop stitching. If you like you can also tack as close as possible to the teeth coil to hold in place.

Change to an invisible zip foot | Take a look at your zip foot and you will see 2 grooves or channels on the bottom of your invisible zip foot –  yours may not look exactly mine but you’ll get the idea. The coils of the zip will sit in one of these channels dependant on which side you are stitching. Choose the groove furthest away from the SA and so that you are stitching through the zip tape right next to the coil.Stitch | Stitch with the dress RSU and start with a backstitch at the top of the zip. Stitch close to the zip coil and roll the coil with your fingers as you stitch so it sits perpendicular to the zip tape as you sew. Do not stitch on the coil as your zip will not close! Stop with a backstitch when you get to your mark at the base of the zip opening.

Mark the stripes | Close the zip. Now carefully mark the base of the opening, the waist seam position and the stripe positions on the tape on the other side of the zip with chalk, tacking thread or a fabric marker pen. Take your time and do this accurately as it will allow you to match the stripes across the zip. Then pull the zip puller to the bottom of the zip again.Now to place the other side of the zip! Pin the zip tape in the same way you did before, making sure the coil stays on the CB line (it will help if you marked your SA) and take your time to match the stripes and waist seam to your markings. Make sure you also line up the top stops on each side of the zip or it will look uneven and stepped at the top when it is closed. Use a small stitch and tack the zip tape and the seam allowance together as close to the coil as possible.

TIP: If you want to close the zip to check your stripe matching after tacking but before you machine stitch permanently, you will need to unpick the last few centimetres of tacking at the bottom of the zip to get the puller back below the zip opening before re-tacking that last bit again.For overkill, and because I still found that the stripes moved a smidge, I went back and added pins horizontally across the zip to stop any stripes shifting under the machine as I stitched. I removed these as I sewed.Start at the top again, with a backstitch, and stitch the other side of the zip using the other groove of your machine foot. Go slowly and stop and backstitch at your mark at the base of the opening.

Close the zip to check puller will run up and down and all looks good before continuing.

If any of your stripes have shifted or you caught the teeth of the zip you can always unpick just a section and re-stitch. But please remember that there is no such thing as the sewing police – if you’re happy to wear it, it’s good enough!

Shorten the zip | If your zip is too long, it’s easy enough to shorten.

Always shorten an invisible zip after it has been sewn in and when it is CLOSED!First, we will need to create a new stopper at the bottom of the zip. Take a length of thread, double it and thread a needle with the folded end to give you 4 strands of thread to sew with. Knot the end.Start from underneath the zip so the knot is hidden and about 1cm below the opening and whipstitch (oversew) around the coil of the zip. You are only sewing through the zip, not the garment.Do this a few times to create a stopper for the zip before securing your thread.Leave about 3cm (1″) of tape below the stopper and then you just can cut off the excess zip.

Secure the zip |Change to an ordinary zip foot (sometimes called a half foot). We are going to anchor the zip tape to the seam allowance at the base of the zip. The point of this is to take some of the strain away from the zip when it’s being pulled up and also to stop it flapping around.Machine stitch through the zip tape and SA by stitching forward and backwards a few times in a straight line on either side of the zip to create a bartack. Make sure you are only stitching zip tape to SA and you are not stitching through the dress! You can do this bit by hand if you prefer, in the same way, that you created a stopper.

Press | Give your zip a gentle final press!

Troubleshooting |

It’s very easy to get carried away and obsess over the things we make and sometimes we just have to say that will do. And it will do, it really will!

But this was a problem I had and the solution wasn’t what I thought it would be, so on the off chance it helps here it is…


Now I’m sorry to say that I didn’t take a ‘before I unpicked it photo’, but those stripes on the skirt below the waist didn’t match. They weren’t out by a lot, but enough to be annoying. I assumed that I needed to move the stripes up or down the zip to get them matching to the other side. Once I had released that stitching I could see that I actually needed to move them to the right (the pins are my original line of stitching) and gain a few millimetres from the SA to get them to match. We had a saying in the Industry years ago – ‘wangle it’ which basically means can you bodge/fiddle something that should work, to make it work? So sometimes, when it’s necessary, we ‘wangle it’ and that’s OK.

So I moved those stripes across to where I wanted them and voila!