Posted on 2 Comments

How to sew with a twin needle | The Somerset T-shirt

HEMMING JERSEY | TWIN NEEDLE

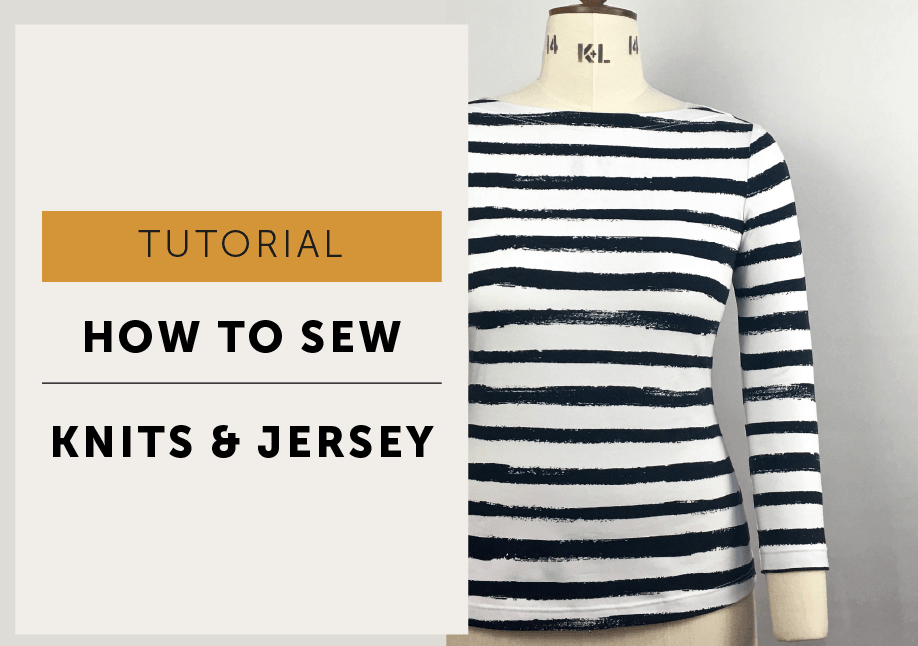
The Somerset T-shirt has a flattering Bateau neckline, and on a minimalist style garment such as this, it’s important to understand that any stitching will a very visible detail. One of the ways to make your clothes look less home-made and more handmade is by paying attention to the finishing of your garments. And for jersey and knit fabrics, a twin-needled hem gives a very professional look.  Most factory-finished ‘Ready To Wear’ t-shirts will have been hemmed with an industrial coverstitch machine, which creates that unmistakeable double row of topstitching that has an inbuilt stretch to it. You can buy domestic coverstitch machines and if you’ve got one, happy stitching! But, if you have got one, I’m going to assume you’ve stopped reading this because it will all be a bit irrelevant!

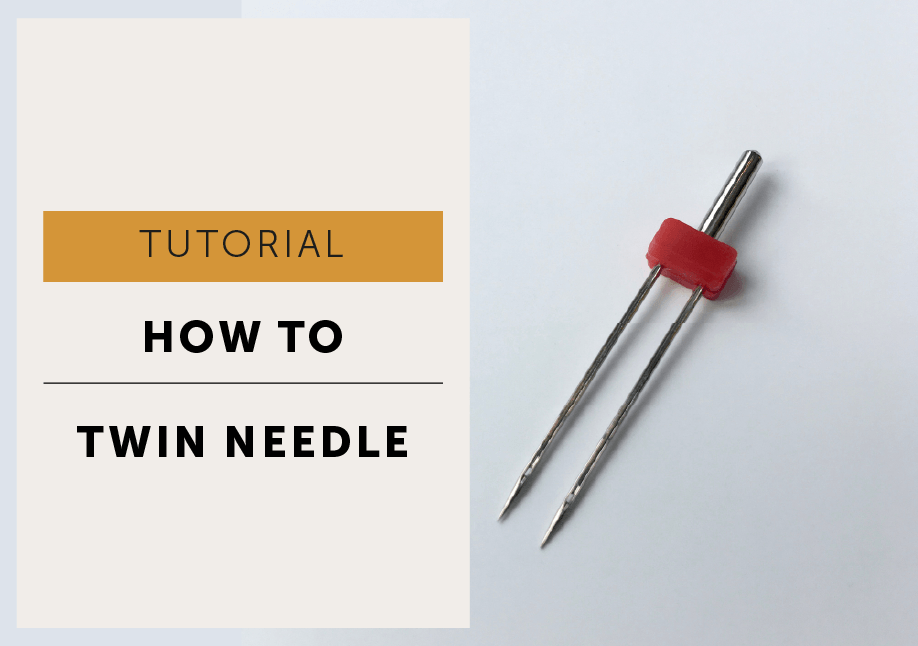
Now, I don’t own a coverstitch machine and if you don’t either, don’t worry, as it can be easily replicated on an ordinary domestic sewing machine. You just need to use either a ballpoint twin or stretch twin needle for your machine. They come in different widths, which is the size of the gap between the needles and this is how far apart your 2 rows of topstitching will be. I use a 4mm needle, just make sure the one you choose will fit inside your presser foot.

THREADING YOUR MACHINE |

You will need to refer to your sewing machine instruction manual to get the exact information for your machine. Use your usual thread in the bobbin and then use 2 reels of thread for the top threading of your machine. Thread your machine as usual with the first reel of thread. Your machine may have a second spool to attach to hold the second reel. Not all machines do have a second spool holder and if like my machine yours doesn’t you can to use a separate spool stand. Thread the second reel of thread as the first, but when you get to the last thread guide above the needle leave it free to help prevent tangling (but again defer to your manual) and thread the eye of the other needle.

PRESS |

Press the hem or facing allowance 2.5cm to the wrong side of the garment (the actual amount may vary depending on your pattern).

WENDY’S TOP TIP! | Machine baste the facing

I can’t take credit for this tip! Wendy, one of my lovely testers, passed on this to me as she always does this before twin needling, stitching a facing or hem from the right side of a garment. It’s much quicker and gives an accurate guideline to follow. It’s also quicker than tacking by hand.

    • Use a contrast colour on your bobbin, it will give you and an easy-to-see and an easy-to-remove colourful basting stitch on the right side.
    • Set your stitch to the longest length.
    • With the wrong side of the garment up, stitch a row 2cm from the folded edge. (Adjust the measurement for your particular need!)
    • This will give you a stitch line to act as a guide for your twin needle row.
    • After twin needling, you can remove the basting stitches.

TWIN NEEDLE |

You want both needles to catch the hem allowance. I have a 2.5cm allowance but I line up the folded edge with the 2cm mark on my machine throat plate – 2cm will actually be the midpoint between the 2 rows of stitching, so I can make sure that I catch the allowance easily (that should also allow enough allowance if you are using a twin needle bigger than 4mm). I’ll trim any excess allowance away later if it needs it, but usually, it is quite a minimal amount so I don’t worry too much. The twin needle creates a zig-zag on the back so there is no need to pre-neaten your hems, but jersey doesn’t really fray anyway.

  • Use a stretch or ballpoint twin needle to create a faux coverstitch.
  • Stitch from the right side of the garment.
  • Test the tension and stitch length on a folded piece of fabric so you are stitching through 2 layers.
  • Check there is enough elasticity in the seam so the stitches don’t crack and snap when pulled.
  • Remember to make a note of your stitch settings so you can switch between settings on your machine with ease during the construction phase.
  • Use a good quality thread to help prevent it snapping.
  • Leave long ends and don’t backstitch, just stitch the ends in by hand later.
  • Increase your stitch length for neater looking stitches.
  • Don’t stretch as you sew.
  • A good press with steam often improves the look of the twin needling.
  • I found a higher tension and slightly longer stitch length worked for my machine.
  • On the wrong side, trim away any excess hem allowance after you’ve finished.
  • OPTIONAL | A walking foot (great if you’ve got one, but they can be expensive if you haven’t) will help feed both layers of fabric through your machine evenly.
  • Alternatively, you could use a zig-zag stitch set to a medium width/length.

OOPS! WHAT WENT WRONG?!

First of all, did you give it a good press? Never underestimate how much pressing your seams and hems will improve the look of your finished garment. And do remember that pressing is just that, lift your iron and use it in an up and down motion, not a dragging side to side motion. And be gentle, you don’t want to stretch anything.

TIME TO TROUBLESHOOT THOSE STITCHES |

Sometimes, no matter how much fiddling around with pressing, tension and stitch length settings, you may find using a twin needle creates a ridge or ‘tunnel’ effect. Before you get upset by it, go off and have a coffee or something, come back and look at it with fresh eyes. Would it have bothered you if you bought it from a shop or are you chasing unobtainable perfection? Because you know what, that picture above, it’s not that bad! But if it is bothering you…

Stabilising the area may help. Try these ideas;

  • try using spray starch to stabilise the area
  • place a tear-away stabilizer underneath before sewing and gently remove after.
  • You could try using wash away wonder tape on the hems. This is a double-sided tape that washes away. When I tested it I found due to the curved shape of the neckline and the tape is straight and not cut on the bias, it caused more problems than it solved, but you may find it useful for hems. And as all fabrics respond differently, it might be worth a little test sample of the neck area to see if it works for you.
  • Stabilise with strips of tricot interfacing.
  • Don’t forget, it’s not worth getting hot and bothered over! You can always use a different stitch, just select a zig-zag or other decorative stretch stitch to finish the hems and neckline.

STABILISE WITH INTERFACING|

To improve the look of tunnelling try applying a strip of fusible interfacing to the hem allowance before stitching. Use a tricot (knitted) interfacing, this is a stretch lightweight polyester iron-on interfacing and is available in black or white.


Cut the interfacing into 2.5cm (1”) wide straight strips (or whatever the width of your hem allowance is) with the most stretch running in direction of their longest length, so it will stretch with your knit fabric and finished garment. As we are using knitted interfacing you will be able to curve the strips into shape as you press in place on your t-shirt. And then test your stitches again!

Other Somerset T-shirt tutorials | Sewing with Knits


Posted on

The Somerset T-shirt | details

So, here she is…our newest PDF pattern, the Somerset t-shirt!

20-22nd December | This weekend, to celebrate the release of our latest pattern we will be donating 50% of all sales of THE SOMERSET T-SHIRT PDF pattern to refuge.org.uk in support of their work in providing refuge against domestic violence.

I have a thing for a bateau neck (or slash neck, if you prefer) t-shirt, always have, always will! I find the neckline is a really flattering shape and I have had various incarnations over the years all of which became staples of my daily wear. So, my mission for this pattern was to create an every day, hard-working pattern that would be a useful foundation piece for any capsule wardrobe.

The Somerset is a slim-fitting t-shirt, designed to fit closely fitted through the shoulders and bust area while skimming, rather than clinging to your body, through the hips and waist. As she is a multi-sized pattern in UK sizes 8-20, you blend between the sizes to create your perfect fit. She has been designed for knitted fabrics with approximately 40% stretch (around 5% elastane) but we have included a handy stretch guide in the pattern, to make sure your knit is suitably stretchy. The elastane content (Lycra and spandex are the same thing) will help your t-shirt retain its shape after wear.

And of course, we want you to get multiple uses from your pattern so we have 4 different sleeve options.


STRAIGHT SLEEVES | Opt for the classic 3/4 length or the long sleeve which is perfect as an everyday t-shirt or for layering.

BISHOP SLEEVES | make a statement with the cuffed bishop sleeve, which comes with a choice of a short cuff for a 3/4 length sleeve or use the deep cuff option for a full-length bishop sleeve.

SIZES UK 8-20 | SKILL LEVEL: ADVANCED BEGINNER | designed for knitted fabrics with 40% stretch (approx 5% elastane)

| available as a PDF pattern for instant sewing fun! Paper pattern to follow soon |

Posted on

The Somerset T-shirt | new pattern release


We are very excited to announce our gorgeous (and long-awaited) Somerset t-shirt pattern will be released tomorrow!

We would usually celebrate a new pattern release with 20% discount for the weekend. But this time we have decided to do something a little different and instead, we will donate 50% of the sales of each Somerset pattern sold (£4.375 per pattern) over our launch weekend to Refuge to help them continue their amazing work in providing support and refuge for women and children against domestic violence.

Refuge is committed to a world where domestic violence and violence against women and girls is not tolerated and where women and children can live in safety. We aim to empower women and children to rebuild their lives, free from violence and fear. We provide a range of life-saving and life-changing services, and a voice for the voiceless.

As a family-run business, we are very lucky to have been able to empower ourselves to be able to do what we love every day and we would like to contribute to the work of Refuge so they can continue to empower others. If you would like to donate directly to Refuge, just click the button below to go straight to their website.Thank you x


Posted on

Sewing with knits

SEWING JERSEY TIPS

Sewing a knit garment can sometimes seem a bit daunting. Many makers think you need specialised machinery, but really good results can be achieved on an ordinary domestic machine. The trick is to test your machine stitch and tension settings before you start and make sure you use the correct needle to avoid skipped stitches.

UNDERPRESSING

My one major piece of advice I would like to offer, and this applies to ALL of your makes, is to take your time and underpress at each stage of construction. Underpressing just means that you will press as you go and press each seam after sewing it. I tend to sew everything I can in one hit and then move on to press everything I can while I’m at the ironing board. I apply the same principle to neatening my seams at the overlocker. I was taught by the sample machinists I worked with to first press the seam flat so the stitches are set into the fabric, and then either press the seam allowance open or to one side. This does give a more professional finish and even though you are effectively pressing each seam twice, pressing the seam allowance flat and together first makes it much easier and quicker to press open or to one side. And do remember that pressing is just that, lift your iron and use it in an up and down motion, not a dragging side to side motion. And be gentle!

  • Always use a ballpoint, jersey or stretch (usually recommended for Lycra) needle so you don’t get skipped stitches.
  • Use a stretch or ballpoint twin needle to create a faux coverstitch for the hem.
  • Don’t pull and stretch your fabric as you sew, though I find holding it firmly to create a bit of tension as it is stitched can be helpful.
  • If your seam goes a bit wavy after stitching, very gently steam and press flat.
  • I have used a walking foot in the past, which helped but I don’t think it was essential. It would be worth trying if you have one, but they can be expensive to buy.
  • My machine tried to swallow the garment into the footplate at the beginning of a seam, so I placed a piece of paper under the garment before stitching. I had some heavy tissue paper handy but the off-cuts from printed Indie sewing patterns would be perfect!
  • Not sure which needle to use – here’s a link to a handy chart.

THREAD

  • You’ll want to sew with a polyester thread as it is stronger and has more ‘give’ than cotton thread so will stretch with the garment and is less likely to snap.
  • UPDATE: I haven’t tried it yet but there is now a thread specifically designed by Gütermann for sewing stretch fabrics. The Gütermann Maraflex Thread is a high stretch thread with a seam stretch of up to 80% and designed so you can stitch jersey with a straight stitch on an ordinary domestic machine.

STITCHES

The Somerset T-shirt Stitch Chart | Maven Patterns
The Stitch Chart

Create a Stitch Library | Test your stitches on a scrap bit of fabric first. Stitch in both directions, along the selvedge and across the width of the knit, to make sure your stitches don’t crack when you pull them. Record your machine settings on the Stitch Chart included in the Somerset T-shirt pattern, or in a notebook, to create your own Stitch Library so you can refer back to them easily during the construction of this (and future!) garments.

Tension and stitch settings will vary and be dependant on your machine and your fabric. The best method, tension and stitch length settings will vary depending on your sewing machine, the fabric you are using and the finish you prefer.

There are a couple of different options (listed below) for stitching your seams. You really need to get friendly with your sewing machine manual and you may find further guidance there on selecting a suitable stretch stitch as your machine may have different stitch options available than those we have listed. I can’t state this enough…test them out on a scrap and see which one you prefer and works best for you and your fabric.

Zig-zag stitch | lightning stitch | straight stitch | 4 thread overlocker
  • Zig zag on a narrow to medium width and 2.5-3mm short length (I used this as was quicker than the lightning stitch, and set my stitch width to 0.5 and stitch length to 2). Don’t stretch the fabric as you stitch, just guide it through the machine and let the feed dogs do their job.
  • Stretch stitch (sometimes called lightning stitch). This is a specific stretch stitch which preforms well. The disadvantages are it is slower to stitch a seam with and it is harder to unpick than the zig zag stitch. Again, don’t stretch the fabric as you sew.
  • Straight stitch. This one may be controversial but I actually stitched mine with a straight stitch, and just pulled the fabric very slightly in front of the needle so it was under tension as it was stitched but I was very careful not to stretch my seams. My t-shirt has been heavily worn and washed and the seams haven’t cracked to date. Keep in mind what type of garment you are making and what type of knit you are using. Do not use this if you are sewing a very stretchy jersey or making activewear or swimwear though, I haven’t tried it but I’m pretty sure your seams will crack under those circumstances.
  • Overlocker – you can cut, sew and neaten your seams all in one go. 3 threads are usually just used for neatening seams, 4 (or 5) threads are used for all in one seam stitching as it makes for a stronger seam. The stitches have a built-in stretch to them.
  • Neaten seams. To neaten your seams either use a zig-zag or overlock together. You could in theory just stitch and leave the edges raw and unfinished or trim them with pinking shears as knit fabric don’t really fray.

CUTTING

  • Prewash and press
  • Lay the fabric flat on the table, do not stretch it but let it relax.
  • It’s preferable to cut knit fabrics in a single layer for accuracy.
  • If folded make sure the underneath layer is flat too as it has a tendency to ‘ripple’ as it grabs the top layer.
  • Do not let it hang off the edge of the table as it will stretch the cloth out of shape or pull it off-grain.
  • Pin in the seam allowances to prevent marking the body of your garment.
  • Or use weights and cut with a rotary cutter.
  • INDUSTRY TIP | mark the wrong side of the fabric with a chalk cross it if isn’t easy to spot the right and wrong side. Black jersey – I’m looking at you!

Other Somerset T-shirt tutorials | How to Twin Needle | The Somerset t-shirt