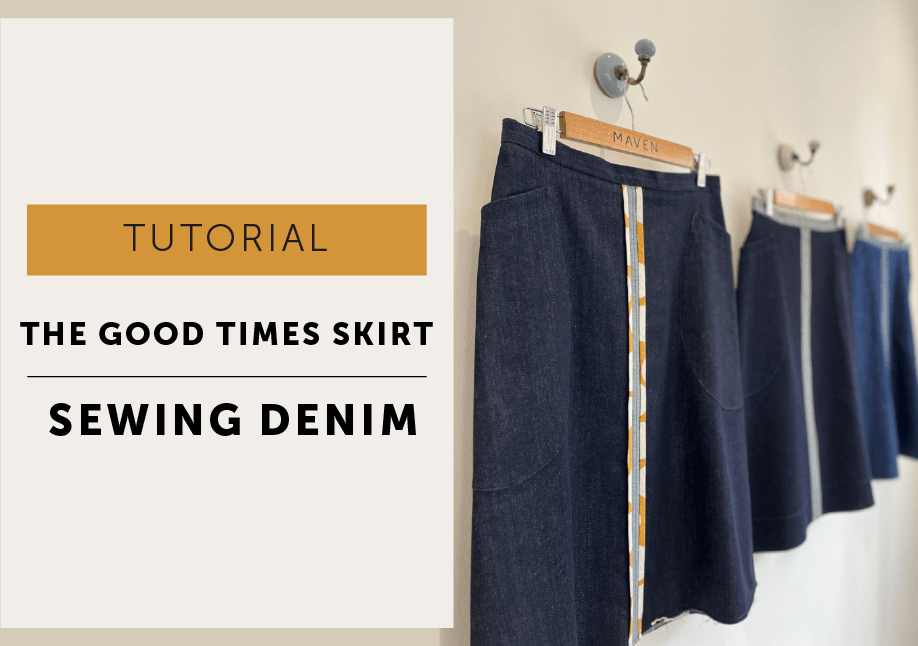
Posted on

The Good Times Skirt | sewing denim

The Good Times Skirt | tips for sewing denim

I like practicality and utilitarian in my design work so denim has always been one of my favourite fabrics. I like the way the fabric ages to tell a visible story of wear and history.

Denim is a very durable, strong fabric, traditionally woven in a twill weave and made from cotton with indigo dyed warp (vertical/lengthwise) threads and white weft (horizontal/across) threads that gives denim its characteristic look. In the last 20 years or so fashion and technology have had an impact on denim with the addition of other fibres such as elastane and Tencel to give a different feel and finish. Some of these fabrics will not be as hard wearing as traditional denim.

Denim comes in many weights but for The Good Times Skirt, you are looking at using 9-12oz denim, with around 2% elastane (lycra/spandex) for a bit of comfort stretch. Try and be thoughtful and intentional about the fabric you choose, the aim is to produce a garment that can be part of your wardrobe for years to come.

Denim is not a very difficult fabric to sew but it can get a bit bulky, so having a few tricks in your sewing arsenal can make sewing it a smidge easier.

PRE-WASH YOUR FABRIC | 

Denim will shrink, and the indigo dye on the darker denim will run. Wash separately at 30° with plenty of room in the machine and you can pop a cup of white vinegar in the wash with your denim to help fix the colour. I tend pre-wash dark unwashed denim twice to avoid blue fingers while sewing. Denim also frays quite a bit so consider neatening the raw edges before washing or sewing into a loop first. Washing your denim with room in your machine for the denim to move (don’t pack it tightly in!) and ironing whilst still damp will help prevent white lines appearing on the surface.

I prefer not to tumble dry anything, ever, as I think it breaks down the fibres (especially lycra) and that can’t be a good thing. That fluff in the tumble dryer must come from somewhere. I don’t actually have a tumble dryer anymore (but I also don’t have small children and I work from home so can time the washing for a sunny day – I’m in England and laughing as I write that optimistic statement) but if you’re likely to throw your denim in the dryer later it’s probably best to treat it the same way at the pre-wash stage but it’s advisable to check the wash care instructions for your cloth first.

There is, of course, the denim purist method of not washing and wearing denim for 6 months to a year and popping in the freezer occasionally to kill off any bacteria. I read that the other day that the freezer idea is under debate, but hey ho!

TIPS FOR SEWING DENIM |

  • Use sharp scissors or a rotary cutter with a fresh blade.
  • Denim can be quite sturdy and bulky, test interfacings on your denim to make sure you are happy with the result, many sewing decisions are just down to personal taste.
  • Facings are best cut in lightweight cotton, to help reduce bulk.
  • Use a Jeans needle – size 90/14 for lighter denim, 100/16 or 110/18 for heavy denim
  • Test topstitching and stitch tension on scraps of fabric before you start.
  • Topstitch with a slightly longer stitch than you usually use, around 3mm, but do a test to see what’s good for your machine.
  • Think about topstitching colours and weight of thread. Do you want your topstitching to stand out or blend in?
  • Topstitching with your usual weight in a matching or tonal colour thread gives a subtle look.
  • Consider using a heavier weight thread to make a feature of topstitching, use either Jeans or buttonhole thread and your usual thread in the bobbin. 
  • If your machine has an extra spindle on top can also use ordinary weight thread for topstitching but thread the needle with a double thread to give the appearance of a heavier thread.
  • Press as you go and use lots of steam.

BULKY SEAMS |

Reduce bulky seams by trimming and grading seam allowances. For very bulky corners and seam junctions, tap the area with a hammer! Protect your garment with a piece of folded denim below and cover with another scrap and just gently tap until it softens. A very useful tip for the corners of the waistband and if you are hemming jeans.

LEVELLING FOOT/BUMPER/HUMP JUMPER | honestly, I’ve heard all those terms so not making it up…

So what often happens with thicker fabrics like denim is the back of your presser foot isn’t level with the front when you sew (or vice-versa at the end of a seam). That’s when you get problems with uneven topstitching because the fabric is not feeding through evenly. It happens when your hemming jeans at the intersection of the seams or anywhere there is a lot of bulk to stitch over, and your stitching looks a bit messy with different length stitches.

All you need to do is fold a scrap of fabric and place behind or in front of the thick bit you’re stitching and under the machine foot to keep it level as you sew over thicker areas. You can buy a special gadget or use a piece of card, but I like a bit of fabric so I can fold it to the right depth.

My new machine has a levelling presser foot with this screw thing you can push in to keep the foot level. (I’ve got a Juki). It’s sometimes useful, but not always, so lo-tech scrap of fabric is still winning.

FINAL TIP |

Take your time! You can literally crank the wheel by hand and go one stitch at a time if necessary, especially over those thick tricky bits. Happy sewing!


Posted on

The Good Times Skirt | waistband tutorial

THE GOOD TIMES SKIRT | waistband tutorial

We’re really excited to share with you our new pattern The Good Times Skirt!

I really love the contrast waistband detail. The zip finishes right at the top of the band giving a crisp, clean look and also means we have no buttonhole to deal with! And while this tutorial is meant for The Good Times Skirt, you may well find some useful tips for any waistband!

ABBREVIATIONS | 

WS: wrong side | RST: right side together | RSU: right side up | RS: right side | SA: seam allowance | WB: waistband

METHOD |

You should have completed up to STEP 17 of your instructions and are now ready to pop on the waistband.

INTERFACING THE WAISTBAND |

I designed The Good Times Skirt to use the WRONG SIDE of the denim as the FACE SIDE (the RS of the cloth, AKA the side on show to the world) for a contrast waistband. Therefore, the interfacing will be fused onto the darker side (normally RS) of the cloth. You can, of course, use either side of the fabric. It’s up to you if you want a contrast waistband or not – it’s your skirt after all! I’m going to refer to the finished (seen by the world) face side of the waistband as RS or RSU, no matter which side of the fabric you’ve decided to use.

I’ve used slotted waistband interfacing (a) because I had it, (b) it’s easy to get hold of and (c) because it showed well in photographs. It is quite a stiff interfacing but it’s been OK to wear especially after washing – I’ve actually been wearing this skirt for over a year. Depending on your denim and how you like the waistband to feel you may prefer to use something softer, I’d suggest a medium weight fusible interfacing. Test out different interfacings on a scrap of your fabric first and then block fuse your waistband. Jeans are often done without any interfacing, if that’s your preference, but the waistband may stretch!

STAYSTITCH | I don’t mention this in the instructions, but you may like to staystitch the waist of the skirt before you start to prevent it from stretching. Denim is quite a stable cloth so I didn’t do this step and, with the exception of very fluid fabrics, I rarely staystitch anything if the truth be told. If you prefer to staystitch or will be trying your skirt on a lot as you make it and are concerned the waist may stretch staystitching will be a good option.

TO STAYSTITCH THE WAIST | In the seam allowance stitch with your normal stitch length from the side seam to the centre of the waist. Repeat from the other side seam back to the centre again.

NEATEN |

Once your waistband is interfaced, one of the long edges needs to be neatened. You could overlock (serge) or zigzag stitch in a matching or a contrasting colour, or finish with Hong Kong binding. Press in half to give you a centre fold line (that’ll be handy later when it’s time to pop the zip in).

Next pin WB and skirt with RST with edges aligned, match notches with seams and be sure to make sure the WB SA extends 1.5cm beyond the skirt at the zip opening.

The skirt eases very slightly onto the waistband to help fitting over tummies! 

Wrap the 1.5cm SA around to the WS of the skirt and pin.

Stitch the waist seam closed with a 1cm SA. It’s a good idea to check now your waist seam lines up on either side of the zip opening and fix it if necessary.

The corner of the waistband is going to be bulky so clip the corner and grade the waist seam. To grade the seam, carefully trim the SA on the skirt by half. Press the waist seam flat.

This is the Instagram worthy picture…

TIP | If this corner is still a little bulky and thick (depending on your choice of denim, it may be) my tip is to hit it with a hammer. 

…this is the reality!

Yep, a hammer – oh, what fun! Now, you don’t want to damage the skirt, so protect your garment by laying it on an offcut of denim and cover the area with a double layer of denim and gently whack with a hammer to flatten. Press the area with your iron again. Gently repeat if necessary! This is an incredibly useful tip for hemming Jeans too. Also, very therapeutic – enjoy!

The last step! Turn the waistband to RS and press waistband and SA upwards, away from skirt body.

TIP | Check again that your waist seam is level and not staggered – the zip opening should be exactly the same length on each side. If it’s not even now it’s easy enough to go back and restitch one side so they do line up, don’t wait until you’re putting the zip in to find out!

So that’s the waistband done, next stop…the zip!

Click here for


Posted on

The Good Times Skirt | zip tutorial

The Good Times Skirt | a zip tutorial

There is a very specific order of making The Good Times Skirt.

Usually, with a centre back zip, I would advise inserting it before the side seams are closed so the skirt is as flat as possible. However, some bright spark (me) decided that she wanted the zip to go straight into the waistband, and have huge pockets that sit on top of the side seam. So, therefore, we have to make the skirt and attach the waistband first before tackling the zip. And I also complicate things slightly with a reversed seam detail.

TOOLS |

9″ metal trouser zip, zipper foot, standard machine presser foot and the usual sewing stuff!

TIP | If you want to use a slightly longer zip that’s ok, just lower the zip drill hole to accommodate the extra zip length, close the CB seam accordingly and you’re good to go!

ABBREVIATIONS | 

WSU: wrong side up | WS: wrong side | RSU: right side up | RS: right side | SA: seam allowance | CB: centre back

METHOD |

You will have already closed the centre front with your preferred method, closed and neatened the side seams, stitched on the pockets, closed the CB seam up to the drill hole (marker dot) for the base of the zip and attached the waistband (that is completed all the instructions to step 24).

TIP | Often during construction you would apply a strip of interfacing to a zip area, but I have chosen not to because denim is usually very sturdy and we also have the reverse seam detail. If you are making your skirt in a cloth that would benefit from some interfacing, cut a strip 2cm wide and a bit longer than the opening and apply it to the RIGHT SIDE of the skirt centrally over the CB seam (the stitchline) before closing the CB seam. The interfacing will be hidden inside the reverse seam.

Place the zip |Baste the zip opening closed, by oversewing the edges together with a large-ish stitch and make sure the waist seam nicely aligned and is not staggered. The waistband in the picture shows it finished by overlocking (left) and Hong Kong binding (right). You should have already decided and finished your waistband, I just thought it’d be nice to show how they could look.

With the skirt inside out (WS facing you) place the zip face down centrally on the CB seam.

TIP | One of my lovely testers recommends using a double-sided basting tape to hold the zip in place.

The top stoppers of the zip should sit about 3mm below the centre fold of the waistband. Pin to hold but make sure it stays central. The bottom zip stop should be about 5mm above the end of the stitching for the CB seam. If it is slightly out, don’t worry, just remember that we want to topstitch BELOW that stopper so you don’t break your needle. It’s actually a good idea to mark on the RS of the skirt where the zip stop is, so you can avoid it!

At the top edge, fold back the zip tape at an angle so it will be out of the way of the zip puller.

Tack through the zip tape and ALL the layers, down each side and across the base, keeping that zip central on the CB.

TIP | The zip will be stitched in place from the RS. Mark the stitchline with chalk or fabric pen about 1cm (3/8″) from the CB on each side. (When stitching I use my machine foot width as a guide, it actually came out slightly under 1cm). Mark the base of the stitchline 5mm BELOW the zip stopper.

Stitch the zip | Change to a zip foot

Take out the basting thread holding the CB together.

With RSU and the zip closed, start stitching with a small backstitch on the CB seam (at the base of the opening but below the zip stopper!) and stitch across to your chalk mark guide and pivot* and start to stitch up one side of the zip. Concentrate on keeping your stitching an even distance from the CB seam.

 *TO PIVOT | stitch to the pivot point, leave your machine needle IN your garment, lift your machine foot and turn your work 90° in the direction you want to stitch, drop your foot back down and continue to stitch – makes a nice tidy corner!

You are probably going to have to move the zip puller out of the way at some point because it will be in the way of your zip foot. It’s not a problem, stop stitching about half way (not vital where) but leave your machine needle down and in the skirt. Lift your zip foot and just wiggle the zip puller past your needle so it now sits behind the foot. Drop the zip foot again, and carry on stitching up to the fold line of the waistband. Backstitch to finish and secure.

TIP | When stitching over the waistband seam, you may find due to the thickness that your foot doesn’t lie flat and this makes your stitches uneven. Easy solution, leave your needle in the fabric, slide a bit of folded denim (or card) to lift up the back of the foot so it is level with the front and carry on stitching. (You can buy gadgets for this but I’ve never bothered).

Close the zip, and repeat for the other side.


Waistband | Fold the waistband along the centre covering the waist seam. Pin to hold. With WS facing tuck the waistband in 5mm at the CB, making it a slight angle, so it will give enough room for the zip puller to glide past unimpeded

Stitch | change back to the presser foot.

With RS of the skirt facing you, stitch in the ditch of the waist seam through all the layers to secure the waistband.

Give it a good press and well done you!


Posted on

Small Bust Adjustment | SBA with No Dart

MAVEN PATTERNS_THE ROCHESTER_DRESS_FBA_full bust adjustment

There seems to be a lot of advice regarding Full Bust Adjustments, but not so many for a Small Bust Adjustment (SBA), so this tutorial is for SBA for The Rochester pattern but could be applied to any dress or top without a bust dart.

What is a Small Bust Adjustment (SBA)? 

Sewing patterns are generally (and there are exceptions) drafted to accommodate a B cup. All Maven Patterns are drafted with a B cup. Unfair I know, but unfortunately, it’s just not possible for us (I say us, it’s just me doing all the design related stuff!) to produce a pattern that will keep all body shapes happy, as we are all unique and the variations are limitless! So, great if you are a B cup, but not so much if you are smaller. In which case you might need to do a Small Bust Adjustment – SBA (or a Full Bust Adjustment – FBA – if you are larger in the cup). An SBA is a pattern alteration that will decrease the volume of the cup area to remove the excess fabric.

How do you know if you need a small bust adjustment? 

You will have a nice fit in the neckline and the shoulders but will see too much fullness in your garment at the bust area as there will be too much volume in the cup.  We want to reduce some of that volume. A  Small Bust Adjustment is basically the same process as an FBA, but involves overlapping the pattern to reduce instead of spreading the pattern to increase the bust cup size.

Small Bust Adjustment (SBA) without a bust dart in woven fabric!

Abbreviations |

SBA | small bust adjustment     FBA | full bust adjustment      CF | centre front          BP | bust point/apex

Equipment |

  • Copy of pattern (or the ability to re-print) – I’m showing diagrams for the Rochester top, but it’s the same for the dress.
  • Ruler
  • Pencil
  • Sticky tape
  • Tape measure
  • Paper scissors
  • Pattern paper

Which cup size are you?

Measure yourself while wearing the appropriate underwear. If you are going to wear a padded bra under your dress, go put one on first – it will make a difference to the fit.

Importantly, your cup size for a sewing pattern is not the same as your bra cup size. (I’m a B for a pattern, and wear a D bra)

  • Measure your HIGH bust across your back, under your armpits and above your bust.
  • Then measure your FULL bust, at the fullest part of your bust.
  • Note these measurements and the difference between them.
  • Difference of 1”  (2.5cm) = A cup (SBA)
  • Difference of 2″ (5cm) = B cup
  • Above this measurement, you may need the FBA tutorial 
  • Difference of  3” (6.5cm) = C cup (FBA) and so on.

How much?

As you can see from the little chart above it’s about 1″ (2.5cm) per cup size. So if you are an A cup and the Rochester pattern is a B cup you will need to reduce the pattern by 1”(2.5cm). This would be the TOTAL amount, when it comes to the alteration you will be working on HALF the pattern so will reduce your pattern by 1/2″ (1.25cm).

TOILE | So obviously the above picture is not a toile, it’s our sample garment, but I think the easiest way to find out how much is to make a really quick toile (just the body, don’t bother with sleeves, facings etc). Try it on and mark your bust point and pin the excess fabric out of the bust. Don’t be tempted to over-fit The Rochester pattern, it is meant to skim the body rather than hug the body.

Knowing exactly how much is a bit of chicken and egg situation. There is not one way to do this alteration (or any alteration). It can be a little test and see, and a lot of getting to know your OWN body and how you like a garment to fit on you. You just have to start somewhere to find what works for you! You’ll need to toile and test and tweak your alteration, maybe more than once. A toile is going to be your best friend – the fabric doesn’t lie! Also, consider the look of the garment, you may just decide you want more/less ease and adjust your SBA accordingly.


METHOD | Small Bust Adjustment without a bust dart

  • Find the Bust Point (also called the APEX) | The Bust Point (BP) or Apex is already marked on The Rochester pattern for you so it’s very easy to find (you’re welcome!). Mark your BP on the pattern and compare with the BP that has been pre-marked on the pattern. If there is a lot of difference, use your BP for the alteration as you want the alteration in the right area for your bust. (How to find your BP – Lower a bust dart tutorial)

Remove the lower pattern | 

So the lower section of the pattern doesn’t reduce in width, making it smaller through the waist and hips, we are going to remove it for now and keep it safely to one side.

  • Using a copy of your front pattern, mark the seam allowances so you know where the stitch line is.
  • Draw a line HORIZONTALLY across the pattern so it intersects with the CF line at a (90°) right angle at roughly the waist level. It’s not crucial exactly where it is but make sure it is above the pockets notches for the dress.
  • Cut along the line and remove the lower section from the upper bodice section. Place LOWER SECTION safely to one side.

Draw the Lines on the Upper Bodice Section | 

  • LINE 1: Draw a line from the BUST POINT (BP) right down to the bottom of the pattern, parallel with the CENTRE FRONT LINE. Draw a line from the BP to a point about a ⅓ of the way along the armhole.
  • LINE 2: Draw a line from the BP to the centre of the shoulder.
  • LINE 3: Draw a line from the BP to the midpoint of the neckline.
  • LINES 4 & 5: Draw 2 lines from armhole to line 2 spread evenly between the shoulder and line 1.

Cut the Lines | 

  • Cut along LINE 1. Start at the bottom of pattern and cut to the BP and then to the armhole. Cut UP TO stitch line but NOT through it. Cut from OUTSIDE of the pattern up to the same point on the armhole stitch line, leaving a 3mm hinge of paper.
  • *If you hinge your armhole from the outside edge of the pattern instead of the stitch line, your armhole increases in length and then your sleeve won’t fit.
  •  Cut along LINE 2 leaving a hinge at the shoulder stitch line.
  • Cut along LINE 3 leaving a hinge at the neckline stitch line.
  • Cut along LINES 4 & 5 leaving a hinge at the armhole stitch line.
  •  Mark sections A, B, C & D as in the diagram below.

Place some paper behind your pattern pieces. Draw a line on your paper (shown in red). Anchor down section A with tape or pins, lining up the pattern CF with the one you just drew. On SECTION A mark the amount to be reduced (the orange lines), keep parallel with CF.

Overlap | 

Keep the hinges intact and slide SECTION D across so it overlaps SECTION A by the amount of your SBA. Keep the bottom of the pattern pieces level and pivot the pattern from the hinges at the neck, armhole and shoulder so they slide into position and overlap as needed, keeping the pattern flat.

  • Tape everything down. Tape the lower section back in place
  • Redraw the shoulder seam
  • Smooth the armhole curve and the neckline.
  • Redraw the side seam (use the back pattern as a template so you know they match!)
  • Redraw your front facing so it is the same shape as the altered neckline.
  • Trace off the pattern if you like a tidy pattern (or use lots of tape to hold everything together, no one is judging!).
  • Toile to check your alteration!

FBA tutorials |

The Rochester FBA Tutorial

The Kitty Dress FBA Tutorial

The French Dart FBA Tutorial