
The MAVEN GIFT EDIT, BY MRS M
Christmas is my favourite time of year, it’s hard not to be merry with so many fairy lights around. As it is the season of giving I have pulled together some of my all-time favourite Maven pieces in the form of a gift guide!
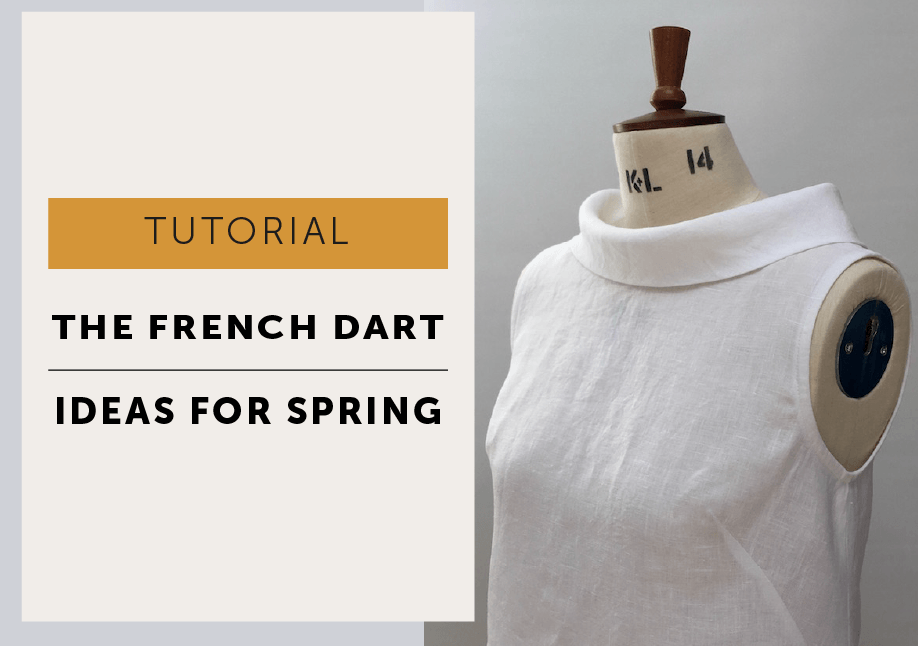
Kicking off our gift guide is our French Dart Shift! I would recommend any one of our delightful patterns for any seamstress as they are easy to follow with detailed instructions. However, given that this particular pattern is a forever favourite of our customers the French Dart Shift is straight to the top of our gift guide! She is a delightful shift dress with flattering french darts, a staple for all seasons. Check out the full listing here to see her in all her glory.. and don’t forget to check out the tutorials that are available so you can see the versatility for yourself and see why it is such a customer favourite! Shop the French Dart Shift… 
Next up on my edit, is another great gift for any creative friends or family… the beautifully detailed glass-headed pins by Tulip Hiroshima. Tulip Hiroshima needles and pins are produced in Hiroshima, Japan where needle-making has long been one of its major industries. These high-quality needles are a blend of traditional techniques that have been handed down through generations and modern cutting-edge technology, resulting in the perfect needle. They pierce fabric smoothly and are beautifully flexible. Each delightfully boxed phial contains 20 fine pins with a glass head in shades of lilac and soft green, representing cherry blossoms. These pins are a good choice for thin fabric and for detailed work. The glass heads are heat resistant. A fine present for friends and family – or you! Take a look at these beautiful pins here…

This next item is one of my all-time favourite tools, it’s my trusty clapper – that’s why it’s next up on my Maven gift guide! What is a clapper you ask?! Pressing your garments properly is an essential part of sewing to achieve a professional finish. These traditional Tailor’s Clapper, point & seam pressers are hand made in the UK by a local craftsperson from Tulipwood and are the perfect addition to your pressing tools. Especially useful for the making of jeans, tailoring, coats, quilting to aid with the flattening of a bulky seam or lumpy collar as well as for general dressmaking when a sharp, crisp edge is desired. For more information the clapper, click here!

Next up on my gift edit, has to be some fabric! I’ve chosen the lovely Nani Iro Jardin II double gauze, perfect for a Wendy smock which whilst is toasty layered over roll neck t-shirts, I can’t help but lust over summer days wafting around in a joy dress. However you end up wearing this gorgeous print, I can wholeheartedly recommend this print for friends, family (and yourself of course!)

Next on my gift guide, is another pattern! With the Christmas season approaching cosiness is obviously of the highest importance… which is why the next gift in my edit is the Simone Set. A comfy two-piece pyjama set for those nights you manage to snuggle in at home or create a faux jumpsuit in a bold matching print for those festive nights out. Click to shop our wonderful Simone and how incredibly versatile she can be! 
Coming to the end of our edit now, this next one has been added based on the sheer joy we see this tool bring to our customers at the show when they discover it for the first time. Pattern Notchers! Pattern notchers are the professional way to mark notches on your pattern and my goodness, they do look good. I promise. With a smooth action clipping motion, notch your pattern neatly and accurately. Keeping your pattern paper tidy so that you can keep on making your pattern for many years to come! Check out our pattern notchers here…

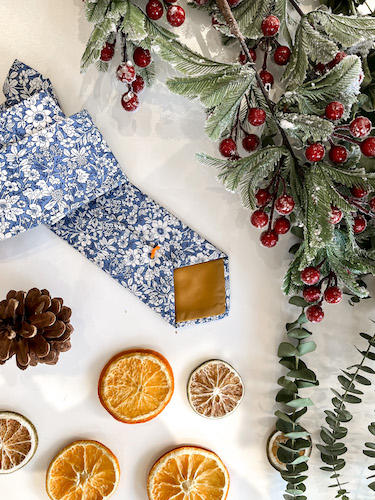
And finally on my merry Maven gift guide is our brand new kit! Our delightful tie kit contains all the notions needed to create a beautiful handmade tie. We have used the traditional making methods to ensure your tie will be of premium quality and be a stand-out present of 2021! Either by giving the gift of creativity for someone to make their own tie or lovingly creating one for them, the choice is yours! The Warwick Tie Kit and Pattern is now available for pre-order to be delivered in time for Christmas. Check out the Warwick Tie Kit here…

I can’t wait to see who has some Maven under the tree this year!
Best Wishes,


