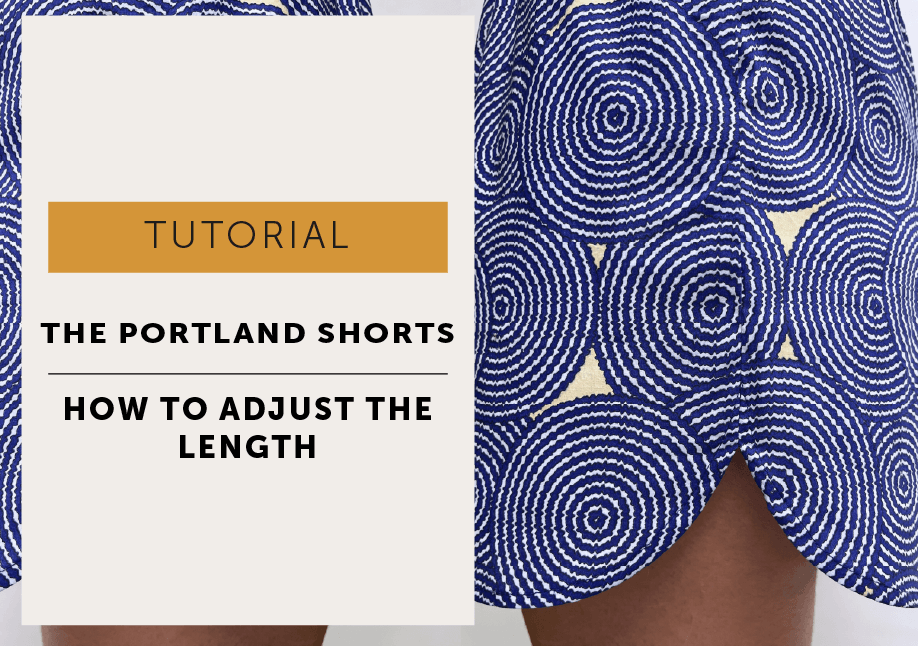
Posted on

How to lengthen The Portland Shorts

If you wanted to change the length of your Portland Shorts, don’t let the curved shape of the hem confuse you! It’s a really straight forward alteration. The trick is just to avoid cutting through the curved area, if you are making your shorts longer, so the shape doesn’t distort and the proportions of the curve stay the same.

But I’m also going to talk you through shortening The Portland Shorts and cutting straight through the hem detail, so the split doesn’t get too high on the thigh!

We have the adjustment lines already marked on The Portland Shorts. It’s a staggered line so you can decide which method works best for you. The same principal can be applied to any pattern where you have a detail you’d like to avoid changing; in this case a curve but it could be a placket or a side split that you want to keep the same length. If you don’t have an adjustment line on your pattern just draw one on, keeping it at a right angle to your grain line.

Learn how to lengthen or shorten a shorts pattern

Tools

  • Your pattern (or copy of your pattern if you don’t want to alter your original)
  • ruler
  • pencil
  • tape
  • Paper

Things to be aware of

  • If you are doing lots of alterations to your pattern, do any length adjustments first.
  • Keep the grainline or “place to fold line” IN A STRAIGHT LINE, do not allow them to stagger.
  • The Chain Effect: when altering one pattern piece, also alter the corresponding pattern piece in the same way and remember to check they still fit together after your alteration. In this case, the length of the side seams and in-seams will need to match.

ADD LENGTH TO THE PATTERN

First decide how much longer you would like your shorts. You can measure yourself or an old pair of favourite shorts.

Cut along the adjustment lines marked lengthen (highlighted in the picture) and separate the pattern piece. The line is staggered to avoid cutting through the curve of the hem.

LENGTHEN 

Place a piece of paper behind your pattern and tape the top portion of your pattern to it.

Extend the grain line. Draw a line parallel to the your adjustment line the amount you need to lengthen the pattern by. Tape the lower portion of your pattern to the new line, matching up the grainline. 

Join the pattern pieces back together by re-drawing the seam lines so that they are a smooth line. Then cut away any excess pattern paper.

SHORTEN

When shortening your pattern if you use the upper section of the adjustment line, the split will move upwards and potentially could sit quite high on your leg and possibly interfere with the pocket. To keep the upper most point of the split in the same place when shortening your shorts, use the lower section of the adjustment line.

First decide the amount you want to shorten your shorts by. You can measure yourself or an old pair of favourite shorts.

Cut along the adjustment lines marked shorten (highlighted in the picture) and separate the pattern pieces.

Place a piece of paper behind your pattern and tape the top portion of your shorts pattern to it.

On the pattern, draw a line parallel to the your adjustment line the amount you need to shorten the pattern by.

Overlap the pattern pieces to shorten, taping the lower portion of the pattern to the new line and matching up the grainlines. 

Re-draw the in-seam and the hemline to make sure they are a nice smooth line. Then cut away any excess pattern paper.

REPEAT AND CHECK! 

Make sure to do the same alteration to the front and back leg, and double check they are the same length before cutting out!

All done! Off you go and enjoy those shorts!

Posted on

Learn to sew a narrow curved hem

One of my favourite details of The Simone Camisole is the lovely gently shaped hem.

A shaped or curved hem doesn’t really like having a big hem allowance, it’ll look twisted and ‘ropey’ so a narrow hem is the best option. They can be tricky to finish neatly if you are working with a delicate or lightweight fabric, which is often the fabric of choice for a camisole. Different fabrics can require different construction methods so it’s always nice to have a little arsenal of alternative methods in your tool box should the need arise.

If you are ever in doubt of the best method to use just do a little test on a scrap of fabric. If you are testing the best way to hem a curve, remember to do your testing on a similar shape.

| Sewing a Narrow Curved Hem |

WS | wrong side of fabric  RS | right side of fabric  SA | seam allowance

TIPS |

  • Press at every step.
  • If you have a ‘bouncy’ fabric that doesn’t hold the press line (like the one I used!) use a few pins to help, but first check they don’t damage your delicate fabrics.
  • If you carefully tack your hem in place along the top edge of the hem allowance, it will give you a guide to follow when you stitch the hem from the RS, ensuring you catch all the allowance.
  • A good final press and steam will shrink any stretching that may have happened on the curved areas.
  • For reference: the fabric I have used for this post is a fine, slippery, (allegedly) silk crepe de chine that was lurking in the stash.

Double Turn Hem | 1cm Hem Allowance

This is my usual method and the one that you will find in The Simone Maker Instructions. The benefits are it’s easy and works for most fabrics. It gives a small, neat hem with all the raw edges enclosed.

  • Machine a row of stitching 5mm from the raw edge all the way around the hem

  • With WS up, press up the raw edge of the hem using the stitch line as a guide.
  • The stitch line should roll to the WS. (I’ve held the hem in place with a pin for the photo).
  • Fold again and press, enclosing the raw edge
  • Stitch the hem, being careful to catch all the hem allowance. (You can see, above, I have partially stitched the hem).

We have a tutorial for the Maria Apron Hem HERE it’s the same principal but there are a few more photos.

Overlock and Turn |

An overlocker (a serger) makes the edge easier to fold neatly, especially if you are double turning the hem. If you don’t have an overlocker you could experiment and see how it looks with your neatening stitch on your usual machine. You can adjust the differential feed of your overlocker on curved hems so the fabric gathers slightly and this will help when you turn up the hem, but I didn’t find it necessary for The Simone pattern in this fabric.

Single turn | The first example is turned once so you can see the overlocking to the WS

  • Overlock the edge of the hem
  • Fold and press the hem the width of the overlocking to WS. Once you’ve done this a few times you may be comfortable to just fold and stitch in one go.
  • Stitch hem

Double turn | This example is turned twice so the overlocking is enclosed, giving a slightly more expensive looking finish.

  • Overlock the edge of the hem.
  • Fold and press the hem the width of the overlocking to WS and stitch.
  • Fold again and stitch on top of your first row, keep folding as you stitch.

  • Again, once you have done this a few times, and are comfortable with the method, it is possible to double fold and stitch in one go.

Traditional Narrow Rolled Hem Method |

This is the usual rolled hem tutorial you’ll often come across. I usually use the first method I listed above because I’m not a huge fan of trimming SA (that’s most likely due to my industry training as it’s not a thing we would have done and I’m a bit lazy if I’m honest), but the benefits of this method is you can make a very narrow hem on trickier lightweight, sheer or slippery fabrics. It would be your go-to method if you ever needed to hem a beautiful floaty circle skirt.

  • 1.5cm Total Hem Allowance
  • Stitch 1cm from raw edge of hem. (yellow stitching)

  • Use the stitch line as guide and press up the raw edge of the hem to the WS, the stitch line will be close but not right on the folded edge.

  • Stitch as close as you can to the folded edge and through all layers and on top of the first row of stitching. Press. (green stitching)
  • Trim away the extra hem allowance as close as you can to the stitch line.

  • Turn the hem again, so all raw edges enclosed and stitch. (blue stitching).
  • Voila! The tiniest tiny, neatest hem!

You can of course use a special rolled hem foot, but I don’t own one so you are on your own if you go down that route!


Posted on

How to Sew a Curved Hem

The Maria Apron Hem Tutorial

I’m going to show you How to Sew a Curved Hem! This is a super easy way to get a professional finish on a double turned curved hem.

Close up of a finished curved hem. How to Sew a Curved Hem.The Maria Apron Hem Sewing Pattern Free sewing Tutorial- MAVEN PATTERNS-THE MARIA APRON

You can’t help notice the beautiful sweeping curve at the hem of The Maria Apron. Because it is such a feature that curve does need to look smooth and they do need they match each other too!

This is my favourite way to make light work of turning and stitching the hem. At the time of writing I was stitching 4 stripey aprons. I was doing this factory-production-style and I found this to be the easiest way to stitch a curved hem. It gives a consistent result, so all the curves are lovely and even!

Key :  WS: wrong side | S/A: seam allowance

The hem of The Maria Apron has a 1.5cm S/A that is double turned hem and footstitched. But you could do this little trick on any double turned curved hem.

Close up of striped fabric ready to be  hemmed. How to Sew a Curved Hem.The Maria Apron Hem Sewing Pattern Free sewing Tutorial- MAVEN PATTERNS-THE MARIA APRON

Ready to hem

So here is the back of the apron, the body has been stitched, pockets in place and facings attached. Just the hem to finish.

Close up of a curved hem with one row of stitching. How to Sew a Curved Hem.The Maria Apron Hem Sewing Pattern Free sewing Tutorial- MAVEN PATTERNS-THE MARIA APRON

Stitch

To help with double turning and pressing that hem, all we are going to do is add an extra row of stitching. Yep, that’s the tip – more stitching! But it does save a smidge of time as it’s a little easier to press the curve without having to constantly measure it. Start from under the back facing and machine a row of stitching 6mm from the raw edge all the way around the hem until you get to the other side. Finish underneath the facing again.

Close up of pressing a curved hem. How to Sew a Curved Hem.The Maria Apron Hem Sewing Pattern Free sewing Tutorial- MAVEN PATTERNS-THE MARIA APRON

Press

Press the raw edge of the hem to the WS using the stitch line as a guide. The stitch line should just be rolled to the WS as in the picture. It folds over very neatly and evenly without too much effort!

Close up of double turning and pressing a curved hem. How to Sew a Curved Hem.The Maria Apron Hem Sewing Pattern Free sewing Tutorial- MAVEN PATTERNS-THE MARIA APRON

Press again

Fold again and press so the raw edge is completely enclosed. The stitch line is now hidden.

Close up of a tacked curved hem. How to Sew a Curved Hem.The Maria Apron Hem Sewing Pattern Free sewing Tutorial- MAVEN PATTERNS-THE MARIA APRON

Tack 

Tack the hem close to the folded edge, making sure you keep the hem width even.

Close up of a finished curved hem. How to Sew a Curved Hem.The Maria Apron Hem Sewing Pattern Free sewing Tutorial- MAVEN PATTERNS-THE MARIA APRON

Topstitch 

Footstitch the hem. To do a footstitch, line up the foot of your sewing machine with the edge of your garment and topstitch. Make sure you catch all the allowance on the back. Give it a press and you’re finished!

You could use this on any double turned curve. My maths worked as follows 1.5cm S/A – 6mm for stitch line guide, x2 for double turn hem = 1.2cm + 3mm to allow for the turn of the cloth (allowance for the thickness of the folded edges). You can easily adjust accordingly for different hem allowances but bear in mind that curved hems don’t like a very deep S/A, and fine fabrics like chiffon won’t need an extra allowance for the turn of cloth.

How to Sew a Curved Hem

And there you have it! You now know How to Sew a Curved Hem for a beautifully finished Maria Apron!