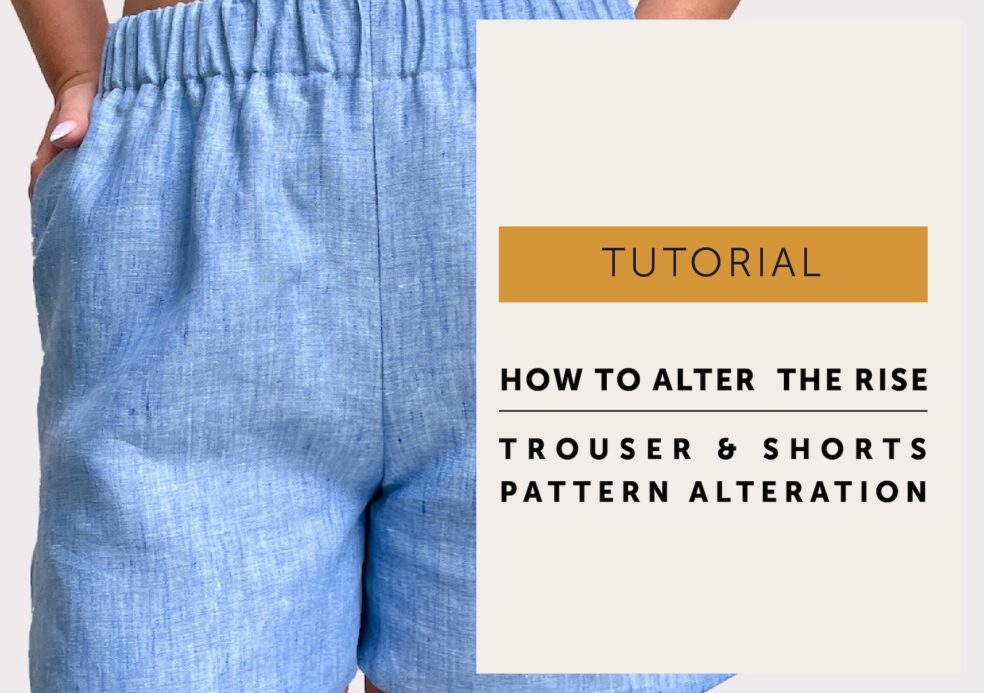
Posted on

How to Adjust the Rise of a Trouser Pattern

image of text - How to alter a trouser Rise Tutorial

Lengthening or shortening the rise (crotch) of shorts or trousers (pants for my US friends) is easy enough to do with a bit of slashing and spreading of your pattern. That actually sounds much more dramatic than it is.

Having a few pattern adjustments options in your sewing tool box will always be handy as we are all different shapes and sizes, tall and short, or you might want to move the waistline for aesthetic reasons. 

As with most pattern alterations, think about where you need the extra fabric. And vice-versa remove fabric where you don’t need it. If you need more fabric to go over your bum, that’s where you add it. If you have an upsetting fold of fabric at the front rise , that’s where you don’t need it!

This alteration may be needed on the front rise or the back rise, or possibly both. And you may still need to make other alterations to your trouser pattern.

I’ve got 2 methods to alter the Rise (crotch length) of trousers to share with you. 

How to alter a Trouser Rise (crotch) – This will show  you how to alter a trouser rise without changing the side seam length. It can be done on the front or the back rise or both of the rises.

Long/short Torso Adjustment – The second method is a useful pattern alteration for those with a longer or shorter torso and shows how to alter both the front and back rise (crotch length) and the side seam length.

IF THE RISE IS TOO LONG – it’ll all be hanging too low and looks saggy (lovely) with excess fabric that you want to pinch out, you might even feel the need to pull them up all the time to make the rise sit comfortably, but then the trouser sits too high at the waist. 

IF THE RISE IS TOO SHORT – your trousers will be riding up uncomfortably high and you’ll be trying to pull the area down, the fabric may be pulling and creating drag lines. The waist won’t be sitting in the correct position and you’ll feel like you want to pull them up. 

This is quite a common alteration on the back rise. You’ll feel that it just isn’t long enough and too short over the seat area, and the trousers may be pulling downwards at the centre of the waist especially when sitting down. It’s an easy fix – you just need a bit more fabric to go over your bum.

Tools

  • A copy of your trouser or shorts pattern (it’s best practise to keep the original)
  • ruler
  • pencil
  • tape
  • Paper

Toile Time

Hopefully you’ve made a toile. That will give you a lot of information on the fit of your trousers.

  • Make sure that the waist and hips are not too tight, a tight garment will ride upwards and not sit correctly on your body.
  • Also take care not to overfit your garments, it’s usual to have some wrinkles as you need to be able to move and sit down.
  • Pop your Toile on with the waistline sitting where it should be – keep in mind not all trousers are designed to sit at the natural waistline. 
  • Pin or cut the toile to establish the amount you need to add/subtract from your rise. If I’m honest it’ll be a little bit of guesswork as it’s not easy to cut and pin a toile on yourself, be prepared to pull it on and off a few times but it will give you a good idea of how much to add to your pattern and you can refine it if you need too. 

How to Alter a Trouser or Shorts Rise

Lengthening or shortening the rise (crotch) of shorts or trousers (pants) is a very easy pattern alteration

Rise is too Long – Pin the excess wedge of fabric on your toile at the centre and reducing to nothing at the side seams.

Rise is too short – Slash the toile open from the centre to the side seam. Let the toile open as much as it needs, pin some fabric behind to establish how much you’ll need to alter the rise. (You may be able to just measure from the top of your trouser to where it should sit on your body but often you’ll need to slash the toile open).

How to Alter For a longer or shorter Torso

Lengthening or shortening the rise (crotch) of shorts or trousers (pants) is a very easy pattern alteration

Rise is too Long – Pin the excess wedge of fabric, try to keep it an even amount, on your toile all around the body. 

Rise is too short – You may be able to just measure from the top of your trouser to where it should sit on your body but often you’ll need to slash the toile open. Cut all the way through the toile and pin some fabric behind to help establish how much you’ll need to alter the rise.

Adjust the rise on a trouser pattern (without touching the side seam).

You can just alter the FRONT Rise or the BACK rise, or both rises using this method.

Lengthening or shortening the rise (crotch) of shorts or trousers (pants) is a very easy pattern alteration
  • Using a copy of your pattern piece mark the seam allowances so you know where the stitch lines are.
  • Draw a lengthen/shorten line across the pattern through the Rise, ensure it is perpendicular to the grain line. I prefer to do this so it intersects the rise seam on a straighter section rather than the curve.
  • Cut along the line, starting at the RISE seam and cut UP TO the side seam stitch line but NOT through it. Cutting from OUTSIDE of the pattern, cut through the seam allowance and up to the same point on the stitch line, leaving a 2-3mm hinge of paper. 
  • *If you hinge your pattern from the outside edge of the pattern instead of the stitch line, your seam increases in length and then your pattern won’t fit back together properly.

To Lengthen the Rise Seam

Lengthening or shortening the rise (crotch) of shorts or trousers (pants) is a very easy pattern alteration
  • Place some paper behind your pattern pieces and tape the lower section of the pattern securely in place.
  • At the Rise stitch line, mark the amount you need to increase the rise by above the lower pattern piece.
  • Pivot the top pattern piece upwards from the hinge to add the extra amount and tape in place. 
  • Redraw seam lines to give yourself a smooth line, and also redraw the grainline.
  • THE CHAIN EFFECT – remember you may need to alter any other pattern pieces affected such as facings & fly patterns

To Shorten the Rise Seam

Lengthening or shortening the rise (crotch) of shorts or trousers (pants) is a very easy pattern alteration
  • Place some paper behind your pattern pieces and tape the lower section of the pattern securely in place.
  • Mark the amount you need to reduce the rise by ON the lower pattern piece.
  • Pivot the top pattern piece downwards from the hinge, overlapping the pattern pieces and tape in place. 
  • Redraw seam lines to give yourself a smooth line, and also redraw the grainline.
  • THE CHAIN EFFECT – remember you may need to alter any other pattern pieces affected such as facings & fly patterns

Long/Short Torso Adjustment

To adjust the Front Rise, Back Rise and the side seams of your shorts or trousers.

Lengthening or shortening the rise (crotch) of shorts or trousers (pants) is a very easy pattern alteration

Use to lengthen the Front Rise, Back Rise and Side Seams 

  • Using a copy of your pattern piece mark the seam allowances so you know where the stitch lines are.
  • Draw a lengthen/shorten line across the pattern through the Rise, ensure it is perpendicular to the grain line. I prefer to do this so it intersects the rise seam on a straighter section rather than the curve.
  • Cut all the way along the line.
  • Place some paper behind your pattern pieces. Anchor the lower section of the pattern with tape.
  • Extend the grain line upwards. 
  • Draw a second parallel line above the your shorten/lengthen line the amount you need to lengthen the rise by. 
  • Tape the upper portion of your pattern to the new line, matching up the grainline. 
  • Redraw your seam line so they are a smooth line, and also redraw the grainline.
  • THE CHAIN EFFECT – If you have a pocket bag, or other pattern pieces such as facings or Fly zips, remember you may need to alter them too. 
Lengthening or shortening the rise (crotch) of shorts or trousers (pants) is a very easy pattern alteration

To shorten the Front Rise, Back Rise and Side Seams 

  • Using a copy of your pattern piece mark the seam allowances so you know where the stitch lines are.
  • Draw a lengthen/shorten line across the pattern through the Rise, ensure it is perpendicular to the grain line. I prefer to do this so it intersects the rise seam on a straighter section rather than the curve.
  • Draw a second parallel line below it the amount you’d like to reduce the rise by.
  • Cut all the way along the first line.
  • Overlap the pattern pieces to reduce the rises and tape the pattern matching up the grainline. 
  • If necessary, redraw your seam line so they are a smooth line, and also redraw the grainline.
  • THE CHAIN EFFECT – If you have a side seam pocket I’d suggest remarking the pocket position to maintain the original pocket mouth opening size or you may find your hand doesn’t fit. You may need to alter other pattern pieces too. 

As with all pattern alterations, check when you’ve finished that your pattern seams still match and are the same length, they run smoothly and test your finished alterations with another toile before cutting into your good fabric.

All done and now you know How Adjust the Rise on a pattern for perfectly fitting trousers! Mrs M x

Posted on

How to lengthen The Portland Shorts

If you wanted to change the length of your Portland Shorts, don’t let the curved shape of the hem confuse you! It’s a really straight forward alteration. The trick is just to avoid cutting through the curved area, if you are making your shorts longer, so the shape doesn’t distort and the proportions of the curve stay the same.

But I’m also going to talk you through shortening The Portland Shorts and cutting straight through the hem detail, so the split doesn’t get too high on the thigh!

We have the adjustment lines already marked on The Portland Shorts. It’s a staggered line so you can decide which method works best for you. The same principal can be applied to any pattern where you have a detail you’d like to avoid changing; in this case a curve but it could be a placket or a side split that you want to keep the same length. If you don’t have an adjustment line on your pattern just draw one on, keeping it at a right angle to your grain line.

Learn how to lengthen or shorten a shorts pattern

Tools

  • Your pattern (or copy of your pattern if you don’t want to alter your original)
  • ruler
  • pencil
  • tape
  • Paper

Things to be aware of

  • If you are doing lots of alterations to your pattern, do any length adjustments first.
  • Keep the grainline or “place to fold line” IN A STRAIGHT LINE, do not allow them to stagger.
  • The Chain Effect: when altering one pattern piece, also alter the corresponding pattern piece in the same way and remember to check they still fit together after your alteration. In this case, the length of the side seams and in-seams will need to match.

ADD LENGTH TO THE PATTERN

First decide how much longer you would like your shorts. You can measure yourself or an old pair of favourite shorts.

Cut along the adjustment lines marked lengthen (highlighted in the picture) and separate the pattern piece. The line is staggered to avoid cutting through the curve of the hem.

LENGTHEN 

Place a piece of paper behind your pattern and tape the top portion of your pattern to it.

Extend the grain line. Draw a line parallel to the your adjustment line the amount you need to lengthen the pattern by. Tape the lower portion of your pattern to the new line, matching up the grainline. 

Join the pattern pieces back together by re-drawing the seam lines so that they are a smooth line. Then cut away any excess pattern paper.

SHORTEN

When shortening your pattern if you use the upper section of the adjustment line, the split will move upwards and potentially could sit quite high on your leg and possibly interfere with the pocket. To keep the upper most point of the split in the same place when shortening your shorts, use the lower section of the adjustment line.

First decide the amount you want to shorten your shorts by. You can measure yourself or an old pair of favourite shorts.

Cut along the adjustment lines marked shorten (highlighted in the picture) and separate the pattern pieces.

Place a piece of paper behind your pattern and tape the top portion of your shorts pattern to it.

On the pattern, draw a line parallel to the your adjustment line the amount you need to shorten the pattern by.

Overlap the pattern pieces to shorten, taping the lower portion of the pattern to the new line and matching up the grainlines. 

Re-draw the in-seam and the hemline to make sure they are a nice smooth line. Then cut away any excess pattern paper.

REPEAT AND CHECK! 

Make sure to do the same alteration to the front and back leg, and double check they are the same length before cutting out!

All done! Off you go and enjoy those shorts!

Posted on

Learn to how to sew a narrow rolled hem

Sewing a narrow, curved or rolled hem can sometimes be a little tricky, especially in a delicate fabric. But we’ve got you covered with our free tutorial!

A shaped or curved hem doesn’t really like having a big hem allowance, it’ll look twisted and ‘ropey’ so a narrow hem is the best option. They can be tricky to finish neatly if you are working with a delicate or lightweight fabric, which is often the fabric of choice for a camisole. Different fabrics can require different construction methods so it’s always nice to have a little arsenal of alternative methods in your tool box should the need arise.

If you are ever in doubt of the best method to use just do a little test on a scrap of fabric. If you are testing the best way to hem a curve, remember to do your testing on a similar shape.

Sewing a Narrow, Curved or Rolled Hem

WS | wrong side of fabric  RS | right side of fabric  SA | seam allowance

TIPS |

  • Press at every step.
  • If you have a ‘bouncy’ fabric that doesn’t hold the press line (like the one I used!) use a few pins to help, but first check they don’t damage your delicate fabrics.
  • If you carefully tack your hem in place along the top edge of the hem allowance, it will give you a guide to follow when you stitch the hem from the RS, ensuring you catch all the allowance.
  • A good final press and steam will shrink any stretching that may have happened on the curved areas.
  • For reference: the fabric I have used for this post is a fine, slippery, (allegedly) silk crepe de chine that was lurking in the stash.

Double Turn Hem | 1cm Hem Allowance

This is my usual method and the one that you will find in The Simone Maker Instructions. The benefits are it’s easy and works for most fabrics. It gives a small, neat hem with all the raw edges enclosed.

  • Machine a row of stitching 5mm from the raw edge all the way around the hem
  • With WS up, press up the raw edge of the hem using the stitch line as a guide.
  • The stitch line should roll to the WS. (I’ve held the hem in place with a pin for the photo).
  • Fold again and press, enclosing the raw edge
  • Stitch the hem, being careful to catch all the hem allowance. (You can see, above, I have partially stitched the hem).

We have a tutorial for the Maria Apron Hem HERE it’s the same principal but there are a few more photos.

Overlock and Turn |

An overlocker (a serger) makes the edge easier to fold neatly, especially if you are double turning the hem. If you don’t have an overlocker you could experiment and see how it looks with your neatening stitch on your usual machine. You can adjust the differential feed of your overlocker on curved hems so the fabric gathers slightly and this will help when you turn up the hem, but I didn’t find it necessary for The Simone pattern in this fabric.

Single turn | The first example is turned once so you can see the overlocking to the WS

  • Overlock the edge of the hem
  • Fold and press the hem the width of the overlocking to WS. Once you’ve done this a few times you may be comfortable to just fold and stitch in one go.
  • Stitch hem

Double turn | This example is turned twice so the overlocking is enclosed, giving a slightly more expensive looking finish.

  • Overlock the edge of the hem.
  • Fold and press the hem the width of the overlocking to WS and stitch.
  • Fold again and stitch on top of your first row, keep folding as you stitch.
  • Again, once you have done this a few times, and are comfortable with the method, it is possible to double fold and stitch in one go.

Traditional Narrow Rolled Hem Method |

This is the usual rolled hem tutorial you’ll often come across. I usually use the first method I listed above because I’m not a huge fan of trimming SA (that’s most likely due to my industry training as it’s not a thing we would have done and I’m a bit lazy if I’m honest), but the benefits of this method is you can make a very narrow hem on trickier lightweight, sheer or slippery fabrics. It would be your go-to method if you ever needed to hem a beautiful floaty circle skirt.

  • 1.5cm Total Hem Allowance
  • Stitch 1cm from raw edge of hem. (yellow stitching)
  • Use the stitch line as guide and press up the raw edge of the hem to the WS, the stitch line will be close but not right on the folded edge.
  • Stitch as close as you can to the folded edge and through all layers and on top of the first row of stitching. Press. (green stitching)
  • Trim away the extra hem allowance as close as you can to the stitch line.
  • Turn the hem again, so all raw edges enclosed and stitch. (blue stitching).
  • Voila! The tiniest tiny, neatest hem!

You can of course use a special rolled hem foot, but I don’t own one so you are on your own if you go down that route!

Posted on

In-seam pocket Tutorial

I DO LOVE a side seam pocket. They are nicely hidden in the side seam so unobtrusive and don’t disrupt the line of a fantastically printed fabric. And I find it very annoying not having somewhere to shove my hands!

Our signature In-seam (side seam) pockets are a regular feature on Maven Sewing Patterns.  My pockets may look a little unusual to you, but bear with me, I developed the pattern and technique especially to combat a few of the things that annoy me about pocket construction.

IN SEAM POCKET TUTORIAL_MAVEN PATTERNS-07

Problem 1: Overlocking

So, here’s the thing… you may look at the pocket bags on this pattern and think…Mrs M, really what the ???? I’ll admit they may look a little odd at first glance, with the curvy bit added, but I do have a very good reason: I feel this method gives a much better result.

My problem with the usual way of making pockets that sit at the side seam is you can’t overlock around the pocket bag in one easy motion. Generally, you are told to neaten the edge of each pocket bag separately which just isn’t as strong. And end up having to pull the seam ‘straight’ to catch all of it in the awkward little angle created, which is a pain and eventually the overlocking just pulls away in the wash leaving a raw fraying edge exposed. Mmmm…messy.

Side note – I’m going to say overlocking a lot but replace with zig zag stitch or your preferred seam neatening term.

Problem 2: Snipping

And the other problem, with some methods, was sometimes having to snip into the seam allowance to get them to lie flat in the direction you want. It’s a pet hate, I don’t like doing ‘the snipping’ . in fact, I hate snipping and clipping unless I REALLY have too because it makes a weak point on your seam.

Problem 3: Concealed

I wanted the seam off set from the side seam, so it was less visible.

So what I wanted was a pocket bag I could overlock everything easily and together so it is stronger, and NO snipping into the seam.And the pocket bag is set back a little from the side seam so shows less when being worn. And I wanted to press the side seam open. I thought I was really easy-going until I started writing sewing instructions!

The In-Seam pocket Tutorial

Firstly cut out your garment, make sure you cut 2 pairs of pocket bags (so you have 4 bags in total). Transfer the marker dot positions to your garment (chalk, tailor tacks – whatever works for you. I’ve used neon orange pen so it would show in the photos – I don’t recommend it!)  

Spot fuse the strip of fusible interfacing to the pocket mouth on the FRONT body.

A NOTE ON SEAM ALLOWANCES – Images are shown with 1cm side seam allowance + 6mm seam allowance to attach pocket bag. Some patterns have different seam allowances; 1.5cm side seam allowance + 1cm seam allowance to attach pocket bag which will be shown on your pattern. These are shown in brackets below but the technique is the same!

Step 1

MAVEN PATTERNS_IN SEAM POCKET TUTORIAL

Place the pocket bags to the front and back garment, with right sides of the fabric facing each other, and so the notches on the pocket bags line up with the side seam notches and stitch together with a 6mm (1cm) seam allowance. Overlock (or neaten with your usual method) the raw edge of the pocket bag and garment together, starting and finishing about 3cm either side of pocket bag – (shown in green thread).

UPDATE – On the back seam – rather than starting the overlocking just above the pocket bag – start at the top of the seam and overlock the entire seam right down to the hem.  It’ll save you having to go back and overlocking the rest of that seam later. Which means you’ll have 1 less process to do and save at least 30 seconds – you’re welcome!

Step 2

MAVEN PATTERNS_IN SEAM POCKET TUTORIAL

Press the pocket bags AWAY from the garment and understitch on the front pocket bags.

Step 3

IN SEAM POCKET TUTORIAL 4A-04

SIDE SEAM:

Pin with right sides of fabric facing each other, line up the marker dots on the front body with the corresponding one on the back body.

Take a 1cm (1.5cm) seam allowance, start at the underarm and stitch down to the first marker dot, PIVOT * and stitch from the dot across the pocket bag until you are back at a 1cm (1.5cm) seam allowance on the pocket bag. (The stitch line is marked on the pattern piece, so you could transfer the line across with chalk and a ruler if you wanted).

Carry on around the pocket bag, and stitch TO the next marker dot, PIVOT again and continue down to the hem.

It’s a good idea to reinforce each of the corners at the pivot point as in-seam pockets can take quite a lot of stress. Set your machine to a smaller stitch length and just stitch a second machine row DIRECTLY ON TOP of your first row of stitching about 3cm either side of each marker dot.

Don’t forget to put your stitch length back to your normal setting.

*TO PIVOT – Stitch to the marker dot, leave your machine needle IN your garment, lift your machine foot and turn your work in the direction you want to stitch, drop your foot back down and continue to stitch – makes a nice tidy corner.

Step 4

MAVEN PATTERNS_IN SEAM POCKET TUTORIAL

Press the pocket bags towards the front body.

Press the side seams OPEN above and below the pocket bag, as far as you can. Overlock the front side seam first, all the way around the pocket bag – it’s easier because of the curved shape!!!

THIS NEXT STEP IS FROM THE ORIGINAL METHOD – you can skip this step if you are following the updated method and have already neatened the full length of the back seam. On the back side seam: overlock (shown in pink) from the top of the seam down to the pocket bag and overlap the new overlocking (pink thread) over the original overlocking (green thread), so there are no raw edges. Restart the overlocking below the pocket bag, again being sure to overlap as before, so the entire seam is neatened.

Give the pocket a gentle final press.

MAVEN PATTERNS_INSEAM POCKET TUTORIAL 2016

And from the right side…Tis a thing of beauty!