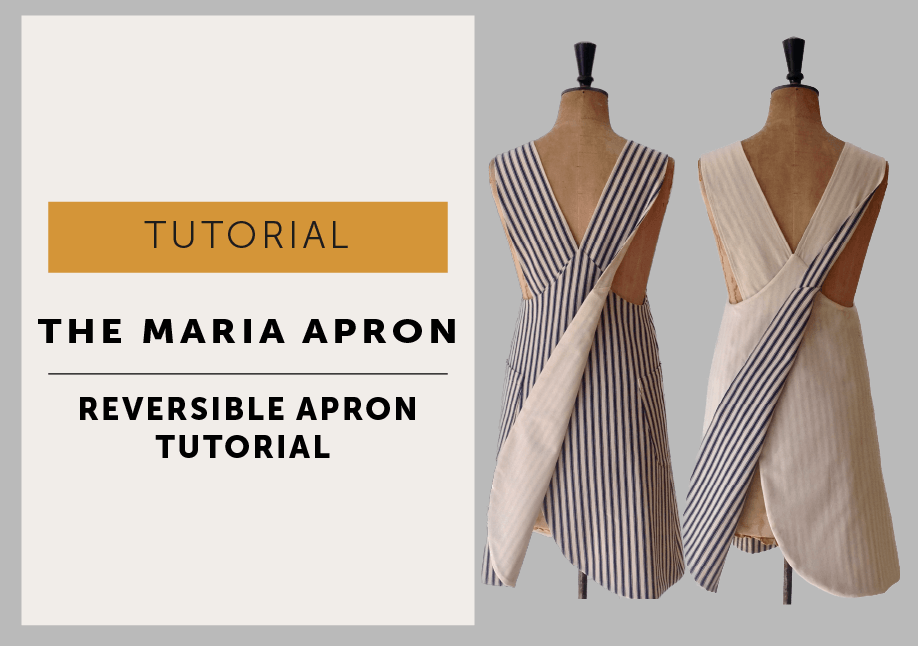
How to Make a Reversible Maria Apron
How do you make the Maria Wrap Apron reversible? This tutorial walks you through the construction step by step, so you can create a neat two-sided apron with clean finishing at the straps, neckline and hem. It is a practical way to make the most of the pattern while giving yourself two wearable looks in one project.
I’ve seen some lovely reversible Maria Wrap Aprons appearing by way of the growing band of happy #mavenmakers. I’m so delighted to see your makes and you’re a very creative bunch.
I’ve had many-a-request for a tutorial of how to make a reversible version. It’s not too complicated, and as with most things there is always more than one way to do it, but this is the method I found the easiest. Do feel free to share your process. I’m all about an easy make!
Arm yourself with the original instructions – to keep this tutorial shorter you’ll need to refer back to them for the full maker instructions.
Be sure to use the seam allowances as stated in the instructions.
CUTTING OUT: we are making Version A of The Maria Apron in this tutorial.
- Use the FRONT (pattern piece 1)
- BACK (pattern piece 2),
- POCKET (pattern piece 7)
- TOP STRAP PATTERN (pattern piece 3)
- DO NOT cut understraps or facings.
CUT 1 set for body A in fabric choice 1 (I’ve used a striped ticking from Ditto fabrics)
Cut 1 set for body B in fabric choice 2 (ideally equal in weight and density to fabric A, so one fabric doesn’t show through the other when reversed.)
*Please forgive my fabric choice 2…I’m currently working on a ‘use fabric from the stash policy only’ or I end up wasting days looking for the ‘perfect’ cloth. So my reversible apron is less reversible, more lined and without pockets in calico.
FACINGS / do not cut in fabric, ONLY cut 1 set in fusible interfacing (I made mine 2cm narrower than the pattern)
UNDERSTITCHING / in the instructions when it tells you to understitch, DON’T – doesn’t apply to a reversible one.
NEATENING OF SEAMS / They’ll all be enclosed between the two layers so don’t bother. YAY!
Don’t forget to press as you go, that’s my very best tip for a professional looking garment.
Test your topstitching tension, it’s going to need to look good on both sides of your garment.
STEP 1: INTERFACING

Fuse the interfacing onto the wrong side of one of your fabrics, doesn’t matter which one, but I’d advise doing a little test first to make sure it doesn’t show through on your fabric (it really showed through on my calico).
Follow the instructions and make up bodies A + B of the Aprons, complete with pockets. Don’t overlock or neaten the seams, they’ll all be enclosed so as I said before, there is no point.
STEP 2: MAKE THE STRAPS

Make up the straps (one A + one B for each strap) and turn through. This is where we deviate from the instructions…don’t understitch the straps. Normally you’d want those seams to sit to the underside of your strap (that’s why there is an understrap pattern, it’s slightly smaller so the seams roll to the underneath) but as we are doing a reversible one it needs to look good from both sides, so our seam is now going to sit exactly on the side, neither to the front OR the back.
Practise on your straps – you’ve got to do the same on the armhole in a minute. Topstitch your straps, neatly does it, remember it’s going to show on both sides.
STEP 3: ARMHOLE

Place body A + body B with RIGHT SIDES TOGETHER (RST), use a 6mm seam allowance and stitch together at the armholes only. Turn back to the right side, so the seam allowance is enclosed and press.
STEP 4: ATTACH STRAPS
Follow the instructions and attach the straps to body A. Just check they’re correct before you continue, you’ll thank me if you’ve got it wrong. All good? Great, let’s carry on then.
STEP 5: FRONT NECKLINE

With RST pin and then stitch A + B together. Cut off the bulk in the corners (as described in the instructions), turn back to the right side and press neckline flat.
STEP 6: BACK AND HEM

With RST again, pin the backs together at the top edges (where the straps are placed) and then continue to pin down the back and all around the hem, make sure you line up the side seams.
Here’s the (not-so) secret to bagging out a fully lined/reversible garment, leave an opening to turn everything through – you are literally going to pull the whole apron through it after stitching to turn it to the right side. If you are just lining a garment (rather than making it reversible) I’d suggest leaving an opening on the side seam as it won’t show at all when you are wearing it. But, as this is reversible and has pockets that sit over the side seam, I’ve gone with leaving an opening on the back seam. It’s a personal choice thing…I could have just as easily left an opening at the hem.
Machine stitch A + B together, use the seam allowances stated in the instructions. Don’t forget to leave the opening on one side – mine is about 12cm long. Press your seam.
STEP 7: TRIM & PRESS

Trim away the excess seam allowance at the hem and around the curve so it will lie flat when turned through to the right side.
Turn the apron to the right side by pulling it through the opening. Now take your time and press the seam where you have joined A + B together, again you want that seam to sit exactly on the side so it neither favours A or B.
STEP 8: FINISH

Close the opening with a slip stitch, you shouldn’t be able to see your stitching when you’ve finished. Now you can topstitch around your Apron (all in the instructions). Personally, I left that stage off…
A: because I liked the look of my apron without it and
B: because my machine was in a bad mood, and I hate ropey topstitching so quit while I was ahead.
So that’s it, a fully reversible (or just fully lined) apron!
Off you go then….get stitching!


More to Sew …