Hi! I'm Sharon.
I've always sewn and made stuff. My love of making led me to study fashion and pattern cutting, and I worked for many years as a pattern cutter in London. Now I am an independent Pattern Designer at Maven Patterns, creating my own glorious PDF sewing patterns that you can download and make at home!
https://mavenpatterns.co.uk/shop/
How do you lengthen a sleeve for a better fit? In this tutorial, we show you a simple way to add length to a sleeve pattern. Whether you need a little extra length to create a new style, a longer proportion or a more practical fit, this quick guide walks you through the adjustment step by step
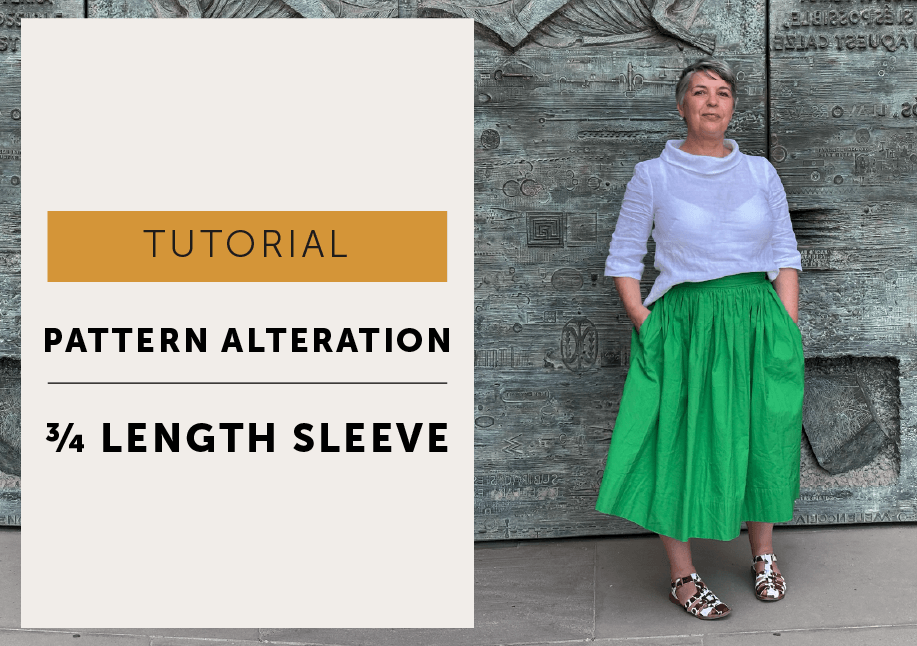
CREATE A ¾ LENGTH SLEEVE (OR HOW TO LENGTHEN A SLEEVE PATTERN) TUTORIAL
A white linen top version with 3/4 length sleeves has been my most used, go-to pattern alteration for The French Dart pattern. It’s such a quick and easy little pattern hack to lengthen the sleeve and always looks very stylish (shown here with The Bloom Skirt)
For reference I’m 5′ 2″ and I’ve lengthened the short sleeve from The French Dart Shift pattern to a 3/4 length sleeve, with finished measurements of 44cm long and a hem circumference of 28cm. Decide on your own measurements by measuring yourself with your arm bent at the elbow.
TOOLS
paper scissors
pencil
pattern master or set square
pins
pattern paper
METHOD
Trace your sleeve and extend the grain line.
Mark the new length at a right angle to the grainline (don’t forget to allow for the seam allowance at the sleeve head).
Below this mark your hem allowance – 3cm is good for a hand stitched or twin needled hem, but you get to decide!
Fold the pattern in half so the underarm bicep points line up with each other (circled).
The fold should run along or parallel to the grainline. Trace and mark the underarm of the sleeve.
Draw the hem and the seam allowance lines, making sure they are at a right angle to the fold.
Measure and mark half the finished hem circumference along the hemline (A) and then add the 1cm seam allowance and mark this point (B).
Draw a line from point B to join the hem to the underarm.
This is the trickiest bit to get your head around, but once you get the hang of this it’s really easy!
When the hem allowance is turned up to it’s final position, to sit properly, it needs to be the same shape as the sleeve.
Draw a line 3cm (or whatever your seam allowance is) above the FINISHED hemline so it intersects with the underarm seam (C). Then just draw a line at a right angle from it (running parallel with your fold) to intersect with the hem allowance (D).
Then join point D back to the finished hemline at point B
When you press up your hem allowance up to finish your sleeve, it will be exactly the right shape!
Cut out the sleeve along the underarm and hem while it is still folded (pin together first). Unpin and then cut around sleeve head, and notch your pattern.
Annotate your sleeve with the style, variation and I like to add the date as a way of keeping track of the latest version.
Voila, you’re done! Just in time to keep warm in this chilly weather, and of course, you can do this alteration in reverse to shorten a sleeve.
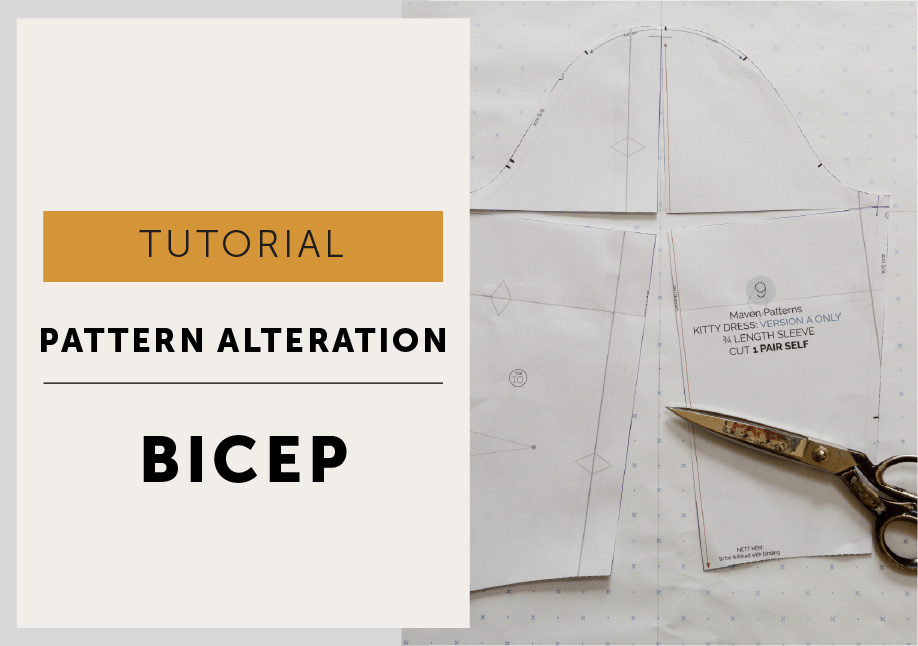
How do you do a bicep adjustment so sleeves fit comfortably without pulling or feeling too tight? In this tutorial, we show you how to alter the sleeve pattern to add extra room through the upper arm, while keeping the armhole and overall shape balanced. It’s a simple pattern adjustment that makes a big difference to comfort and fit, especially for fitted sleeves in woven garments.
What’s a bicep adjustment I hear you ask? Because it sounds painful. It’s not, no biceps were harmed in the making of this tutorial.
So the question is, how are your sleeves fitting? Is your sleeve a little snug and restrictive at the upper arm, or is it a little bigger than desired? But it’s actually a good fit in the armhole.
Well, here’s the answer to your pattern alteration prayers. The Bicep adjustment tutorial. A pattern alteration to help you get a better fitting sleeve without touching the bodice armhole.
Bicep adjustment – The rules
We are going to cut up the pattern so;
RULE NO 1 OF PATTERN ALTERATIONS: DO NOT DESTROY YOUR ORIGINAL!
Trace off your pattern (unless it’s a PDF – you can always print another – hurray for technology!). If it all goes horribly wrong, you’ve just wasted a bit of paper and time – you can then just start again and have another go. It’s also a very good habit to date your pattern alterations, you can easily keep track of your latest version that way.
RULE NO 2: THIS ALTERATION ONLY REALLY WORKS FOR CHANGING BICEP MEASUREMENTS TO A MAXIMUM OF 2.5CM (1″)
RULE NO 3: TOILE, TOILE, TOILE. Don’t even think about mucking about with a sleeve without testing it out!
RULE NO 4: RULES ARE, sometimes, MADE TO BE BROKEN (except rule 3 – just don’t). There’s more than one way to do anything and you could also need a combo of alterations.
HOW MUCH IS ENOUGH?
First, you need to know how much extra to add. Measure your arm at the fullest part with your arm bent. Measure your pattern (without seam allowance) at the bicep (see below for the bicep line) and compare. The difference is the ease.
As with all things, how much ease you have in your pattern is going to depend on your fabric and how you want your garment to look and feel. There isn’t a one size fits all solution but a good guide is 4-5cm (1.5″ to 2″) should be enough for a woven dress, around 10cm (4″) for a coat to be worn over other garments. And then there’s jersey. Depends who you talk too – some say no ease, so the pattern is the same measurement as your body. Some say add 2.5cm (1″) ease. Some patterns have negative ease they are actually smaller than your body (very stretchy cloth!). With jersey fabrics consider how tight do you want the bicep area and how stretchy is your fabric as a starting point.
STEP 1
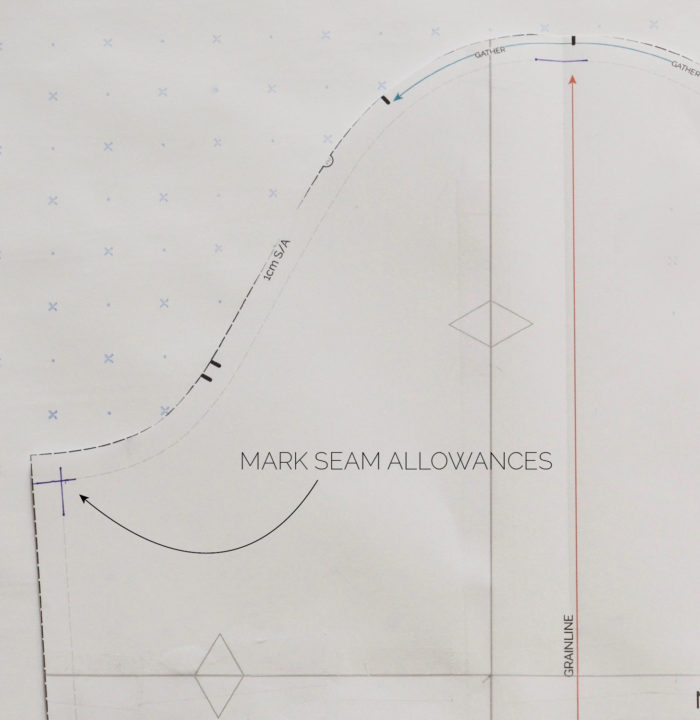
Mark the seam allowances. You can mark the whole pattern piece but you can just do each intersection: at the underarm, sleeve head, hem.
STEP 2
Draw a horizontal line joining the underarm points together, this is the BICEP LINE. Halfway along the bicep line (fold the pattern in half to mark it) draw a vertical line at a right angle to the bicep line the entire length of the pattern. It should be parallel (or in the same place as) the grain line.
STEP 3
Cut along the lines up to the seam allowance (NOTE: I’m using the Kitty sleeve pattern that has no hem allowance as it is finished with a binding, so I’ve cut straight through).
TIP / I like to work with a larger piece of paper behind my pattern piece and then on it draw a horizontal line (for the bicep) and a vertical line (the dashed orange lines above). It’s a good guide to make sure your sleeve pattern stays square and doesn’t go skew-whiff! Some cutters don’t do this and are happy to just slide a piece of paper behind the pattern and tape in place to fill the gaps later. Each to their own, neither is right or wrong, as always pros and cons for either!
STEP 4
Snip from theoutside of the pattern, back toward the seam allowance, leaving 2mm of paper, to make a hinge to help pivot the pattern. They do rip apart, it’s not a big deal, just use pins or tape to anchor in place as a backup/alternative to help when pivoting the pattern into position. The large piece of paper is handy to pin to.
NOTE / All the pivoting will be done from the SEAM ALLOWANCE line, not the outside edge of the pattern.
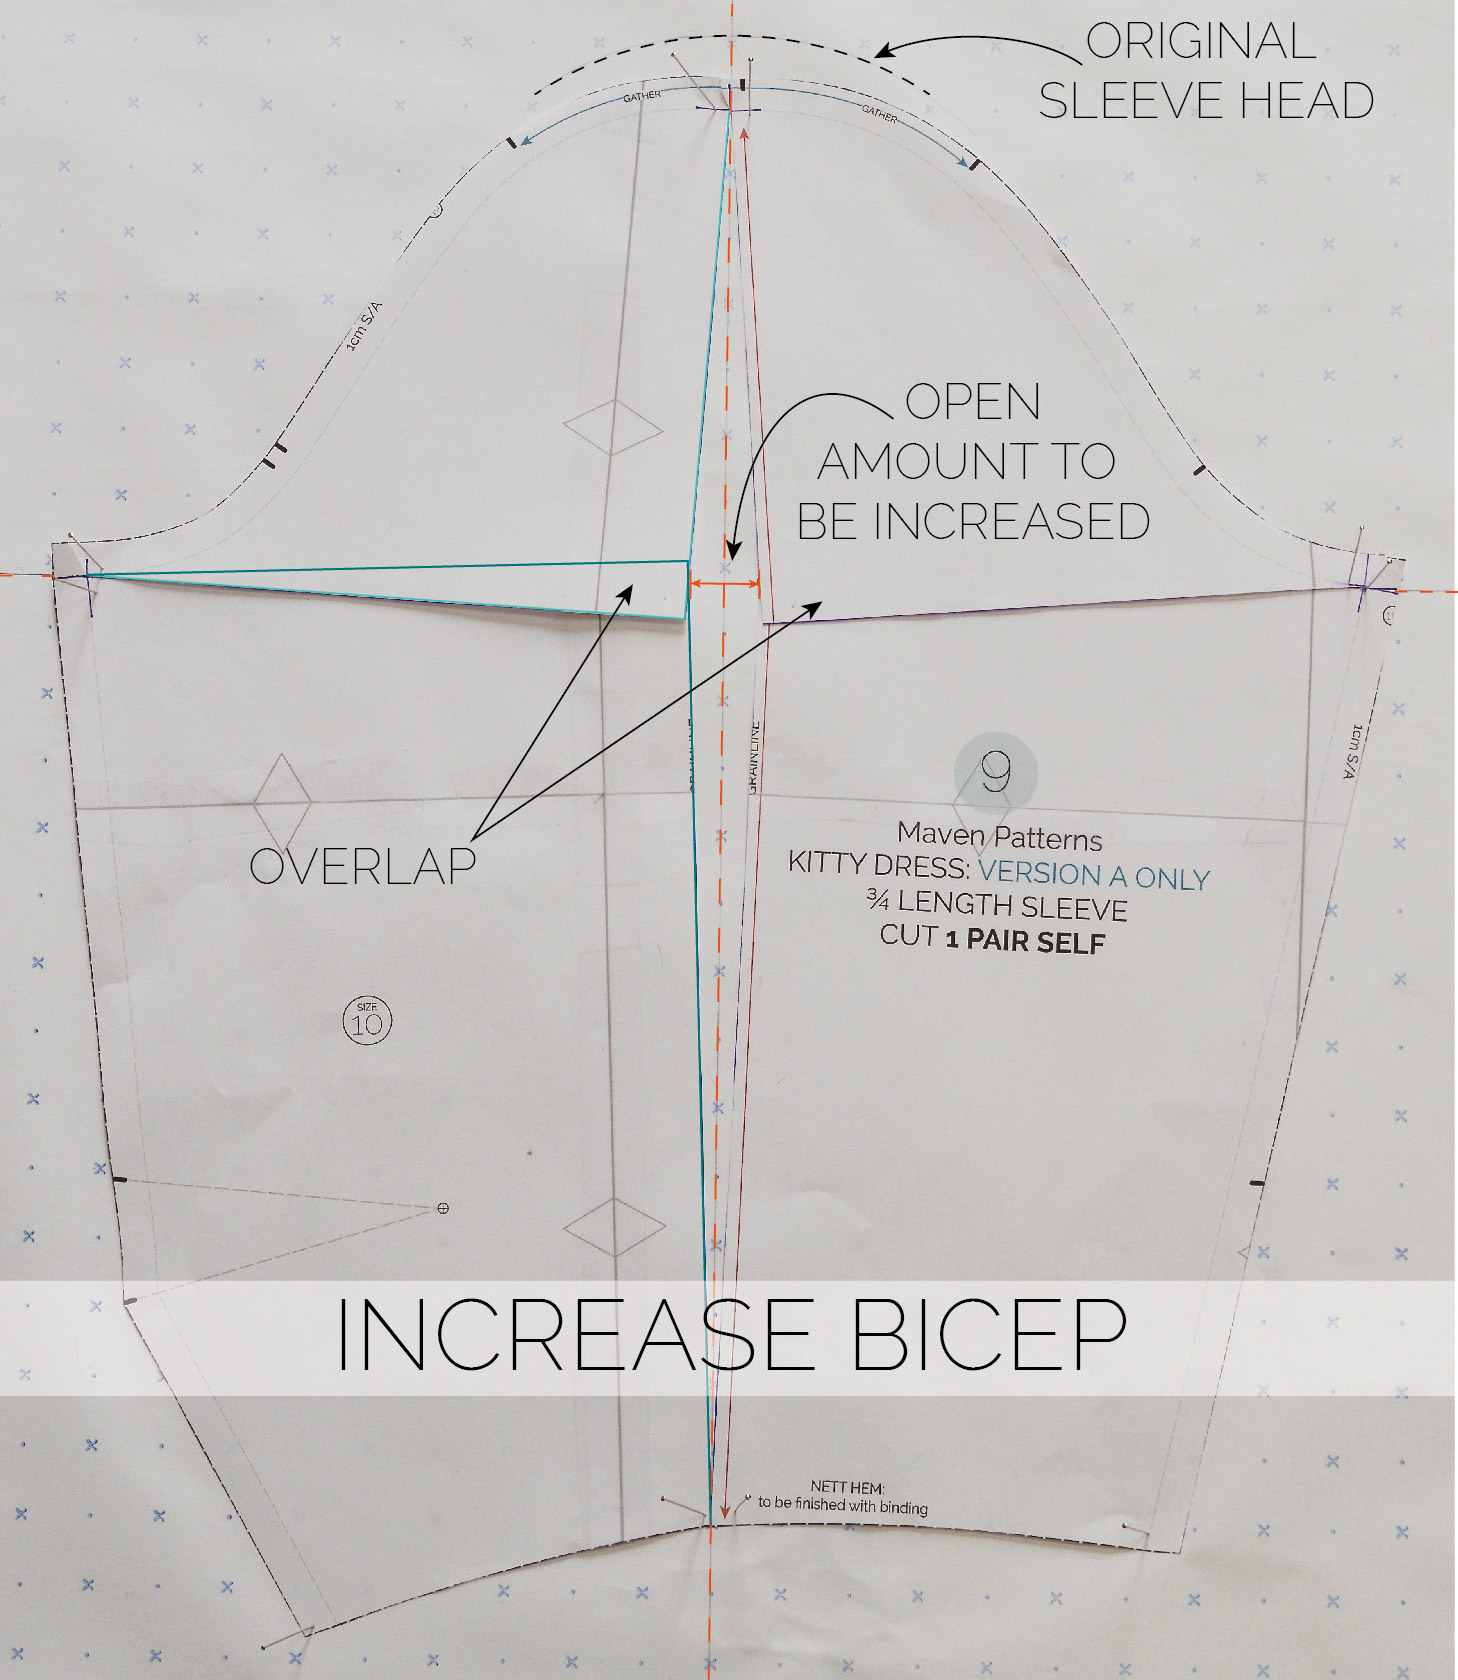
TO INCREASE THE BICEP
Mark the amount you want to INCREASE the bicep by on the bicep guideline, either side of the vertical line. (I’m going with 2cm = 1cm each side of the line)
Line up the sleeve with the guidelines and then gently slide the underarm points outwards along your guide bicep line until you have gained the extra you need in the middle of the pattern. Anchor them down with a pin or tape.
The hinges will help pivot your pattern into place, keep the hem and sleeve head on the vertical line. As the bicep gets wider, the sleeve head will automatically lower and overlap the lower portion of the sleeve. Crucially, the sleeve will still fit into your armhole because the sleeve head is the same measurement. You will probably need to redraw the sleeve head and hem to smooth the line. (See short sleeve picture below).
When you are happy, tape your pattern back together. You can just tape in that new extra bit in the middle and cut away the excess, or trace off the whole new pattern piece.
Close up of one section. You can see how the pattern spreads, raises in the centre and lines up with the guidelines.
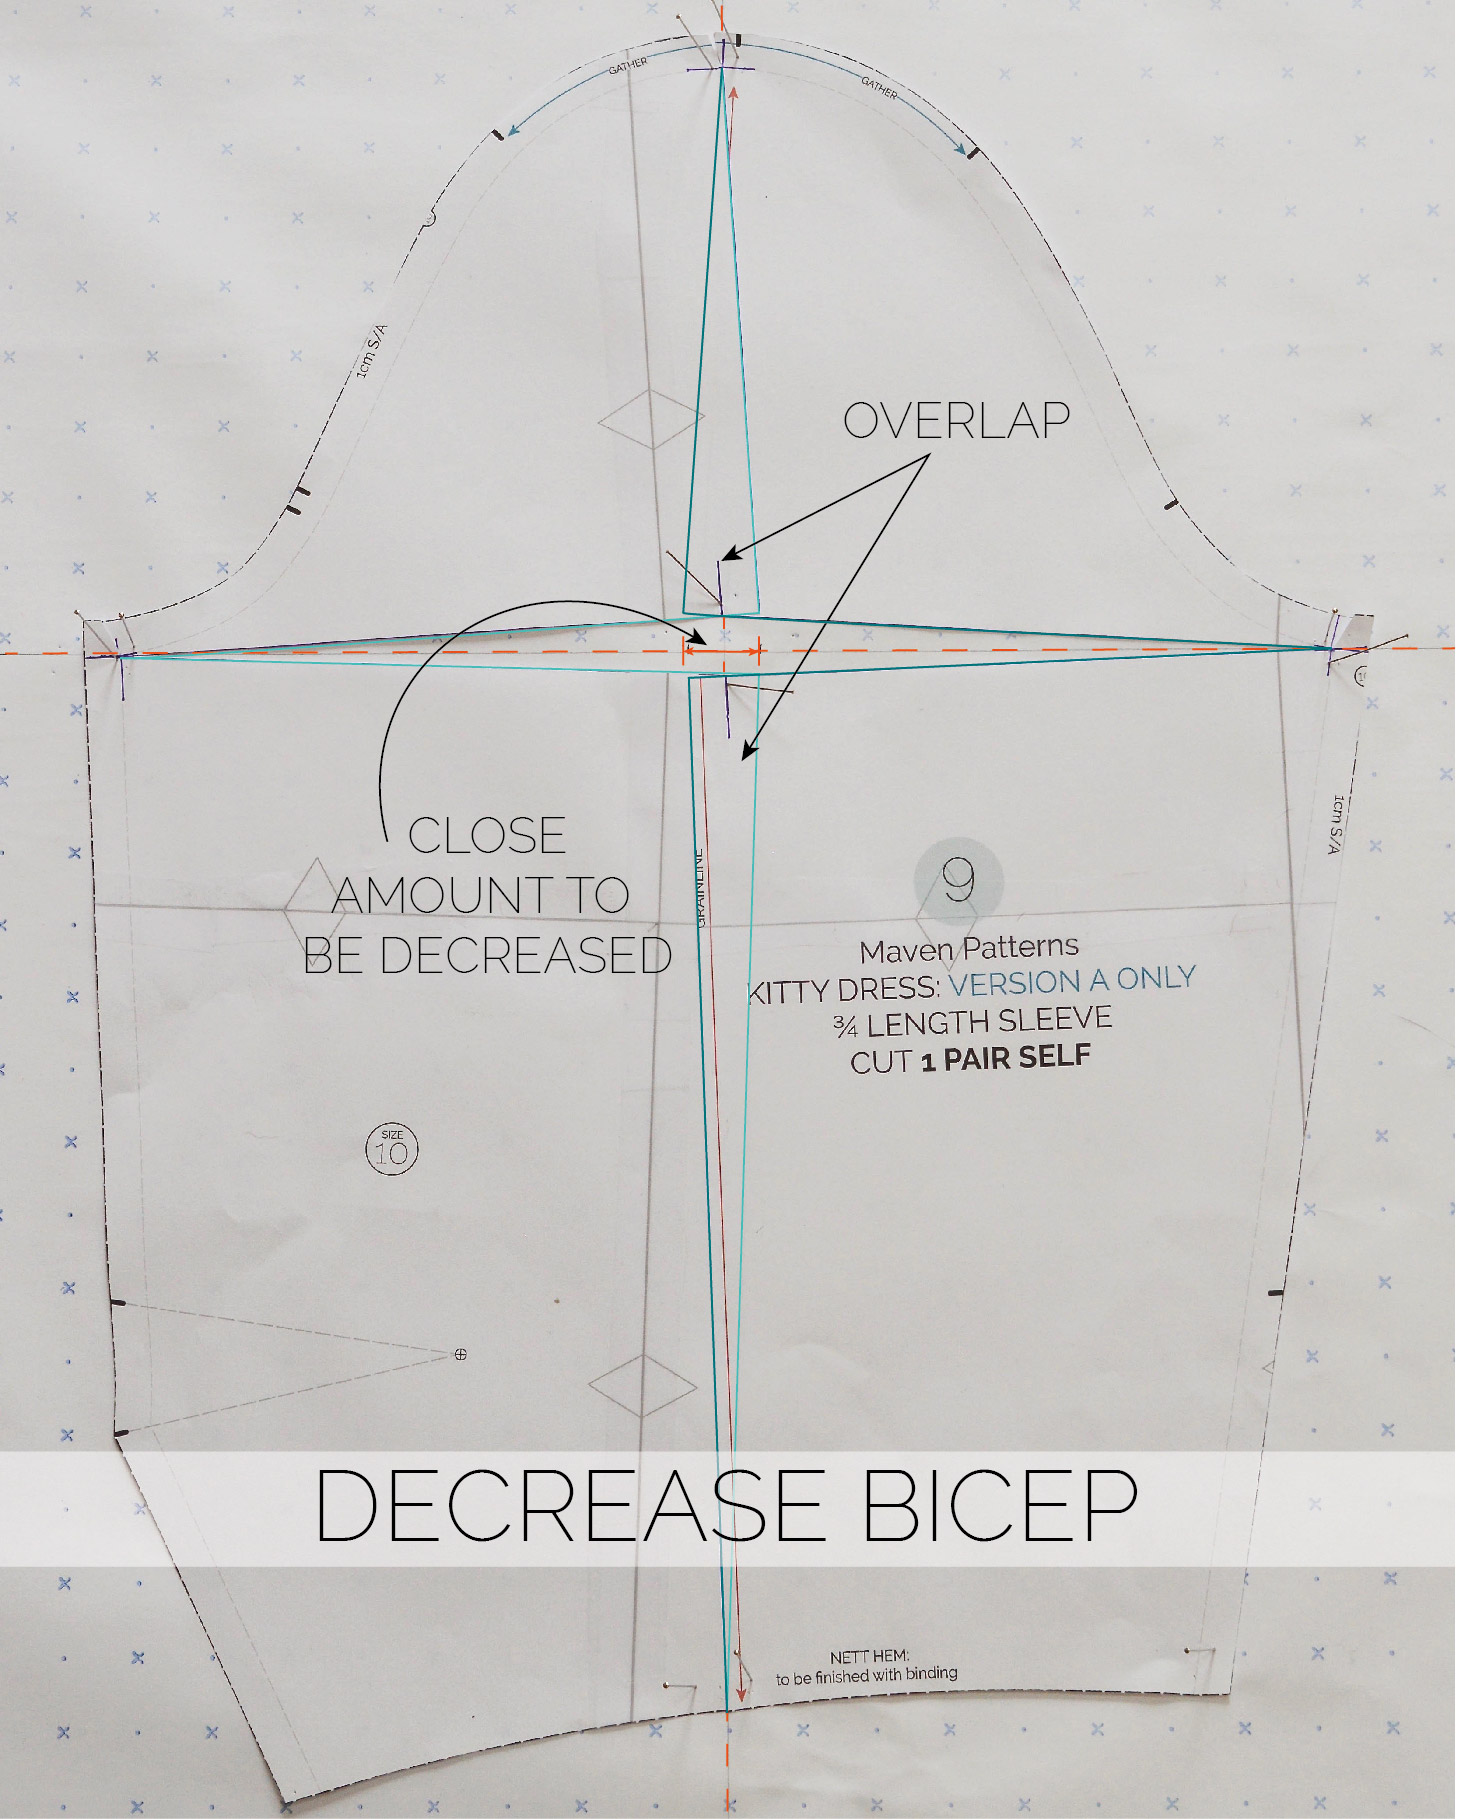
DECREASE BICEP
This uses exactly the same principle as before. We just decrease the bicep measurement by OVERLAPPING the pattern at the centre, rather than spreading it apart.
When you decrease the bicep measurement, the sleeve head raises in height. Redraw the sleeve head and hem to smooth if necessary. Tape back together or trace off the pattern.
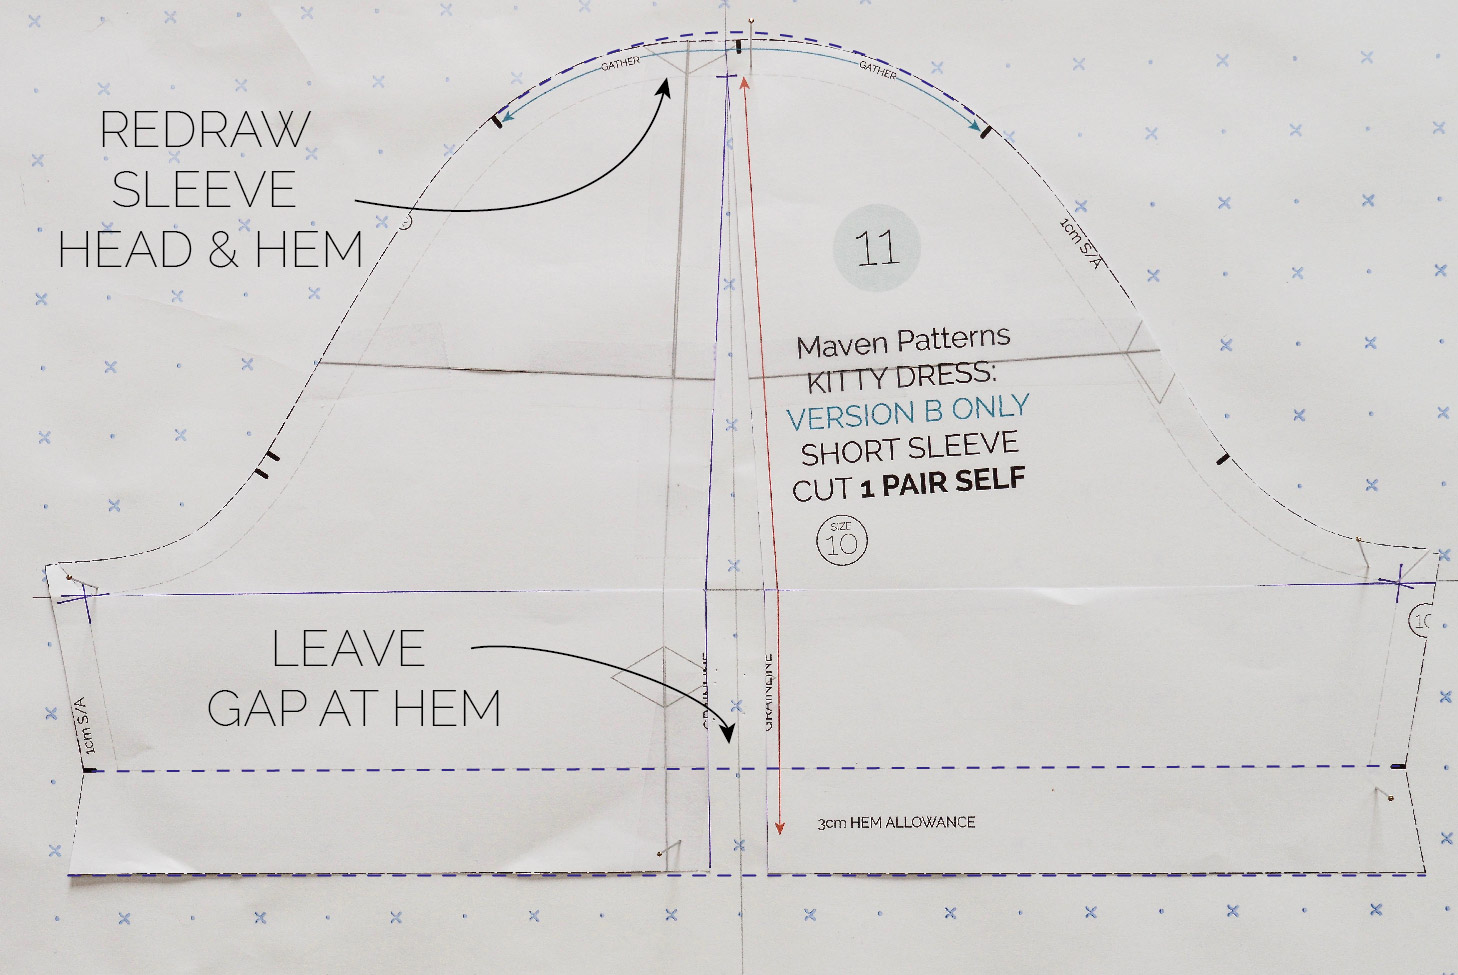
SHORT SLEEVE
Add to your bicep measurement in exactly the same way as the long sleeve. At the hem, you need to cut through and leave a gap to allow for the extra ease. Mine is pretty much parallel all the way down from the bicep, as I wanted to keep the underarm seam at the same angle. You can also see how I’ve redrawn the sleeve head and hem, it’s not a lot, just enough to create a smooth line.
RESULTS
So now you have a new sleeve pattern, with an adjusted bicep. You need to toile (make a test) now, just check it’s working for you. You may need to tweak and add or reduce the bicep again.
It’s August Bank Holiday here in England and traditionally the whole of the UK either queues in traffic on the M5, or does a spot of DIY, falls off a ladder and queues up in the local A & E. Let me save you from all that bother….I have a much better idea. Let’s make a dress instead…
I’m so pleased to announce the release of a new pattern…welcome to The Kitty Dress!
Kitty is a great addition to your wardrobe, a semi-fitted shift style dress with 2 sleeve options – ¾ length with a bound hem or a short sleeve, a Peter Pan collar and bust dart detail. She is fastened at the back neck with a button and loop closure…no zip to sew! (you’re welcome). Oh, and she has in-seam pockets too!
The ¾ sleeve version is just perfect for Autumn, just wear her with tights and boots and BOOM! you’re ready to face the winter sun! The ¾ sleeve has elbow darts, one of my favourite details. Topstitching makes a big appearance on Kitty, the darts – bust, elbow and shoulder darts, along with the centre front and back seam are edgestitched and the peter pan collar is footstitched, but you can leave this off if you prefer – the joy of making is you get to decide! (Watch out for an up coming Top stitching Tutorial)
Version B is the short sleeve option; both sleeve styles have a gently gathered sleeve head. Having the 2 sleeve options is great, I like to have all wardrobe/weather eventualities covered…I don’t know about where you live but I spent last weekend thinking about cosy jumpers and then it hit 30° on Tuesday!
And as a little Bank Holiday gift…you can get 20% off The Kitty Dress for the rest of August!
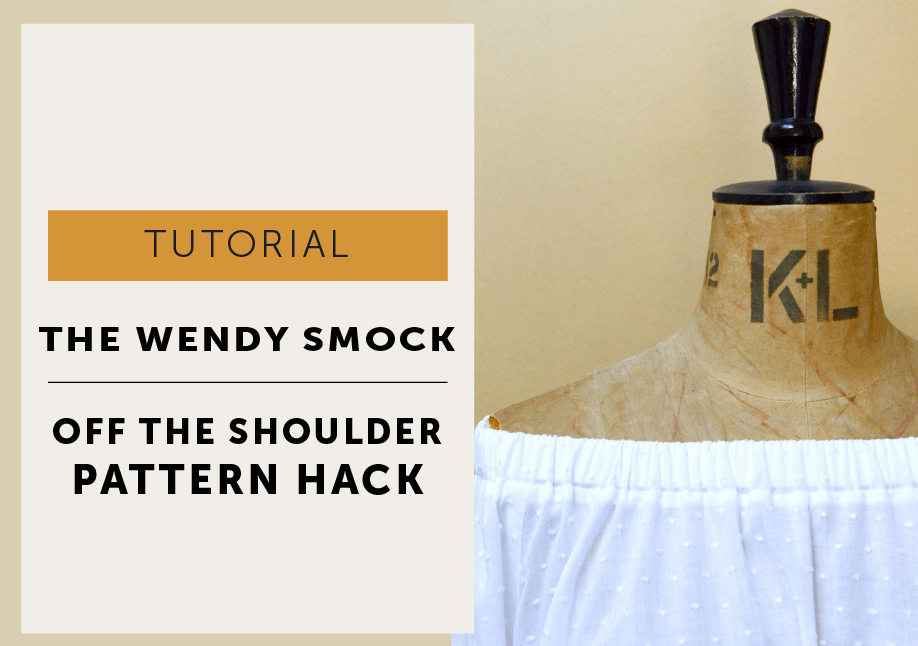
How do you turn a simple top pattern into an off-the-shoulder style? This pattern hack shows you how to reshape the neckline and adjust the construction so you can create a relaxed, wearable off-the-shoulder top without needing a completely new pattern. In this tutorial, we walk through the changes step by step so you can adapt your existing Wendy Smock pattern and achieve a balanced, easy-to-wear silhouette with a soft, summery feel.
Off the shoulder tops are everywhere this summer, aren’t they? I’m not one to usually bother with fashion trends. I’m not a big fan of buying or especially making clothes unless it’s something I really love and will wear loads. I do, however, like to get the maximum mileage out of a pattern, fabric and mostly out of my time. I thought about this trend for a while and came to the conclusion the off the shoulder top, or The ‘Bardot’ Top (or as my eldest called it Bar-Dot, worth writing a tutorial just for that!), could actually become a holiday summer basic.
I started with The Wendy Smock pattern and thought this would be a great little pattern hack to share. It does make the most perfect beach cover-up, just lengthen your pattern to get the leg coverage you are after. It would also make a delightful holiday dress with a little tie belt at the waist too. I’ve made it in an embroidered spot voile. Beautiful fabric – but be warned, it is quite sheer in the white if you are going down the dress route!
And I thought I should probably share it now as in England we’ve had more than 3 days of glorious sunshine this summer, and it’s now 50/50 (yes, I know that’s being optimistic) for the rest of August wether we get any more sunshine.
SUPPLIES
The Wendy Smock Pattern, Tape measure, Scissors, 1 metre (approx) of 2.5cm wide Elastic, Safety Pin
As always, I recommend making a toile; it’s a test run in calico or a cheap fabric – you don’t want to waste your favourite fabric on a less than perfect top.
Cut out your pattern using VERSION B (with no centre front neck opening) and don’t cut the binding pattern.
NECKBAND: cut one long rectangle 7.5cm wide x SMALL: 123cm long / MEDIUM: 128.5 cm long / LARGE: 134cm long. It can be cut along the selvedge or across the fabric width on the straight grain.
Make up your top, following the instructions in the pattern: Attach pockets and sleeves, close side seams.
Cut neckline down by 4cm. Of course you could trim down your pattern pieces before cutting out your garment.
Press the neckband in half length wise
Join with a 1cm seam allowance to make the neck band into a loop, press the seam open
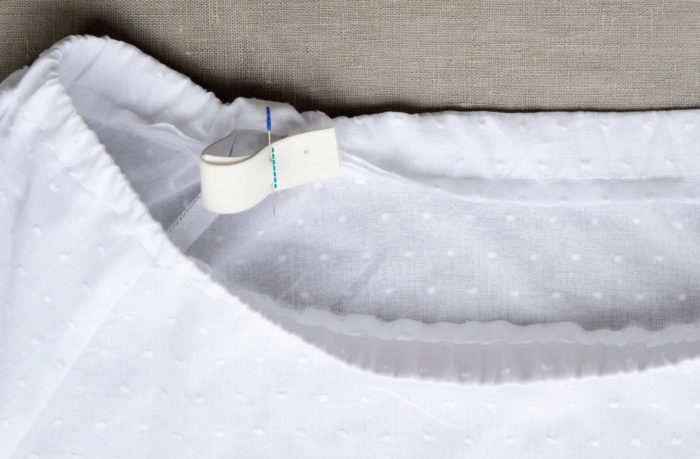
Attach the band
Pin neckband to RIGHT SIDE of the body. Depending on your fabric your neckline may ‘grow’ as it’s on the bias grain in places, just ease your garment onto the neckband.
Stitch your band to the body with a 1cm seam allowance. Leave a gap of about 5cm to thread your elastic through.
To get your elastic length: wrap elastic around shoulders where you want your top to sit, pulling slightly so it stretches, and mark. It needs to be tight enough to stay up but not so tight it cuts off the circulation and if it’s too tight it will ride up, too loose and it’ll drop down! Everyone’s measurement will vary as it depends on a lot of outside factors how stretchy is your elastic/ how tight are you comfortable with etc?
Thread the elastic
(This is the same process as the sleeve hem for the Smock) Attach a safety pin to your elastic to help thread it through the neckband channel. Once threaded lay the elastic with the ends flat on top of each other and stitch where you marked it earlier. Try your smock on and see how that elastic feels, now is the time to adjust if you need to. Once you are happy, make sure that elastic is stitched securely, and trim away excess elastic.
Then just stitch the gap closed, and neaten the raw seam allowance.
Now just enjoy the sun in your off the shoulder top, like the fashionista you are!


