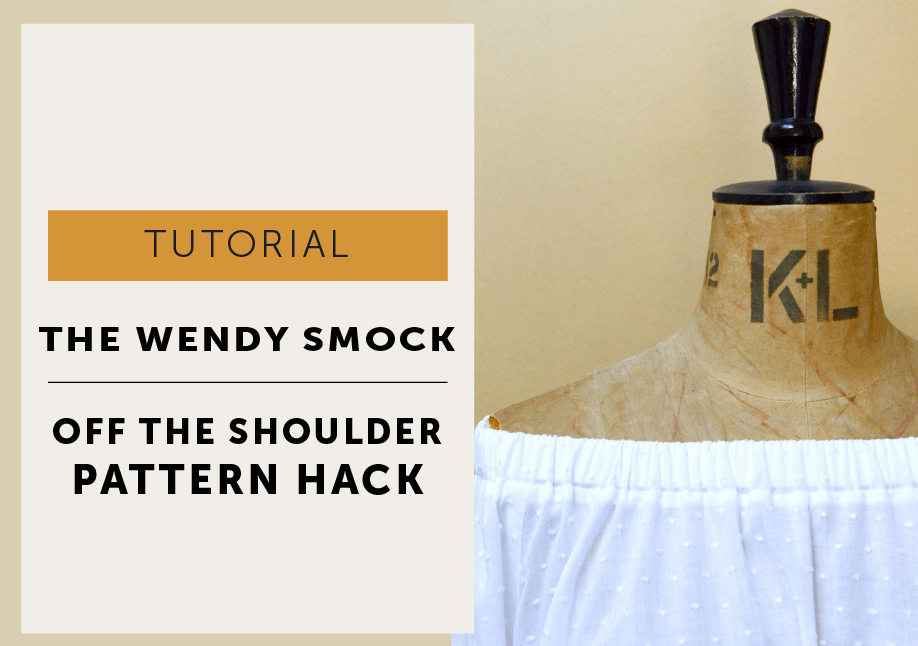
Posted on

PATTERN HACK…How to make an Off the Shoulder Top!

Off The Shoulder Tops…

THEWENDYARTISANSMOCK_OFFSHOULDERTUTORIAL_MAVENPATTERNS-28


…they’re everywhere this summer, aren’t they? I’m not one to usually bother with fashion trends. I’m not a big fan of buying or especially making clothes unless it’s something I really love and will wear loads. I do, however, like to get the maximum mileage out of a pattern, fabric and mostly out of my time. I thought about this trend for a while and came to the conclusion the off the shoulder top, or The ‘Bardot’ Top (or as my eldest called it Bar-Dot, worth writing a tutorial just for that!), could actually become a holiday summer basic.

I started with The Wendy Artisan Smock pattern and thought this would be a great little pattern hack to share. It does make the most perfect beach cover-up, just lengthen your pattern to get the leg coverage you are after. It would also make a delightful holiday dress with a little tie belt at the waist too. I’ve made it in an embroidered spot voile. Beautiful fabric – but be warned, it is quite sheer in the white if you are going down the dress route!

And I thought I should probably share it now as in England we’ve had more than 3 days of glorious sunshine this summer, and it’s now 50/50 (yes, I know that’s being optimistic) for the rest of August wether we get any more sunshine.
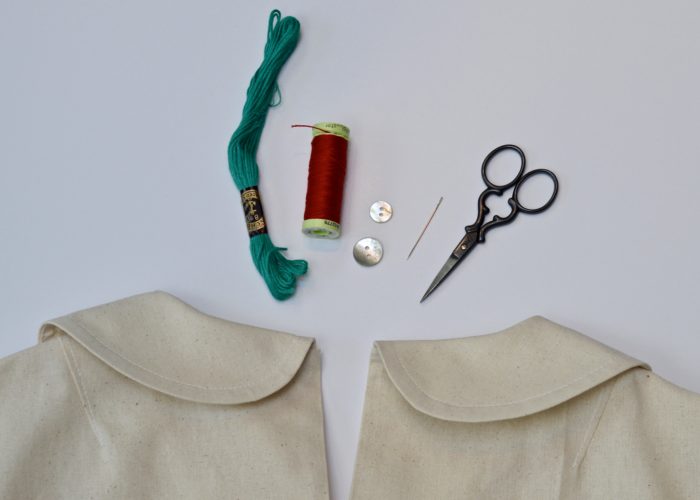
OFF THE SHOULDER TOP TUTORIAL_MAVEN PATTERNS

| SUPPLIES |

Wendy Artisan Top Pattern, Tape measure, Scissors, 1 metre (approx) of 2.5cm wide Elastic, Safety Pin

I recommend, as always, making a toile: it’s a test run in calico or a cheap fabric – you don’t want to waste your favourite fabric on a less the perfect top!

  1. Cut out your pattern using VERSION B (with no centre front neck opening) and don’t cut the binding pattern.
  2. NECKBAND: cut one long rectangle 7.5cm wide  x  SMALL: 123cm long / MEDIUM: 128.5 cm long / LARGE: 134cm long. It can be cut along the selvedge or across the fabric width on the straight grain. 

OFF THE SHOULDER TOP TUTORIAL_MAVEN PATTERNS

Make up your top, following the instructions in the pattern: Attach pockets and sleeves, close side seams.

Cut neckline down by 4cm. Of course you could trim down your pattern pieces before cutting out your garment.

OFF THE SHOULDER TOP TUTORIAL_MAVEN PATTERNS

Press the neckband in half length wise

OFF THE SHOULDER TOP TUTORIAL_MAVEN PATTERNS

Join with a 1cm seam allowance to make the neck band into a loop, press the seam open

OFF THE SHOULDER TOP TUTORIAL_MAVEN PATTERNS

| Attach the band |

Pin neckband to RIGHT SIDE of the body. Depending on your fabric your neckline may ‘grow’ as it’s on the bias grain in places, just ease your garment onto the neckband.

OFF THE SHOULDER TOP TUTORIAL_MAVEN PATTERNS

Stitch your band to the body with a 1cm seam allowance. Leave a gap of about 5cm to thread your elastic through.

To get your elastic length: wrap elastic around shoulders where you want your top to sit, pulling slightly so it stretches, and mark. It needs to be tight enough to stay up but not so tight it cuts off the circulation and if it’s too tight it will ride up, too loose and it’ll drop down! Everyone’s measurement will vary as it depends on a lot of outside factors how stretchy is your elastic/ how tight are you comfortable with etc?
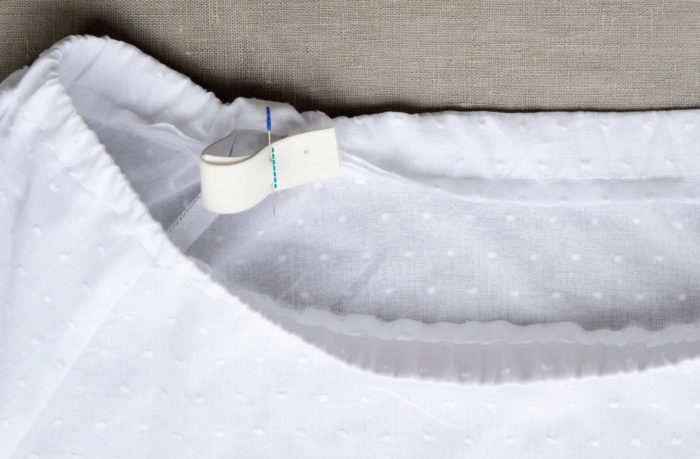
OFF THE SHOULDER TOP TUTORIAL_MAVEN PATTERNS

| Thread the elastic |

(This is the same process as the sleeve hem for the Smock) Attach a safety pin to your elastic to help thread it through the neckband channel. Once threaded lay the elastic with the ends flat on top of each other and stitch where you marked it earlier. Try your smock on and see how that elastic feels, now is the time to adjust if you need to. Once you are happy, make sure that elastic is stitched securely, and trim away excess elastic.

OFF THE SHOULDER TOP TUTORIAL_MAVEN PATTERNS

Then just stitch the gap closed, and neaten the raw seam allowance.

OFF THE SHOULDER TOP TUTORIAL_MAVEN PATTERNS


Now just enjoy the sun in your off the shoulder top, like the fashionista you are!


Posted on 4 Comments

How to Make a Button Loop Tutorial

A handy little tutorial to show you how to make a handworked button loop…..

| HOW TO MAKE A BUTTON LOOP |

BUTTON LOOP TUTORIAL _MAVEN PATTERNS

| SUPPLIES to make a button loop |

Firstly gather your supplies:

garment (obviously)

button (1.5-1cm in width works well for a back neck opening), scissors, needle, beeswax (optional)

Thread: you have to make a decision here; help is at the end of the tutorial!

  • embroidery floss – great colours but makes a bulkier button loop,
  • ordinary sewing thread, will match your garment, good for garments made from delicate fabrics such as lawn. Run it through some beeswax to help strengthen it first.
  • topstitching thread – my preference, good colour selection and strong.

| METHOD |

BUTTON LOOP TUTORIAL _MAVEN PATTERNSTake a length of thread. I’m using topstitching thread and have threaded my needle with it doubled so I’m making 2 loops with one stitch (because I’m lazy and it’s quicker). I’m working on the WRONG SIDE of the garment and starting my loop back a few millimetres back from the edge. Bring your needle out at the point you want your loop to start.

Put your needle back into the garment where you want your loop to end, and bring it back out at the start point to form your loop.BUTTON LOOP TUTORIAL _MAVEN PATTERNS

Make your loop big enough to go over your button. It can be a little bit trial and error to get the loop the right size – it’s wise to check now that it fits!

| Top tip | use your finger or a pen as a guide for consistency.

Decide how many strands you need in your loop and repeat. I’ve done 8 strands. (There is a little guide at the end) Fasten your thread off securely. BUTTON LOOP TUTORIAL _MAVEN PATTERNSWith a new length of thread, bring your needle out at the base of the loop on the left. Work from the left towards the right and cover the loop with a standard blanket stitch: just put your needle through the button loop and keep your thread BEHIND your needle BUTTON LOOP TUTORIAL _MAVEN PATTERNSand pull the thread firmly. Slide the stitch along the loop so it sits to the left, right at the beginning next to the fabric.BUTTON LOOP TUTORIAL _MAVEN PATTERNS

Repeat, sliding each stitch snugly to the next, until the whole loop is covered with a closely worked blanket stitch. Secure your thread and stitch on your button.

| THREAD OPTIONS |

BUTTON LOOP TUTORIAL _MAVEN PATTERNSThese are a few of your options regarding which thread / how many strands per button loop. There isn’t a right and wrong answer for which one to use – depends on what you’re making and what you have available!

My preference is the first one using topstitching thread / 8 strands. I actually thought it was going to be too bulky and setting back a little to the wrong side of the garment helps hide messy starts and finishes. It made a really nice sturdy loop and I do like a little bit of contrast thread, so matching thread isn’t an issue for me.

The second loop is again using topstitching thread but with only 4 strands for the loop, it’s a little floppy but perfectly serviceable. This one I set right on the folded edge of the cloth.

Number 3 is Embroidery Floss / 3 strands. Lots of choice for colours with embroidery floss but is a little bulkier in appearance. Might be nice on knitwear.(I can’t knit, so I’ve never tried that). You could also split the threads and work with fewer strands rather than the usual 8 that the floss is made of.

Number 4 is the most delicate of the button loops. Made from my usual sewing thread pulled through beeswax to strengthen. With 8 strands for the loop and the blanket stitch worked with a double thread for 2 strand coverage. This one would be lovely to use on a delicate fabric such as a cotton lawn.

I do actually really like the last one because I got to finally use my neon pink sewing thread that I bought for no other reason than the colour!

Happy Sewing! x


Posted on

Block Fuse and Spot Fuse Tutorial

Block fusing your facings is a great little industry trick that anyone can use.

Why? It is more accurate to cut out facings from a pre-fused piece of fabric, rather than cutting the fabric and interfacing separately and then trying to fuse them together. They don’t always stay on the straight grain, they may shrink and it’s just so fiddly!

When? On facings, collars, pocket flaps, on any pattern piece that requires the WHOLE area to be interfaced. Maven Patterns are marked as CUT 1 PAIR SELF + BLOCK FUSE,  but other sewing patterns may be marked ‘cut 1 pair fabric + cut 1 pair interfacing’. This is an especially fabulous method to use for hideously slippy fabrics!

METHOD

BLOCK FUSING TUTORIAL_MAVEN PATTERNS

It’s really very simple. When laying up your garment to cut out, leave an extra couple of centimetres around your pattern pieces (a bit of wiggle room and enough in case of shrinkage when fusing) and roughly cut out the fabric. Ideally, make sure you use a piece with the selvedge on, so you can keep everything on grain.

BLOCK FUSING TUTORIAL_MAVEN PATTERNS

Should you be cutting a front facing on the fold; cut out roughly again and snip with your scissors along the folded edge. You’ll have a marker to re-fold on the grain after fusing. I find marking with chalk etc tends to disappear under the iron.

BLOCK FUSING TUTORIAL_MAVEN PATTERNS

Do a test piece first, don’t burn your fabric!

Cut a piece of interfacing very slightly smaller than your fabric, so it doesn’t overhang your edges and stick to your ironing board cover. Placing a cloth over your ironing board first is a good idea too. It saves the cover from gluey gunk which can transfer on to other garments – this is that voice of experience you hear of.

Lay the interfacing with the GLUE SIDE to the WRONG SIDE of the fabric. Cover with a cloth and PRESS into place. Refer to the manufactures instructions but heat, steam and pressure are usually the best combo. Don’t be tempted to drag your iron over it either, it will stretch and shift. Just place and press with your iron. I usually allow it to cool before turning over and pressing on the right side too. You can do quite large pieces if necessary, but it is a lot easier to manage if you use smaller pieces and you are less likely to get creases and bubbles in the interfacing.

BLOCK FUSING TUTORIAL_MAVEN PATTERNS

Now just cut out your facings and collars.

HOW TO SPOT FUSE

BLOCK FUSING TUTORIAL_MAVEN PATTERNS

When and why? If BLOCK FUSING is used to interface an entire piece, how do you strengthen one small area of a garment? That’s when you SPOT FUSE.You might, for example, want to add a patch pocket on a jersey t-shirt. You know that each top corner is going to be a really weak point and wear badly after a few washes. Spot fusing means you can add a small piece of interfacing for extra stability but only where it’s needed. The pocket mouth on The French Dart Shift and the Kitty Dress, and the neck opening on The Wendy Smock all need a little extra reinforcement with fusible interfacing. We don’t need it all over the garment- just in a specific SPOT .

Method

So easy! Cut your pattern piece out in fusible interfacing only as directed (marked on Maven Patterns as CUT 1 PAIR FUSIBLE INTERFACING). Apply directly to the area of your garment that needs extra support. That’s it! 

*a little note…

I’ve called this SPOT FUSING for the last 30 odd years while working in the industry. But, just to confuse you, sometimes the term ‘spot fuse’ is also used to describe attaching fusible interfacing to the fabric when you block fuse a LARGE area. Interfacing is difficult to attach over a large area without it twisting, bubbling or other such delights. Lifting your iron and placing the tip down in various places working from the centre outwards is a good method, basically, gently STEAM BASTING the interfacing into place rather than the attempting to do the whole piece in one go.

Posted on

How to Grade Between Two Sizes

How to Grade Between Two Sizes

We are a unique and amazing bunch of individuals, all different shapes and sizes. Even those of us with the same measurements can be different shapes! You’ll understand them, with the best will in the world, it’s not possible to create a pattern that fits everyone straight off. The best course of action is to arm ourselves with enough fitting knowledge and skills to adjust, as necessary, our patterns to create great fitting garments.

So, what is a girl to do when she falls between different sizes on the size chart? This is where you need to know how to grade between two sizes. This method is also known as blending sizes, and it allows you to use the top half of one size and join to the bottom half of another size.

How do you know?

Once you’ve checked your measurements against the body measurement chart, may well find you cross 2 sizes, perhaps your bust is measuring for the size 12 and your hips are measuring for the size 14.

Take a look at the garment measurement chart – a looser fitting garment may give you that extra you’re looking for. I often find, that for me, this is the case for the waist on a less fitted style – no alteration needed!

You made a toile: perhaps your dress is a little too snug on the hips but great on the bust… then this one’s for you.

WARNING: If your toile is pulling because of a fuller tummy or bottom, or because you actually need to do a full bust adjustment this alteration may not do the trick, this is really just to add a bit of extra wiggle room.

How To Grade Between Two Sizes Tutorial_MAVEN PATTERNS-36

Tools:

  • your nested pattern
  • contrast coloured sharp pencil
  • french curve/pattern master (optional)

GRADE BETWEEN SIZES 01_TUTORIAL_MAVEN PATTERNS-01

If you have a pattern that is layered, use that option to select and print only the sizes you need.

Then all you need to do is draw a line from one size to the next, use a contrasting colour so you can easily see which line to follow later.

In this case I’ve used the bust from the UK size 12 and the hip from the UK size 14.GRADE BETWEEN SIZES TUTORIAL-03

It’s important to make a nice smooth line, remember bodies are rounded, so keep your lines curved rather than joining to each other in a point. A french curve or a Pattern Master is really useful and a good investment for the long term. But, you can also use the pattern as a guide by copying the side seam shape on to a piece of paper, cutting it out and using it as a template between your sizes. It will need pivoting between points, and the line will change but it does give a good starting point.

GRADE BETWEEN SIZES 01_TUTORIAL_MAVEN PATTERNS-01Of course it works the other way, to allow for smaller hips / larger bust combination too (but sadly not instead of a full bust adjustment).

Good To Know:

  • The Chain Effect: Alter all corresponding pattern pieces so they still fit together and the pattern stays balanced.
  • Front and backs need the SAME treatment.
  • This dress has a side seam pocket, as the side seam shape has changed, the pocket pattern needs to be checked against the side seam to make sure it still fits and adjusted if not.
  • Make sure the correct size sleeve pattern is selected, it should be the same size as your selected bust size, so it still fits into the armscye (Fancy word for armhole. Don’t ever get put off by terminology – that is possibly the first time I’ve ever actually used the word armscye , & I’ve been doing this since I was 16!)

NOW CHECK YOUR PATTERN FITS TOGETHER: nice smooth line? side seams the same length? 

Well done – NOW, YOU NEED TO DO ANOTHER TOILE! 

But, it’ll be worth the effort because you are going to have a beautifully fitted pattern you can use again and again, now that you know how to grade between two sizes!