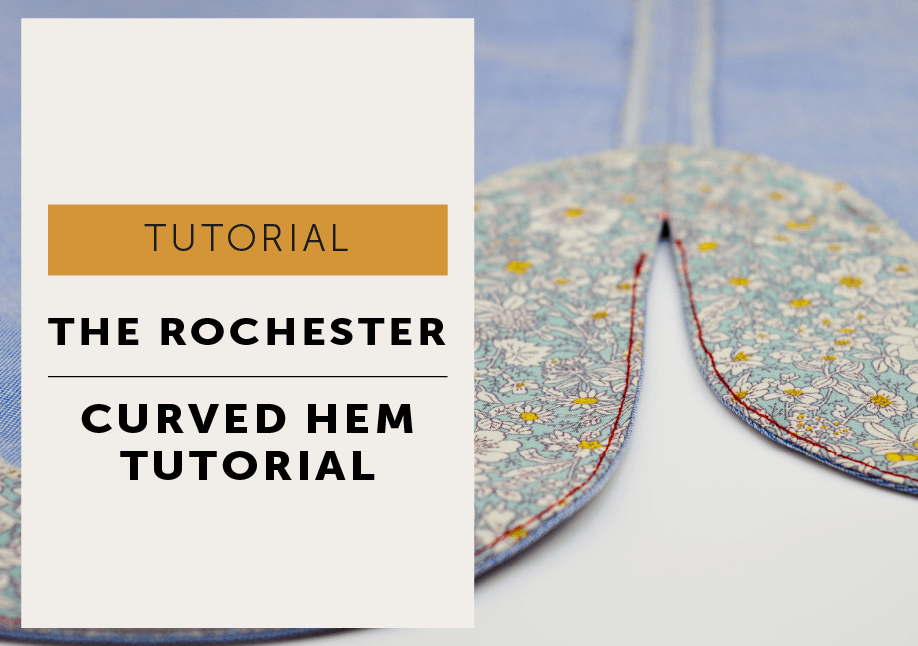
How do you sew the curved hem of The Rochester sewing pattern so it sits smoothly without puckering or rippling? A curved hem can feel tricky at first, but with the right preparation and a few simple pressing and stitching techniques, you can get a clean, even finish that follows the shape of the garment beautifully. In this tutorial, we walk you through how to manage the curve, and stitch a neat hem that sits flat and looks professionally made.
The Curved Hem Tutorial – The Rochester
The Rochester sewing pattern has a lovely curved hem detail with side splits and a topstitched facing. It’s one of my favourite things I’ve designed. But, because of the shape of the curve, you can’t just whip around the facing in one go, the facing needs to be stitched to the hem in stages. Also, you need to do the hem and facing step BEFORE you close the Centre Back seam or the back pleat won’t be a happy bunny. It’s not as tricky as it looks or sounds, just follow the Curved Hem Tutorial and take it step by step!
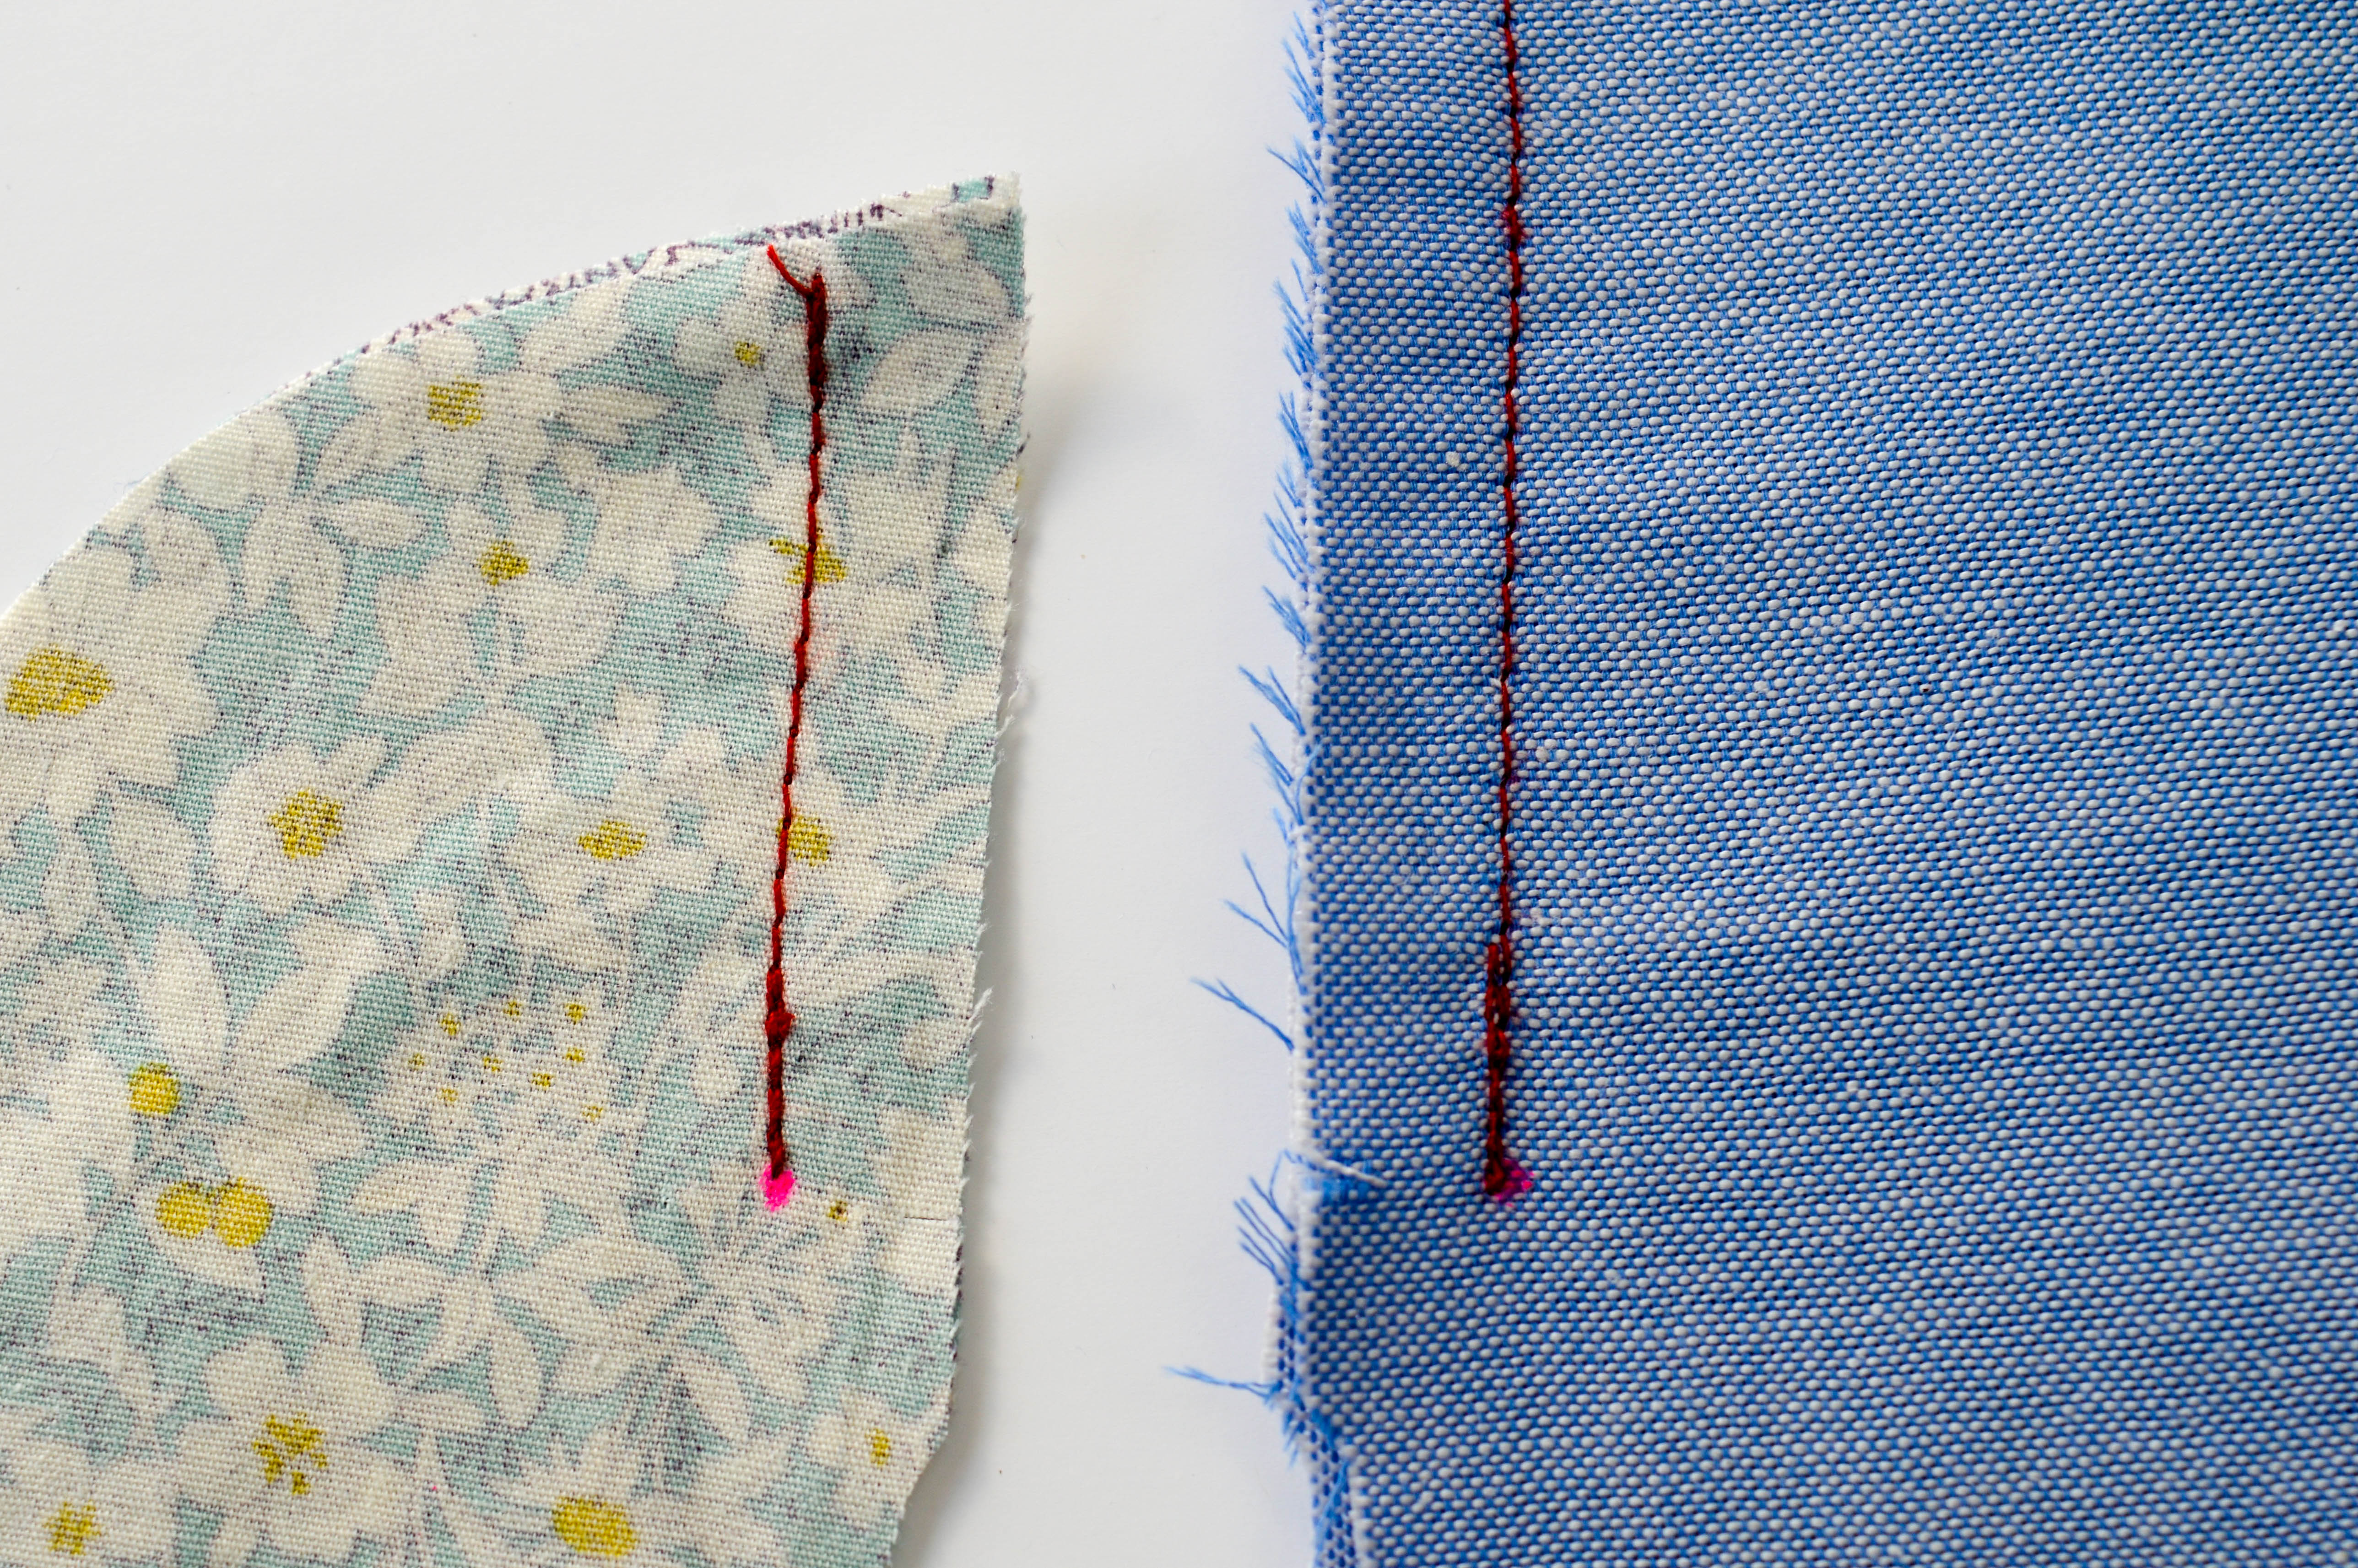
Side note: If you are not in charge of doing a tutorial you’re going to want to use matching thread and transfer your pattern marking with a water soluble fabric pen or chalk – not a fluorescent pink pen.
- With the right sides of fabric together (RST) close the side seams of the body panels and the hem facing. Stitch from the underarm to the DOT.
2. Make sure to stitch TO THE DOT, not past the dot. Yep, that’s the one I marked in fluorescent pink just for you.
3. Overlock (or neaten with your usual method) the body side seams and stop just past the dot, where the seam allowance (S/A) changes. Press the side seams OPEN.
Don’t overlock the facing side seams, they will be enclosed so it’s not necessary, but do overlock the outside edge. Take extra care on the curved bit – it can be a smidge tricky if you go too fast!
TIP / I just had a thought, you could bind the outside edge of that facing. It would look delightful!
4. Place RST and pin the facing to the body, line up at the side seams and notches.
5. Push all of the S/A out of the way….
7. Take a 6mm S/A. Start stitching from the CENTRE BACK towards the side seam, STOP at the marker dot.
8. Now this side is a bit more fiddly. Again push all the S/A out of the way. It is easier to stitch UP to the dot, rather than away from the dot. Start stitching about 2.5cm (1″) below the dot and stitch towards it.
STOP at the dot, leave the machine needle in your garment, lift the machine foot and PIVOT your garment around a full 180°.
9. Drop your foot and stitch back in the right direction ON TOP of your stitchline. Continue around to the front hem and repeat at the other split/side seam.
10. When the facing is all attached, press the stitchline.
TIP / If you find you have got a teeny weeny hole at the junction of your seams DO NOT WORRY ABOUT IT! Do check from the right side, but I bet when everything is in its right place you won’t notice. This one didn’t show at all from the right side once finished.
11. Understitch the facing, stopping below the apex of the split. Press again.
Tack down the outside edge of the facing to hold in place, line up the side seams.
12. Grab your hem template pattern pieces. To make a template of anything take the original pattern piece trace on to card/heavy paper and cut away all S/A. Templates are a great way to ensure consistency for topstitching or pressing patch pockets.13. You’ll need to flip the template over to mark one side of your garment. Line up the edge of the template with the hem of garment, and the arrow on the template with top of split. Use a fabric marker pen and draw in a guide line to show you where to top stitch. The template is for the curved areas of your hem, use a ruler / tape measure to fill the gap in between.
14. And then just follow your guide for some jolly nice topstitching! Remove your tacking thread, give it a press and marvel at what a wondrous job you’ve done.
More to Sew …


