This really is the most delightful Maria Wrap Apron I’ve seen. Let me tell you why…It’s made by THE actual Maria that the apron is named after! Oh, yes…my very inspiring friend Maria of Maria Thomas Textiles is a textile artist, screen printer and a very generous teacher. She wore the very first incarnation of the Wrap apron in her studio, where this image was shot, and you can see some of her work hanging behind her apron. As you can probably see, Maria works with found objects and recycled materials, often recanting the daily rituals of life within her work.
Her apron has been made from an embroidered table cloth, that she has rescued and hand-dyed indigo and given careful consideration to the placement of the embroidery. The edges have been bound as a facing wouldn’t have been a suitable finish in this case, and she has stitched all of that binding down by hand, because she is, in fact, a demon hand stitcher! She has worked with the fabric and squared off the back at the hem to make the most of the embroidered edge.
I met Maria by chance, our eldest children in the same year at school, me also with a 2-year-old in tow & Maria with one a year younger – we discovered we had a mutual love of denim and a hatred of cooking the tea so I think the friendship was meant to be! She talked me into doing a screen printing course that she was teaching, just 2 or 3 days, where we met Wendy (of the smock), who had coincidentally worked with my other friend from college that I had dragged along at the very last minute to cheer her up…funny how you meet your tribe isn’t it!? Well those 2 days, turned into a 4 year, 1 day a week print course, a couple of exhibitions and some very good friends. She is also the reason why I have paper spoons hanging in my kitchen, the occasional hangover, more fabric than is strictly necessary and the knowledge that making stuff is a way of life and I didn’t know I was missing it. Like I said…good friend.
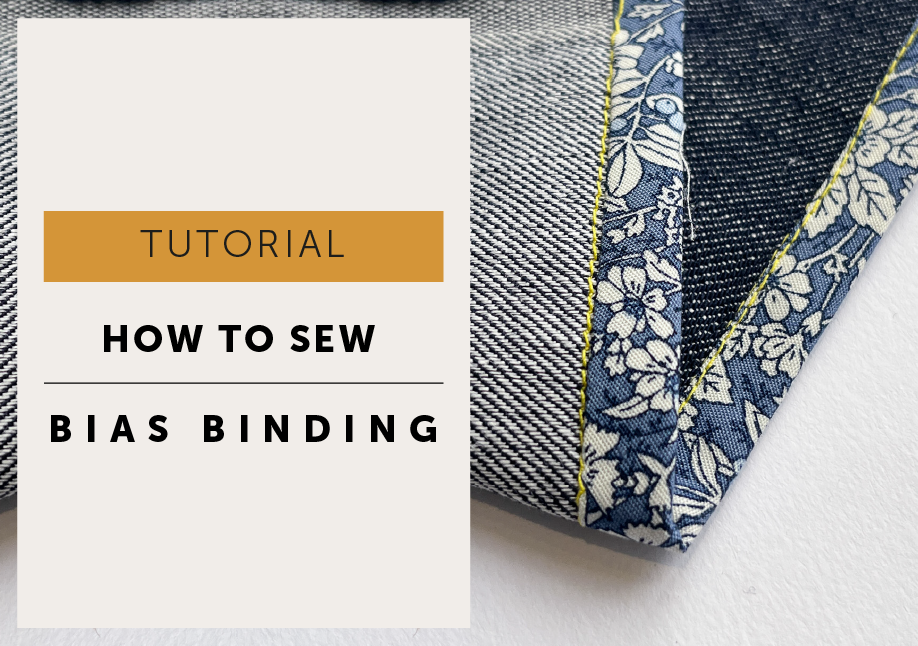
What is bias binding, and how do you sew it neatly? In this tutorial, we guide you through the process of sewing bias binding step by step, from preparing and attaching the binding to finishing curves and corners cleanly. Whether used as a decorative detail or a neat seam finish, bias binding is a versatile technique that adds both function and a beautifully polished finish to handmade garments.
Bias binding is such a useful technique and it’s not difficult to master, like everything a little practise makes perfect. Bias binding is a great way to finish the raw edge of a garment. It is hugely versatile and can be used on necklines, armholes, hems, pretty much anywhere really. You can buy ready made binding from your local haberdashery shop. I like to make my own and use up some of those scraps.
There are really two types of binding for our purposes:
DOUBLE BIAS BINDING
Will show on the right side of the garment. It can be decorative if made in a contrasting fabric.
SINGLE BIAS BINDING
It can be used in lieu of a facing on an armhole or neckline. Apart from a row of topstitching, only be seen on the inside.
In this tutorial I’ll show you how to attach your bias binding tape. If you want to know how to cut, join, press and sew bias binding, go check out my BIG BIAS BINDING TUTORIAL.
How To sew Double Bias Binding
Double bias binding is used when you want to see it on the right side of a garment. It is both decorative and practical. YAY, One of my favourite combo’s!
Take your prepared binding and pin RIGHT side of binding to the RIGHT side of garment. Align the raw edges together. Machine stitch along the fold.
TIP / if you are binding a thicker fabric or a few layers of fabric, take a smaller seam allowance so you have extra binding where you need it to help accommodate that extra bulkiness.
Press binding AWAY from the garment.
Wrap binding over to the raw edge to WRONG side of garment. Position the folded edge of binding so your machine stitching is covered by a few millimetres. Pin to hold. Tack right on the edge of the binding to hold into place. Ensure you catch all the binding on the reverse side and just cover the machine stitch. Keep an even distance away from the binding on the front. Take your time to get this right now, the tack line will be a guide to your topstitching!
TWO OPTIONS TO FINISH
OPTION 1 / EDGE STITCH ON THE BINDING
Top stitch the binding to finish
With the right side of your garment facing you, edge stitch the binding. As long as you stitch to the inside of your tacking stitch, you know you’ve caught the back of the binding!
OPTION 2 / If you don’t want your stitching to show on your binding try this method.
Finish your binding by Stitching in the Ditch (also known as sink stitch).
‘Stitch in the Ditch’ is a really useful technique to know, good for finishing waistbands as well as bindings. When stitched in the same colour as your main fabric the stitch line practically disappears as it settles into the seam.
Position your machine needle in line with the groove (the ditch) of the seam, you are going to stitch right in that ditch, NEXT to the binding but not on it. And as long as you stitch to the inside of your tacking thread, you know you’ve caught your binding on the back 🙂
Just remove your tacking thread, and you’re done.
And another way to attach binding
There is yet another way to attach bias binding to finish a raw edge.
This way was shared with me by Shelley, one of my lovely testers of the new Maven1832 patterns. Shelley was making the French dart with the bishop sleeve in a slippery fabric and found this was an easier way to attach the binding at the cuff.
It’s pretty similar to the above methods, except you attach to the wrong side of the fabric and flip binding to the right side of the fabric and stitch. This method only works with visible edgestitching but you might find it less fiddly if you are working with a tricky or slippery fabric.
It’s really a personal preference which way you prefer to sew your binding, but it’s always good to have more than one way to stitch something. Different fabrics do sometimes require a different method!
METHOD
Place the right side of binding to the wrong side of fabric and stitch in the fold to attach.
Fold binding over to the Right Side so all the raw edges are enclosed and the stitch line is covered. You can trim the seam allowance down a smidge if the biding doesn’t quite cover the stitch line.
And then, with the Right Side Up facing up, edgestitch the binding in place.
How To Sew Single Bias Binding
Single bias binding is used to finish a raw edge without it showing to the front of your garment, a great choice if you want a fuss free finish without a facing.
This isn’t everybody’s method, but this is the method I was taught by a sample machinist I worked with about 20 years ago, she called it the Cheat Method. I liked the method because it was quick and that binding NEVER frayed no matter how much I washed those garments (baby and kids clothes), must have been the combination of a folded edge and the extra understitching – great for linen fabrics. I’ve used this many times over the years instead of a having a flappy facing. The only drawback is some fabrics are just too bulky, but just bind anything too thick with a contrasting fabric and make a feature of the inside!
PRESS / Fold your binding in half and press.
ATTACH / Line up the raw edges of your binding with the raw edge of your garment, with right sides together.
Stitch with a 6mm seam allowance to attach.Press binding and seam allowances away from garment. Understitch (machine stitch an edge stitch through all the layers on the binding close to the seam.) The understitching is an optional step, there won’t be a disaster without it, but it does make the binding roll to the wrong side better and I think it makes the binding stronger.
Tack along the edge of the binding to hold in place, this will also give you a guide line for your next row of stitching.
Flip your garment over and topstitch with the right side up. If you stitch inside your tacking line so you know that you will catch all the binding!
(You can make narrower binding if you prefer…simple bit of maths… finished width of binding + seam allowance, x 2 = cutting width of binding.)
I’ve added some hyperlinks – Wahoo! – so now if you are viewing your instructions on a screen you can get a direct link to the relevant tutorial if you need it.
I know a lot of you view your instructions on iPads or laptops while sewing up a storm, so hyperlinks can be really useful. Personally, I have to print everything as the computer/office bit/corner of the kitchen is downstairs and sewing studio is upstairs. Obviously, hyperlinks won’t work if you print your instructions as I have too… I’m good but I’m not that good 😉 I’ve also added some pretty colours, because Hey! pretty colours…well, why the hell not?
So just for clarity: there are NO CHANGES TO THE ACTUAL PATTERN OR HOW TO MAKE THE APRON, I’ve just added a few little pretties so the maker instructions have the same features that are already on The Wendy Smock instructions.
If you have already bought The Maria Wrap Apron PDF sewing pattern and would like an updated Maker Instruction file, send me an ETSY convo and I am very happy to email you one – for FREE!
What other features do you like to see in your patterns and maker instructions?
Lots of detail and explanation?
Or do you do the same as my friend Maria (the inspiration for The Maria Wrap Apron) She may (maybe) give the maker instructions a fleeting, cursory glance before completely ignoring them and doing her own thing, only going back to the instructions if necessary. I’m with Maria (it’s why we’re friends, that and we bonded over how much we hated cooking the small people’s tea after school – it cut into valuable making time – true story. Beer and curry is also part of that story, but I’ll spare you that part…). I’m just firmly of the opinion there is more than one correct way to stitch anything, and you learn from each mistake. So ignore away if that works for you, or read every word and ask all the questions you like – it’s all good ladies!
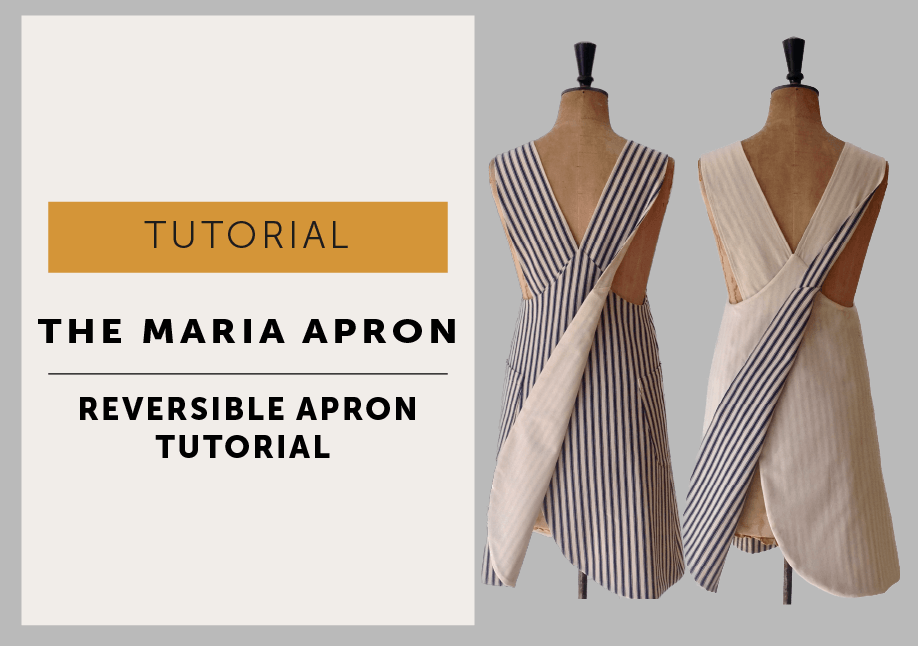
How do you make the Maria Wrap Apron reversible? This tutorial walks you through the construction step by step, so you can create a neat two-sided apron with clean finishing at the straps, neckline and hem. It is a practical way to make the most of the pattern while giving yourself two wearable looks in one project.
I’ve seen some lovely reversible Maria Wrap Aprons appearing by way of the growing band of happy #mavenmakers. I’m so delighted to see your makes and you’re a very creative bunch.
I’ve had many-a-request for a tutorial of how to make a reversible version. It’s not too complicated, and as with most things there is always more than one way to do it, but this is the method I found the easiest. Do feel free to share your process. I’m all about an easy make!
Arm yourself with the original instructions – to keep this tutorial shorter you’ll need to refer back to them for the full maker instructions.
Be sure to use the seam allowances as stated in the instructions.
CUTTING OUT: we are making Version A of The Maria Apron in this tutorial.
Use the FRONT (pattern piece 1)
BACK (pattern piece 2),
POCKET (pattern piece 7)
TOP STRAP PATTERN (pattern piece 3)
DO NOT cut understraps or facings.
CUT 1 set for body A in fabric choice 1 (I’ve used a striped ticking from Ditto fabrics)
Cut 1 set for body B in fabric choice 2 (ideally equal in weight and density to fabric A, so one fabric doesn’t show through the other when reversed.)
*Please forgive my fabric choice 2…I’m currently working on a ‘use fabric from the stash policy only’ or I end up wasting days looking for the ‘perfect’ cloth. So my reversible apron is less reversible, more lined and without pockets in calico.
FACINGS / do not cut in fabric, ONLY cut 1 set in fusible interfacing (I made mine 2cm narrower than the pattern)
UNDERSTITCHING / in the instructions when it tells you to understitch, DON’T – doesn’t apply to a reversible one.
NEATENING OF SEAMS / They’ll all be enclosed between the two layers so don’t bother. YAY!
Don’t forget to press as you go, that’s my very best tip for a professional looking garment.
Test your topstitching tension, it’s going to need to look good on both sides of your garment.
STEP 1: INTERFACING
Fuse the interfacing onto the wrong side of one of your fabrics, doesn’t matter which one, but I’d advise doing a little test first to make sure it doesn’t show through on your fabric (it really showed through on my calico).
Follow the instructions and make up bodies A + B of the Aprons, complete with pockets. Don’t overlock or neaten the seams, they’ll all be enclosed so as I said before, there is no point.
STEP 2: MAKE THE STRAPS
Make up the straps (one A + one B for each strap) and turn through. This is where we deviate from the instructions…don’t understitch the straps. Normally you’d want those seams to sit to the underside of your strap (that’s why there is an understrap pattern, it’s slightly smaller so the seams roll to the underneath) but as we are doing a reversible one it needs to look good from both sides, so our seam is now going to sit exactly on the side, neither to the front OR the back.
Practise on your straps – you’ve got to do the same on the armhole in a minute. Topstitch your straps, neatly does it, remember it’s going to show on both sides.
STEP 3: ARMHOLE
Place body A + body B with RIGHT SIDES TOGETHER (RST), use a 6mm seam allowance and stitch together at the armholes only. Turn back to the right side, so the seam allowance is enclosed and press.
STEP 4: ATTACH STRAPS
Follow the instructions and attach the straps to body A. Just check they’re correct before you continue, you’ll thank me if you’ve got it wrong. All good? Great, let’s carry on then.
STEP 5: FRONT NECKLINE
With RST pin and then stitch A + B together. Cut off the bulk in the corners (as described in the instructions), turn back to the right side and press neckline flat.
STEP 6: BACK AND HEM
With RST again, pin the backs together at the top edges (where the straps are placed) and then continue to pin down the back and all around the hem, make sure you line up the side seams.
Here’s the (not-so) secret to bagging out a fully lined/reversible garment, leave an opening to turn everything through – you are literally going to pull the whole apron through it after stitching to turn it to the right side. If you are just lining a garment (rather than making it reversible) I’d suggest leaving an opening on the side seam as it won’t show at all when you are wearing it. But, as this is reversible and has pockets that sit over the side seam, I’ve gone with leaving an opening on the back seam. It’s a personal choice thing…I could have just as easily left an opening at the hem.
Machine stitch A + B together, use the seam allowances stated in the instructions. Don’t forget to leave the opening on one side – mine is about 12cm long. Press your seam.
STEP 7: TRIM & PRESS
Trim away the excess seam allowance at the hem and around the curve so it will lie flat when turned through to the right side.
Turn the apron to the right side by pulling it through the opening. Now take your time and press the seam where you have joined A + B together, again you want that seam to sit exactly on the side so it neither favours A or B.
STEP 8: FINISH
Close the opening with a slip stitch, you shouldn’t be able to see your stitching when you’ve finished. Now you can topstitch around your Apron (all in the instructions). Personally, I left that stage off…
A: because I liked the look of my apron without it and
B: because my machine was in a bad mood, and I hate ropey topstitching so quit while I was ahead.
So that’s it, a fully reversible (or just fully lined) apron!


